While those of us in the hacking community usually focus on making new things, there’s plenty to be said for restoring old stuff. Finding a piece of hardware and making it look and work like new can be immensely satisfying, and dozens of YouTube channels and blogs exist merely to feed the need for more restoration content.
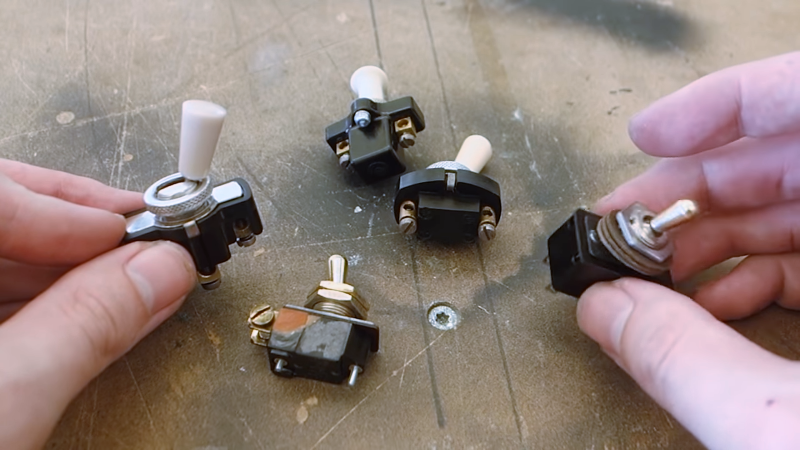
The aptly named [Switch and Lever] has been riding the retro wave for a while, and his video on restoring and repairing vintage toggle switches shows that he has picked up a trick or two worth sharing. The switches are all flea market finds, chunky beasts that have all seen better days. But old parts were built to last, and they proved sturdy enough to withstand the first step in any restoration: disassembly. Most of the switches were easily pried open, but a couple needed rivets drilled out first. The ensuing cleaning and polishing steps were pretty basic, although we liked the tips about the micromesh abrasives and the polishing compound. Another great tip was using phenolic resin PCBs as repair material for broken Bakelite bodies; they’re chemically similar, and while they may not match the original exactly, they make for a great repair when teamed up with CA glue and baking soda as a filler.
3D-printed repairs would work too, but there’s something satisfying about keeping things historically consistent. Celebrating engineering history is really what restorations like these are all about, after all. And even if you’re building something new, you can make it look retro cool with these acid-etched brass plaques that [Switch and Lever] also makes.


Excellent resource.
Restoring dashboard switches has been part of the vintage car restoration business and hobby for a long time, plenty of info on those restoration forums, and as a 1940s vintage vehicle restorer myself I’ve done switches and bezel plates.
Some observations-
Use proper soft jaws such as a shim of copper or brass when using pliers (or a vice) to remove knurled nuts and rings, a few layers of paper tissue is no guarantee to stop plier teeth marks happening. Once you’ve marred the bezel, you’re not going to buff it out.
If you’re just going to put WD40 in a cup then buy it in the bottle, way cheaper than using the spray. There is also a product called Kroil penetrating agent which people recommend, I’ve not used it though as I’ve never seen it sold where I am.
Home-made ‘penetrating oil’ can be made from ATF (automatic transmission fluid) and acetone (google), probably not great for soaking plastic parts (Bakelite probably ok but would try it first).
For stubborn screws, bolts and the like, use the tiniest drop of ‘ScrewGrab’ to stop the screwdriver blade slipping. This stuff is industrial magic in a bottle. I think it’s probably microscopic particles of carbide in suspension. Whatever it is, a bottle will last you years and years. It’s saved me many times, a brilliant product (I have no affiliation just admiration).
Rotary wire brushes work nicely on metal but after removing the oxidation the surface will corrode again so applying treatment such as a coat of clear spray lacquer on the metal will help there.
If you are using the Dremel buffing wheel to remove paint, use a very low speed because if you are too eager you will melt into the plastic before you realise it.
Rather than reaching for the Dremel first, instead drop that handle into some brake fluid and strip the paint off that way. It may save having to use the fancy sandpaper as much.
You can buy aluminium, copper, steel and brass rivets of all sizes, cheap on eBay eg. https://www.ebay.com/itm/200pcs-M2-5-M3-Half-Round-Head-Aluminum-Rivets-Solid-Rivet-Assortment-Kits-Set/282433388625 and it looks more orginal than a screw.
And why not replace the missing piece of bakelite casing with ….a piece of scrap bakelite? It would look a whole lot better than the circuit board.
A small drill press or cheap electric drill stand will give way better control and accuracy than holding the switch in one hand and the drill in the other.