Acetone Smoothing Results In Working Motor

Here’s something only ’90s kids will remember. In 1998, the Air Hogs Sky Shark, a free-flying model airplane powered by compressed air was released. This plane featured foam stabilizers, wings, a molded fuselage that served as a reservoir, and a novel engine powered by compressed air. The complete Sky Shark setup included an air pump. All you had to do was plug the plane into the pump, try to break the pressure gauge, and let the plane fly off into a tree or a neighbor’s rooftop. It’s still a relatively interesting mechanism, and although we’re not going to see compressed air drones anytime soon it’s still a cool toy.

Since [Tom Stanton] is working at the intersection of small-scale aeronautics and 3D printing, he thought he would take a swing at building his own 3D printed air motor. This is an interesting challenge — the engine needs to be air-tight, and it needs to produce some sort of usable power. Is a standard printer up to the task? Somewhat surprisingly, yes.

The design of [Tom]’s motor is more or less the same as what is found in the Air Hogs motor from twenty years ago. A piston is attached to a crank, which is attached to a flywheel, in this case a propeller. Above the cylinder, a ball valve keeps the air from rushing in. A spring is mounted to the top of the piston which pushes the ball out of the way, allowing air into the cylinder. At the bottom of the stroke, the ball closes the valve and air escapes out of the bottom of the cylinder. Simple stuff, really, but can it be printed?

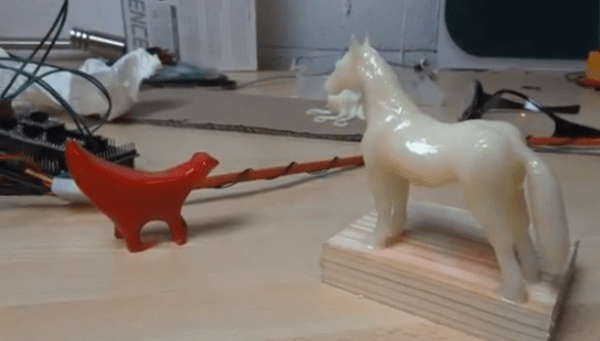
Instead of the usual printer [Tom] uses for his builds, he pulled out an old delta slightly modified for higher quality prints. Really, this is just a 0.2 mm nozzle and a few tweaks to the print settings, but the air motor [Tom] designed came out pretty well and was smoothed to a fine finish with acetone.

After assembling the motor, [Tom] hooked it up to a soda bottle serving as a compressed air reservoir. The motor worked, although it’s doubtful a plane powered with this motor would fly for very long. You can check out [Tom]’s video below.

Continue reading “Acetone Smoothing Results In Working Motor”

Using Acetone To Create Print Transfers

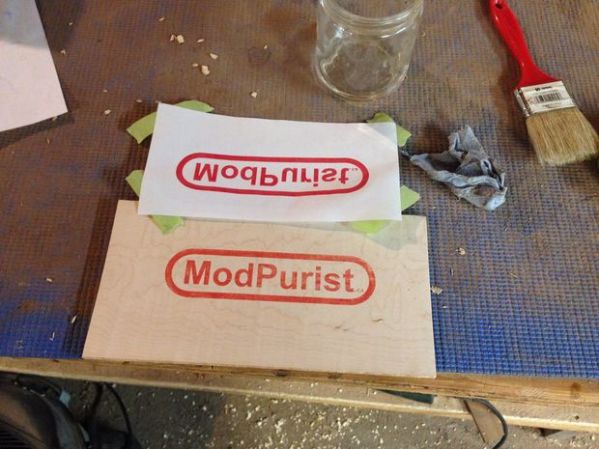
Looking for an easy way to print transfer a logo or image? Don’t have time to get transfer paper? Did you know you can use… regular paper? Turns out there’s a pretty awesome method that just uses Acetone to transfer the ink!

Using a laser printer, print off your desired logo or image. Don’t forget to mirror it! Place the paper onto the material you would like to transfer the graphic to, face down. It works best on wood and cloth, but can also be done on metal, glass and even plastic!  Continue reading “Using Acetone To Create Print Transfers”

Making PLA Stick To A 3D Printer Build Platform By Using Hairspray Or An Acetone ABS Slurry

[Chris] has been having some real problems getting PLA to stick to the build platform of his Printrbot. This is of course not limited to this brand of printers, and affects all extruder-based hardware using the PLA as a source material. He came up with a couple of ways to fix the problem.

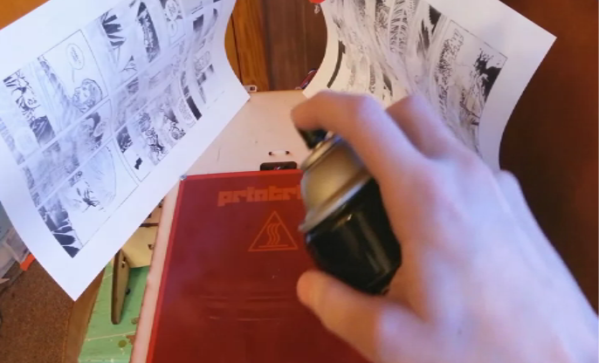
The first is something we’re quite familiar with. The image above shows [Chris] applying a thin layer of hairspray to the platform. This is a technique the we use with our own 3D printer. The sheets of paper are used as a mask to help keep the sticky stuff off of the threaded rod. For more info on the hairspray trick [Chris] recommends that you read this article.

The second technique uses a slurry made from saturating a bottle of acetone with ABS leftovers. In the clip after the break he shows off a glass jar of the solvent with scraps from past print jobs hanging out inside. After a couple of days like that it’s ready to use. He takes a paper towel, wets it with the solution, and wipes on a very small amount. He does mention that this will eventually eat through the Kapton tape so apply it rarely and sparingly.

Continue reading “Making PLA Stick To A 3D Printer Build Platform By Using Hairspray Or An Acetone ABS Slurry”

Smoothing 3D Prints With Acetone Vapor

If you’ve ever used an extruding 3D printer, you know that the resulting prints aren’t exactly smooth. At the Southackton hackerspace [James] and [Bracken] worked out a method of smoothing the parts out using vapor. The method involves heating acetone until it forms a vapor, then exposing ABS parts to the vapor. The method only works with ABS, but creates some good looking results.

Acetone is rather flammable, so the guys started out with some safety testing. This involved getting a good air to fuel mixture of acetone, and testing what the worst case scenario would be if it were to ignite. The tests showed that the amount of acetone they used would be rather safe, even if it caught fire, which was a concern several people mentioned last time we saw the method.

After the break, [James] and [Bracken] give a detailed explanation of the process.

Continue reading “Smoothing 3D Prints With Acetone Vapor”

More Acetone-vapor Polishing Experiments

acetone-vapor-polishing-experiments

If you’re thinking of trying the acetone-vapor polishing process to smooth your 3D printed objects you simply must check out [Christopher’s] experiments with the process. He found out about the process from our feature a few days ago and decided to perform a series of experiments on different printed models.

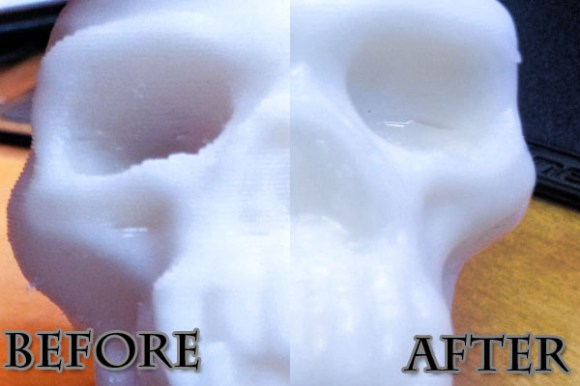
The results were mixed. He performed the process in much the same way as the original offering. The skull seen above does a nice job of demonstrating what can be achieved with the process. There is a smooth glossy finish and [Christopher] thinks there is no loss of detail. But one of the three models he tested wasn’t really affected by the vapor. He thinks it became a bit shinier, but not nearly as much as the skull even after sending it through the process twice. We’d love to hear some discussion as to why.

There is about eight minutes of video to go along with the project post. You’ll find it after the jump.

Continue reading “More Acetone-vapor Polishing Experiments”

Electrospinning Artificial Heart Valves

When you think about additive manufacturing, thoughts naturally turn to that hot-glue squirting CNC machine sitting on your bench and squeezing whatever plastic doodad you need. But 3D printing isn’t the only way to build polymer structures, as [Riley] shows us with this fascinating attempt to create electrospun heart valves.

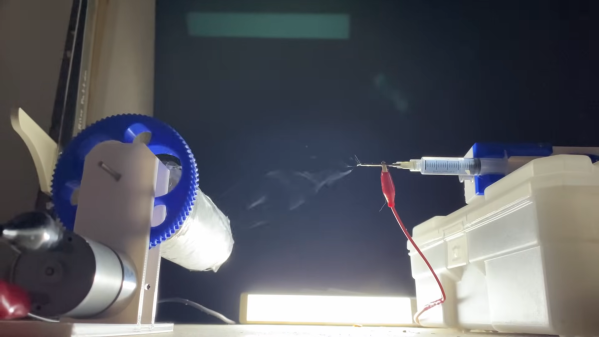
Now, you may never have heard of electrospinning, but we’ll venture a guess that as soon as you see what it entails, you’ll have a “Why didn’t I think of that?” moment. As [Riley] explains, electrospinning uses an electric field to build structures from fine threads of liquid polymer solution — he uses polycaprolactone (PCL), a biodegradable polyester we’ve seen used in other medical applications, which he dissolves in acetone. He loads it into a syringe, attaches the positive terminal of a high-voltage power supply to the hypodermic needle, and the negative terminal to a sheet of aluminum foil. The charge turns the PCL droplets into fine threads that accumulate on the foil; once the solvent flashes off, what’s left is a gossamer layer of non-woven plastic fabric.

To explore the uses of this material, [Riley] chose to make an artificial heart valve. This required a 3D-printed framework with three prongs, painted with conductive paint. He tried a few variations on the design before settling on a two-piece armature affixed to a rotating shaft. The PCL accumulates on the form, creating a one-piece structure that can be gingerly slipped off thanks to a little silicon grease used as a release agent.

The results are pretty impressive. The structure bears a strong resemblance to an artificial tricuspid heart valve, with three delicate leaves suspended between the upright prongs. It’s just a proof of concept, of course, but it’s a great demonstration of the potential of electrospinning, as well as an eye-opening look at what else additive manufacturing has to offer.

Continue reading “Electrospinning Artificial Heart Valves”

Copper Coating 3D Prints

We would all like to 3D print in metal, but for now, the equipment to do that is out of reach for most of us. Instead of dealing with powder printers or metal-bearing polymers, [Robert] has a simple solution. Using a process known as mechanical plating or peen plating, he deposits a layer of copper on a PLA print. The results look good, as you can see in the video below.

This isn’t electroplating, although the result is similar. With electroplating, you have to make the 3D part conductive. You also have to deal with wet chemistry and fumes. This process uses a rock tumbler, copper powder, and small ball bearings.

Continue reading “Copper Coating 3D Prints”