Breathe Easy With This LED Air Sensor Necklace

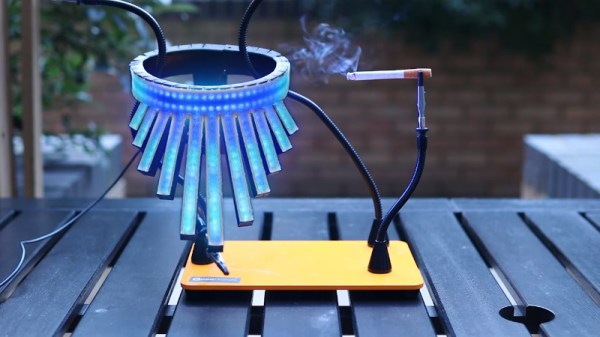
When you’re building wearables and glowables, sometimes a flashy rainbow animation is all you need. [Geeky Faye] likes to go a little further, however, and built this impressive necklace that serves to inform on the local air quality. 

The necklace consists of a series of Neopixel LED strips, housed within a tidy 3D printed housing made with flexible filament. A dovetail joint makes putting on and removing the necklace a cinch. A TinyPico V2, based on the ESP32, runs the show, as it’s very small and thus perfect for the wearable application. A USB power bank provides power to the microcontroller and LEDs.

The TinyPico uses its WiFi connection to query a server fed with air quality data from a separate sensor unit. The necklace displays a calm breathing animation as standard in cool tones. However, when air quality deteriorates, it shows warmer and hotter colors in a more pointed and vibrant fashion.

It’s a neat project that shows off [Geeky Faye]’s abilities at both electronics and tasteful wearable fabrication. It’s not always easy to build projects that are both functional and comfortable to wear, but this one works on both counts. Both the 3D files for the necklace and the microcontroller firmware code is included in the GitHub repo for those keen to dive in to the nitty gritty.

We’ve seen some great necklaces over the years, including those that rely on some beautiful PCB art. Video after the break.
Continue reading “Breathe Easy With This LED Air Sensor Necklace”

Breathe Easy With This Online Dust Sensor Box

It’s an unfortunate reality that for many of us, our air isn’t nearly as clean as we’d like. From smog to wildfires, there’s a whole lot of stuff in the air that we’d just as soon like to keep out of our lungs. But in order to combat this enemy, you first need to understand it. That means figuring out just what’s in the air you breathe, and how much of it. That’s where devices like the Dust Box from [The IoT GURU] can come in handy.

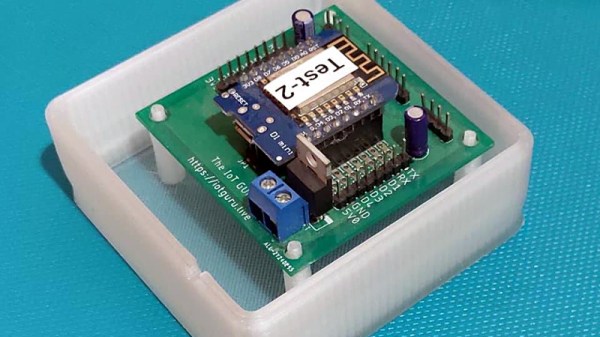
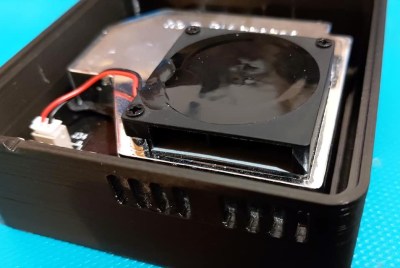
Inside the 3D printed enclosure is a Wemos D1 Mini ESP8266 development board, sitting on a custom breakout PCB. This board gives you some easy expandability to add your own sensors and hardware, though in this particular configuration, the Dust Box is using the BME280 sensor for general environmental monitoring and the SDS011 laser particle sensor to determine what’s in the air. Just plug it into a convenient USB power source, make sure it’s connected to the WiFi, and off it goes.

But where does all that lovely data end up? That’s up to you, but in this case, the [The IoT GURU] is pushing everything out to a web interface that allows the user to view yearly, monthly, and weekly historical data for each of the parameters the Dust Box can check. This is probably a bit more granular than most of us need, but it’s a good example of what’s possible should you need that much information.

For a similar project that allows you to take your sensors a bit farther off the beaten path, checkout FieldKit, which was recently crowned winner of the 2019 Hackaday Prize.

Breathe Easy With A Laser Cutter Air Filter

A laser cutter is a great tool to have in the shop, but like other CNC machines it can make a lousy neighbor. Vaporizing your stock means you end up breathing stuff you might rather not. If you’re going to be around these fumes all day, you’ll want good fume extraction, and you might just consider a DIY fume and particulate filter to polish the exhausted air.

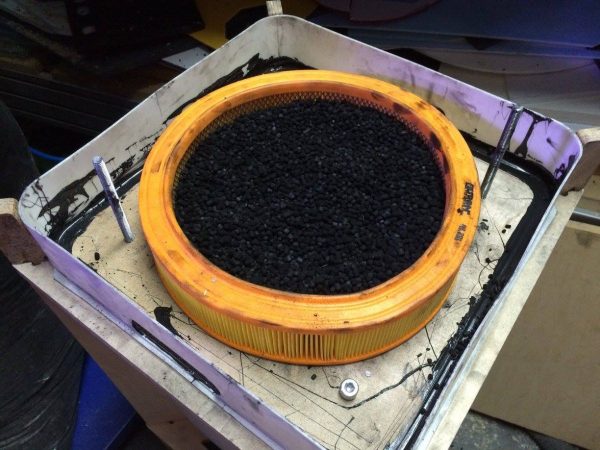
15203365_644939182347358_619032134291602214_nWhile there’s no build log per se, [ZbLab]’s Facebook page has a gallery of photos that show the design and build in enough detail to get the gist. The main element of the filter is 25 kg of activated charcoal to trap the volatile organic compounds in the laser exhaust. The charcoal is packed into an IKEA garbage can around a prefilter made from a canister-style automotive air cleaner – [ZbLab] uses a Filtron filter that crosses to the more commonly available Fram CA3281. Another air cleaner element (Fram CA3333) makes sure no loose charcoal dust is expelled from the filter. The frame is built of birch ply and the plumbing is simple PVC. With a 125mm inlet it looks like this filter can really breathe, and it would easily scale up or down in size according to your needs.

No laser cutter in your shop to justify this filter, you say? Why not build one? Or, if you do any soldering, this downdraft fume extractor is a good way to clear the air.

CNC’d MacBook Breathes Easy

Sick of his 2011 Macbook kicking its fans into overdrive every time the temperatures started to climb, [Arthur] decided to go with the nuclear option and cut some ventilation holes into the bottom of the machine’s aluminum case. But it just so happens that he had the patience and proper tools for the job, and the final result looks good enough that you might wonder why Apple didn’t do this to begin with.

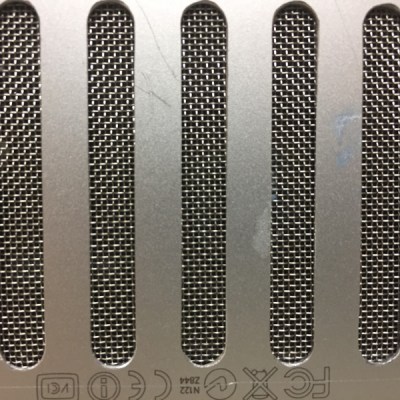
After disassembling the machine, [Arthur] used double-sided tape and a block of scrap wood to secure the Macbook’s case to the CNC, and cut out some very slick looking vents over where the internal CPU cooler sits. With the addition of some fine mesh he found on McMaster-Carr, foreign objects (and fingers) are prevented from getting into the Mac and messing up all that Cupertino engineering.

[Arthur] tells us that the internal temperature of his Macbook would hit as high as 102 °C (~215 °F) under load before his modification, which certainly doesn’t sound like something we’d want sitting in our laps. With the addition of his vents however, he’s now seeing an idle temperature of 45 °C to 60 °C, and a max of 82 °C.

In the end, [Arthur] is happy with the results of his modification, but he’d change a few things if he was to do it again. He’s somewhat concerned about the fact that the mesh he used for the grill isn’t non-conductive (he’s using shims of card stock internally to make sure it doesn’t touch anything inside), and he’d prefer the peace of mind of having used epoxy to secure it all together rather than super-glue. That said, it works and hasn’t fallen apart yet; basically the hallmarks of a successful hack.

It’s worth noting that [Arthur] is not the first person to struggle with the Macbook’s propensity for cooking itself alive. A few years back we covered another user who added vents to their Macbook, but not before they were forced to reflow the whole board because some of the solder joints gave up in the heat.

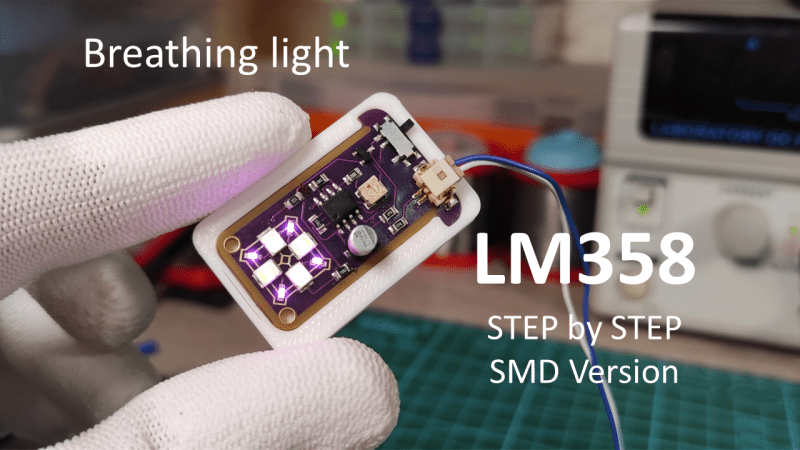
Surface Mount Breathing Light PCB, using LM358 op-amp

Surface-Mount Light Breathes Life Into Your Project

If you’ve ever seen those gadgets with the “breathing light” LEDs on them and wondered how to do it, then [DIY GUY Chris] can show you how to design your own surface-mount version, using only analogue electronics.

Simulation trace showing the LED breathing light circuit operating. Traces for voltage and current are shown over a few seconds
The LED current tracks up and down in an approximately triangular-wave pattern

The circuit itself is built around a slow triangular-wave oscillator, that ramps the current up and down in the LEDs to make it look as if the lights are breathing in and out. The overall effect is rather pleasing, and the oscillation speed can be adjusted using the on-board potentiometer.

This project is actually an update to a previous version that used through-hole components (also shown in the video below), and goes to show that revisiting completed projects can give them a new lease of life. It also shows how easy it has become to design and order custom circuit boards these days. It’s not so long ago that a project like this would have been either made on stripboard or etched from copper-plated FR4 in a bubbling tank of acid!

If you have revisited an old project that you’re proud of and would like to show others, why not drop us a message on our tips line?

We have covered some other options for breathing LEDs in the past, such as this digital logic version, and this Arduino library that has a host of other effects to choose from, too. Continue reading “Surface-Mount Light Breathes Life Into Your Project”

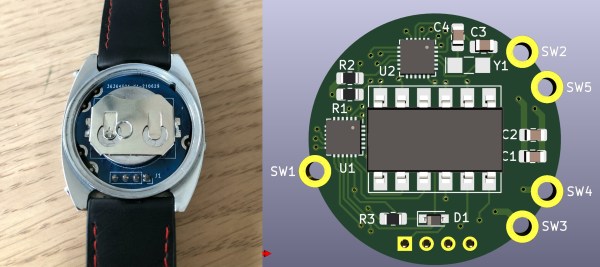
A vintage watch with a new PCB inside, next to a 3D rendered image of the PCB

Modern, Frugal PCB Breathes New Life Into Soviet-Made LED Watch

The first electronic digital watches were admired for their pioneering technology, if not their everyday practicality, when they were introduced in the 1970s. Their power-hungry LED displays lit up only when you pressed a button, and even then the numbers shown were tiny. Their cases were large and heavy, and they drained their batteries rather quickly even when not displaying the time. Still, the deep red glow of their displays gave them a certain aesthetic that’s hard to replicate with today’s technology.

A vintage LED watch displaying "16.42"
Pressing the top-right button enables those beautiful LED modules

When [Benjamin Sølberg] got his hands on an Elektronika-1, a first-generation digital watch designed in the Soviet Union, he set about designing a modern replacement for its internals. Where the original had several custom chips wire-bonded directly onto a substrate, the new board contains an MSP430 series microcontroller as well as an AS1115 display driver. The PCB makes contact with the watch’s pushbuttons through clever use of castellated holes.

For the display [Benjamin] went with period-correct LED modules made by HP, which keep the display’s appearance as close to the original as possible. While these draw quite a bit of current, the rest of the watch has become an order of magnitude more frugal: the stand-by time is now estimated to be about ten years, where the old design often needed new batteries within a year. [Benjamin] uses his renovated watch on a daily basis, apparently without trouble.

If you’ve got an old Soviet digital watch that you’d like to upgrade, you’ll be pleased to hear that the entire design is open source. Just like this retro watch, in fact, that uses a similar LED display. If you’re into original vintage watches, we’ve covered them in depth, too.

A vintage pocket calculator with extra exposed circuitry added

I2C Breathes New Life Into Casio Pocket Calculator

When is a pocket calculator more than just a calculator? [Andrew Menadue] has been pushing the limits of his 1970s Casio FX-502P by adding all sorts of modern functionality via the calculator’s expansion port.

Several older Casio calculators included an expansion port for connecting cassette tape storage and printing functionality. Data on the FX-502P could be saved on cassette tape using the well-known Kansas City standard, however this signal was produced by Casio’s FA-1 calculator cradle, not the FX-502P itself. To interact with the calculator itself would require an understanding of whatever protocol Casio designed for this particular model.

It turns out that the protocol is a little quirky compared to its contemporaries, with variable length data packets and inverted data logic, (zero volts is ‘1’ and three volts is ‘0’). Once the protocol was untangled, it was ‘simply’ a matter of connecting the calculator to the GPIO interface on the STM32, and using some software wizardry to start shooting data packets back and forth.

This hack can be used to send and receive data from an SD card (via a RAM buffer), however it’s the other expansion capabilities that really make us wonder. [Andrew] has demonstrated how easy it is to add a real-time clock or thermal printer. Using the I2C capabilities of the STM32, it’s likely that all sorts of gadgets and sensors could be coupled with this vintage calculator, and many others like it.

You can find even more details about this hack over here, including some follow up videos to the original hack. No stranger to vintage calculators, we last featured [Andrew] after he retrofitted a modern LCD display to an old Casio. It’s charming to see how these calculators are far from obsolete.

Continue reading “I2C Breathes New Life Into Casio Pocket Calculator”