3D Printering: The Problem Of Thingiverse

Most makers, I’m sure, enter into the 3D printing world with a goal in mind. Whether that’s printing enclosures for projects, Warhammer figurines, robot chassis, or even a mechanical computer, there is usually some obvious utility in having a 3D printer at home. 3D printers are a machine tool, though, and any time it’s not being used means it’s an investment with a lower return, or at the very least a really cool toy gathering dust.

Where then do you find new stuff to print that you don’t design yourself?

For the longest time now, Thingiverse has been the largest repository to share, browse, and download object other people have made. Even I have some very stupid stuff up on Thingiverse and have made use of a few random objects I found on there. This does not mean the 3D printer community particularly likes Thingiverse, however: Last year, Makerbot, the people behind Thingiverse, changed the terms of use so (allegedly) Thingiverse owns everything uploaded to their service. Couple this with completely unsubstantiated rumors of things being removed from Thingiverse that compete with Makerbot products, and you have a perfect storm of people unsatisfied with an online repository of 3D objects.

There is a huge market for an online repository of user-submitted 3D objects that isn’t controlled by Makerbot, and many have attempted to enter the fray. Defense Distributed, the guys behind the 3D printed AR lowers and all-plastic handguns launched DEFCAD, a Thingiverse clone, made an attempt by mirroring thousands of Thingiverse objects, removing the attribution in violation of these object’s licenses. Shady, yes, but at least it’s an option. There are other repos such as Cubehero and the newly launched YouMagine, a repo developed by Ultimaker. the Luke Skywalker to Makerbot’s Darth Vader.

But here is the problem with Thingiverse: even if you would like to get away from using this Makerbot service, it’s still the largest collection of 3D printed objects on the Internet. It has the most users, and is growing more each day than any of its competitors. Putting your objects anywhere else only means fewer people will see them, and fewer still will incorporate your designs into their new designs.

There are a few tools for you to ‘roll your own’ object repository. Github has a great new tool for viewing diffs between different versions of objects. There’s even a lot of work in making the Github landing page more like a Thingiverse page. This doesn’t address the core value of Thingiverse – if all the objects aren’t catalogued in one database, searchable by anyone, it’s just not as useful a site as Thingiverse.

I’m simply not smart enough to offer up a solution to this problem. Therefore, I’m turning it on to you: how should the 3D printer community retain the great value Thingiverse offers while still making something as usable as the now-malagined site? Should any new site mirror objects already on Thingiverse a la DEFCAD, only with proper attribution? Who should control the portal to all the objects, if anyone?

If you have any ideas on how to solve the problem of Thingiverse, drop a note in the comments.

Smoothieboard, The Be-all, End-all CNC Controller

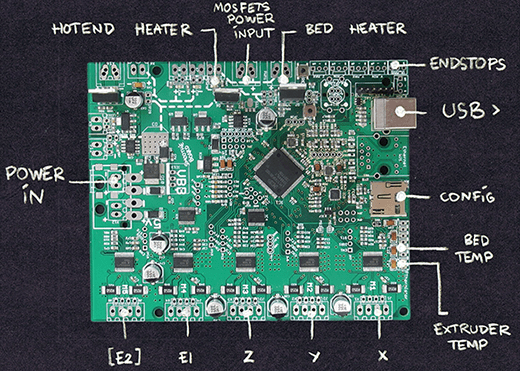
A while back we took a look at electronics boards for 3D printers, going over the cost and benefits of the most common electronics boards for printers, laser cutters, and mills. One of the most impressive boards was the Smoothieboard, but finding a supplier back then was a little difficult. Now, the Smoothieboard is up on Kickstarter, giving everyone the opportunity to get their hands on this very cool CNC control board.

While most RepRap and 3D printer controller boards use an ATMega or other 8-bit microcontroller, the Smoothie uses a 32-bit ARM chip in the form of an NXP LPC Cortex-M3 chip. Not only does this allow the Smoothie to do some very cool things with your machine – native arcs and circles, for example, but this better hardware also allows for Ethernet, drag-and-drop firmware, and exposing the USB port as both a serial port or mass storage device.

The Smoothie comes in three flavors, with either 3, 4, or 5 stepper motor drivers. These Allegro A4982 drivers are good enough for any 3D printer, laser cutter, or small mill, but the broken out pins allow for stepper drivers supplying more than 2A of current.

Everything on the Smoothieboard is modular, meaning this board is equally capable of powering a RepRap, mill, laser cutter, or plotter. There’s even a planned control panel called the Smoothiepanel, making this a great choice for your next CNC build.

Inside The Clapper

clapper

Hackaday readers above a certain age will probably remember the fabulously faddish products developed by Joseph Enterprises. These odd gadgets included the Ove’ Glove, VCR Co-Pilot, the Creosote Sweeping Log, and Chia Pet (Cha-Cha-Cha-Chia) as mainstays of late night commercials, but none were as popular as The Clapper, everyone’s favorite sound-activated switch from the 1980s. [Richard] put up a great virtual teardown of The Clapper, that provides a lot of insight into how this magic relay box actually works, along with some historical context for the world The Clapper was introduced to.

Sound activated switches are nothing new, but the way The Clapper did it was just slightly brilliant. Instead of listening to every sound, the mic inside the magic box sends everything through a series of filters to come up with a very narrow bandpass filter centered around 2500 Hz. This trigger is analyzed by a SGS Thompson ST6210 microcontroller ( 4MHz, ~1kB ROM, 64 bytes of RAM, and 12 I/O pins ) to listen for two repeating triggers  within 200 milliseconds. The entire system – including the source code for the MCU – can be seen in the official patent, US5493618.

The Clapper sold many millions of units at a time when a lot of homes were assuredly in a pre-microelectronics world. Yes, in 1986, a lot of TVs had microcontrollers and maybe a washer/dryer combo may have had a few thousand transistors between them. Other than that, The Clapper was many household’s introduction to the ubiquitous computing power we see today, and all with less capability than an Arduino.

How Much Can You Cram Into A Wristwatch

Creating wearable electronics that are functional and not overly bulky is very, very hard. [Zak], though, makes it look easy. He started his DIY digital wrist watch to see how much he could cram into a watch-sized device. The finished product is really incredible, and one of the most amazing DIY watches we’ve ever seen.

The electronics for the watch include an ATMega328p, a DS3231M Real Time Clock, a Microchip battery charger, and a few resistors and caps. The display is an OLED, 1.3″ wide and only 1.5 mm thick, contributing to the crazy 10mm overall thickness of the watch.

The software is where this watch really shines. Along with the standard time and date functions, [Zak] included everything and more a wrist watch should have. There is an interface to set up to ten alarms on different days of the week, a Breakout and ‘Car Dodge’ game, a flashlight with integrated ‘rave’ mode, and a stopwatch. On top of this, [Zak] included some great animations very similar to the CRT-like animations found in Android.

It’s a fabulous piece of kit, and if any project were deserving of being made into an actual product, this is it.

You can check out [Zak]’s demo of all the functions of his watch below.

Continue reading “How Much Can You Cram Into A Wristwatch”

An Improvised ATtiny2313 Logic Analyzer

2313logic

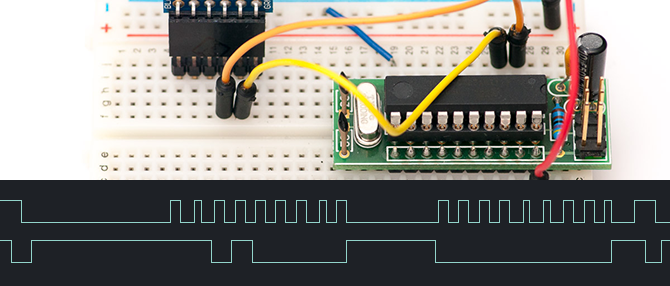
After banging his head against a wall trying to get a PS/2 interface to work, [Joonas] decided he needed a dedicated logic analyzer. He didn’t need anything fancy; writing bits to a serial port would do. He came up with a very, very simple ATtiny2313-based logic analyzer that can capture at 50+ kHz, more than enough for a PS/2 port.

The hardware for [Joonas’] build is a simple ATtiny2313 breadboard adapter, an FTDI Friend, and not much else. The 2313 has eight input ports on one side of the chip, making attaching the right logic line to the right port a cinch.

The highs and lows on each logic line are sent to a computer over the FTDI chip, converted into OLS format, and piped into Open Sniffer to make some fancy graphs.

[Joonas] was able to capture PS/2 signals with his logic sniffer, so we’ll call this project a success. However, there were a few problems that made this project a little more trouble than it was worth: there is no easy way to turn a serial dump into a binary file, Putty didn’t allow suppressing output to the terminal, and Mac serial ports twinkling above 115.2 kbps don’t work natively. Still, the project did its job, and we couldn’t ask for anything more.

[via Dangerous Prototypes]

Wi-Fi Enabled Garage Door Opener

Normally, internet-controlled household devices are a cobbled together mashup of parts. This is great for a prototype, but if you’re looking for something that will last a decade in your garage, you’ll need something a little cleaner and more robust. [Phil]’s Internet-enabled garage door opener is just that, replete with a custom-made enclosure for his Arduino powered system.

The main hardware for [Phil]’s build is a Freetronix EtherTen, an Arduino clone with a built-in Ethernet interface. Aside from that, the electronics are simple: a relay, transistor, and diode provide the connection from the EtherTen to the garage door opener.

The software for this setup consists of a main file that sets up the web page, the serial monitor, and loops through the main program. There are a bunch of classes for initializing the web page, writing passwords to the EEPROM, activating the door, and setting the MAC and IP addresses.

Opening the door with this remote is a snap: with any WiFi enabled smartphone or tablet, [Phil] only needs to log onto his network, surf on over to the page hosted on the Arduino, and enter a password. From there, opening the door is just a press of a button. Passwords and other configuration settings cane be entered with MegunoLink. This software also includes a serial monitor to log who opened the door and when.

It’s an interesting and compact system, and handy to boot. You might sometimes forget your garage door opener, but we’re thinking if you ever find yourself without your phone, a closed garage door is the least of your problems.

Opening Up The Settings In MakerWare

ProfTweak

[Rich Olson] really likes MakerWare and the Makerbot slicer – the software package that comes with every Makerbot – but sometimes he needs to change a few settings. Makerware doesn’t allow the user access to 90% of the setting for slicing and printing, so [Rich] did something about that. He came up with ProfTweak, a tool to change all the MakerWare slicing and printing parameters, giving him precise control over every print.

ProfTweak handles common settings changes such as turning the fan on or off, adjusting the filament diameter, changing feed rate options, and turning your infills into cats. It’s a handy GUI app that should work under Windows, OS X, and Linux, so if you’re running MakerWare right now, you can get up and running with this easily.

One thing [Rich] has been using his new software for is experimenting with alternative filaments. With his Makerbot, he’s able to print in nylon, the wood and stone PLAs, flex PLA, and PET. That’s a lot more material than what the Makerbot natively supports, so we have to give [Rich] some credit for that.