Exploring The Open Source That Really Goes Into A RISC-V Chip

It’s an exciting time in the world of microprocessors, as the long-held promise of devices with open-source RISC-V cores is coming to fruition. Finally we might be about to see open-source from the silicon to the user interface, or so  goes the optimistic promise. In fact the real story is considerably more complex than that, and it’s a topic [Andreas Speiss] explores in a video that looks at the issue with a wide lens.

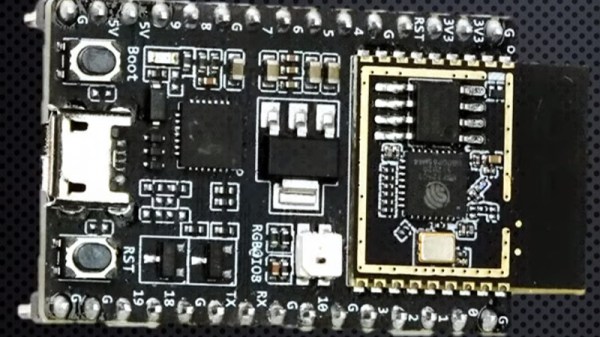
He starts with the basics, looking at the various layers of a computer from the user level down to the instruction set architecture. It’s a watchable primer even for those familiar with the topic, and gives a full background to the emergence of RISC-V. He then takes Espressif’s ESP32-C3 as an example, and breaks down its open-source credentials. The ISA of the processor core is RISC-V with some extensions, but he makes the point that the core hardware itself can still be closed source even though it implements an open-source instruction set. His conclusion is that while a truly open-source RISC-V chip is entirely possible (as demonstrated with a cameo Superconference badge appearance), the importance of the RISC-V ISA is in its likely emergence as a heavyweight counterbalance to ARM’s dominance in the sector. Whether or not he is right can only be proved by time, but we can’t disagree that some competition is healthy.

Take a closer look at the ESP32-C3, with our hands-on review.

Continue reading “Exploring The Open Source That Really Goes Into A RISC-V Chip”

A Very Modern Tube Headphone Amplifier

Once a discarded relic, over the years the humble vacuum tube has been rehabilitated in the arena of specialist audio. There are plenty of tube amplifiers now being manufactured, with a popular choice being headphone amplifiers that use a tube as a gain stage followed by an op-amp as a buffer with a low impedance output. This forms the basis of [Ratti3]’s amplifier, but with the added interest of a battery supply and a Bluetooth connection.

The tube circuit is a very conventional anode follower using an EF95 pentode. This provides plenty of gain and of course that “valve sound” beloved of audio enthusiasts, but suffers from an output impedance too high to drive a set of headphones. An NE5532 steps in for the op-amp buffer role, making for a very simple circuit. Power comes from a set of four 18650 Lithium-Ion cells with associated charger and balance boards, while a little switching boost converter provides the 100 volt HT for the tubes.

We’ve visited this type of amplifier before with a similar but much more rough-around-the-edges Chinese version. That had some astonishingly cheap Chinese tubes, but if we’re seeking better components it’s interesting to know just who makes tubes these days.

Spectrogram Drawing For Fun And Coding

It probably can’t have taken long after the first spectrum waterfall display was created, before somebody had a go at creating a waveform that would create an image in the waterfall. We don’t know who that pioneer was, but it’s over 20 years since Aphex Twin famously used the technique in their music, so it’s nothing new. If you fancy a go for yourself, [Gokberk Yaltirakli] has the project for you, creating waterfall images with an SDR from image files, using a bit of Python code.

The value here isn’t necessarily in creating the waterfall of Bitcoin logos that can be seen in the video he’s put on the page, instead it’s in the simple explanation of creating I and Q values for an SDR. The code is a bit slow so writes its values to a file which is output by a HackRF, but it could just as easily be used by any other capable output device such as GNU Radio and a soundcard if you too want an Aphex Twin moment. The hardware for displaying a spectrum waterfall doesn’t even have to be very complex.

Thanks [Leo] for the tip.

DIY All-Transistor Addressable Pixel

By now most readers should be used to addressable LEDs, devices that when strung out in a connected chain can be individually lit or extinguished by a serial data stream. Should you peer at one under a microscope you’ll see alongside the LED dies an integrated circuit that handles all the address decoding. It’s likely to be quite a complex device, but how simply can its functions be replicated? It’s a theme [Tim] has explored in the TransistorPixel, and addressable LED board that achieves addressability with only 17 transistors.

It uses a surprisingly straightforward protocol, in which a pulse longer than 500ns enables the LED while a shorter one turns it off. Subsequent pulses in a train are passed on down the line to the next device. A 20µs absence of a pulse resets the string and sets it to wait for the next pulse train. Unlike the commercial addressable LEDS there is only a single colour and no suport for gradated brightness, but it’s still an impressive circuit.

Under the hood is some very old-school RTL logic, a monostable to detect the pulse and a selection of gates and a latch to capture the state and forward to the chain. It’s laid out on a PCB in order of circuit function, and while we can see that maybe it’s not a practical addresssable LED for 2021, it’s likely that it could be made into a much smaller PCB if desired.

Perhaps unsurprisingly given the ready availability of addressable LEDs, we’ve not seen many home made ones. This addressable 7-segment display may be the closest.

May (No Longer) Contain Hackers: MCH 2021 Has Been Cancelled

In a sad but unsurprising turn of events, MCH, this summer’s large hacker camp in the Netherlands, has been cancelled. Organising a large event in a pandemic would inevitably carry some risk, and despite optimism that the European vaccine strategy might have delivered a safe environment by the summer that risk was evidently too high for the event organisers IFCAT to take on. Our community’s events come from within the community itself rather than from commercial promoters, and the financial liability of committing to hire the site and infrastructure would have been too high to bear had the event succumbed to the pandemic. Tickets already purchased will be refunded, and they leave us with a crumb of solace by promising that alternatives will be considered. We understand their decision, and thank them for trying.

As with all such events the behind-the-scenes work for MCH has already started. The badge has been revealed in prototype form, the call for participation has been completed, and the various other event team planning will no doubt be well  under way. This work is unlikely to be wasted, and we hope that it will bear fruit at the next Dutch event whenever that may be.

It would have been nice to think that by now we could be seeing the light at the end of the pandemic tunnel, but despite the sterling work of scientists, healthcare workers, and epidemiologists, it seems we still have a a way to go before we’ll once more be hanging out together drinking Club-Mate in the company of thousands of others. If the pandemic is weighing upon you, take care of yourselves.

Turn An Ender 3 Into A Belt 3D Printer Of Your Very Own

Infinite-bed 3D printers have long been an object of desire in our community, but it has taken a long time for the promise to catch up with the reality in terms of relatively affordable models that live up to expectations. They’re still a little expensive compared to their fixed-bed cousins though, so if you hanker for a Creality CR30 but only have the cash for an Ender 3, [Michael Sgroi] may have the project for you. He’s created the EnderLoop, a set of parts to perform the conversion from a stock Ender 3 to a fully-functional belt printer.

It takes the Ender 3 gantry and tilts it sideways on a pair of 3D printed supports, and replaces the stock Y azis with a belt on rollers driven by a larger motor through a timing belt drive. He has a variety of suggestions for sourcing a belt, and in his case he’s chosen one from PowerBelt3D. As well as the GitHub repository already linked, it can also be found on Thingiverse.

It’s clear that hacking apart a reliable printer in this way is not for the faint-hearted, and that a cautious hacker might prefer to wait a while for a cheaper off-the-shelf model. But we can see that the reliability of the Ender 3 will mean that its parts are still of decent quality in the new configuration, and that it looks as though the base printer can be reassembled should a belt-based build be a failure. Infinite bed printers will inevitably have a major presence in our community, and it is designs such as this one which will lead the way as they evolve into reliable machines.

Taking A Capacitor Microphone To The Next Level

There was a time when a microphone for most people was a cheap plastic affair that probably came for free with their sound card, but in the age of pandemic video streaming no desktop is complete without a chunky model that looks for all the world as though it escaped from a studio. Few people make their own microphones, so the work of [DJJules] in building very high quality condenser microphones is a particularly fascinating read.

A condenser microphone is a capacitor in which one plate is formed by a conductive diaphragm. A bias voltage is supplied to the diaphragm via a resistor, and since the charge on the plate remains constant as its capacitance changes with the sound vibrations, the voltage on the capacitor changes accordingly. This is picked up by a high impedance buffer and from there fed to a normal microphone input. This Instructable uses a commercial condenser microphone capsule, and takes the reader through generating the bias voltage for it before describing the op-amp buffer circuit.

The most interesting part comes at the end, as we’re shown how the sensitivity pattern of a dual-microphone array can be tuned to be omnidirectional, cardoid, or figure-of-eight. This is probably the norm among audio engineers, but we rarely see this sort of insight in our community. We may never build a microphone of our own, but it’s fascinating to see this one from the ground up in the video below the break.

If you’re confused about the difference between a condenser microphone and the more common electret condenser microphone, we have published a guide to that topic. Continue reading “Taking A Capacitor Microphone To The Next Level”