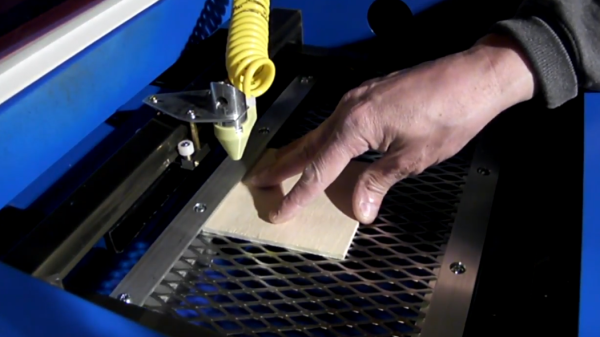
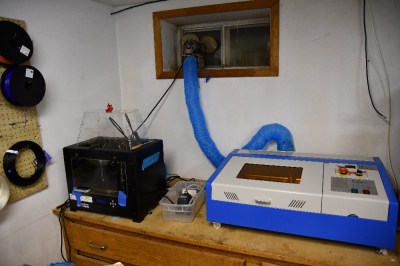
K40 Gets A Leg Up With Open Source Z Table

If you’ve done even the most cursory research into buying a laser cutter, you’ve certainly heard of the K40. Usually selling for around $400 USD online, the K40 is not so much a single machine as a class of very similar 40 watt CO2 lasers from various Chinese manufacturers. As you might expect, it takes considerable corner cutting to drive the cost down that low, but the K40 is still arguably the most cost-effective way to get a “real” laser cutter into your shop. If you’re willing to do some modifications on the thing, even better.
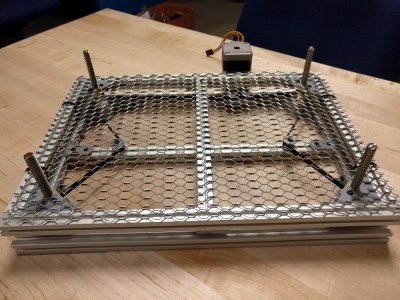
One of the shortcomings of the K40 is that it lacks a Z axis, and with thick material that needs multiple cuts at increasingly deeper depths, this can be a hassle. [Aaron Peterson] decided to take it upon himself to design and build an adjustable Z table for the K40 at his local makerspace (River City Labs), and being the swell guy that he is, has made it available under an open source license so the rest of the K40-owning world can benefit from his work.

[Aaron] started the design with a number of goals which really helped elevate the project from a one-off hack to a sustainable community project. For one, he only wanted to use easily available commodity hardware to keep the cost down. The most complex components should all be 3D printable so the design would be easy to replicate by others, and finally, he wanted the user to have the ability to scale it in all dimensions. The end result is a electronically controlled lifting platform that anyone can build, for any laser cutter. It doesn’t even have to be limited to laser cutters; if you have a need for precisely raising or lowering something, this design might be exactly what you’re looking for.

The table is primarily constructed out of 15×15 aluminum extrusion, and uses standard hardware store expanded wire mesh as a top surface. Height is adjusted by rotating the four 95 mm T8 leadscrews with a GT2 belt and pulleys, which prevents any corner from getting out of sync with the others. Connected to a standard NEMA 17 stepper motor, this arrangement should easily be capable of sub-millimeter accuracy. It looks as though [Aaron] has left controlling the stepper motor as an exercise for the reader, but an Arduino with a CNC shield would likely be the easiest route.

We’ve seen a lot of hacking around the K40 over the last couple of years, from spring loaded beds to complete rebuilds which are hardly recognizable. If you’re looking for a cheap laser with a huge catalog of possible hacks and modifications, you could do a lot worse than starting with this inexpensive Chinese machine.

Spring-Loaded Bed For K40 Laser Acts As An Auto-Focus

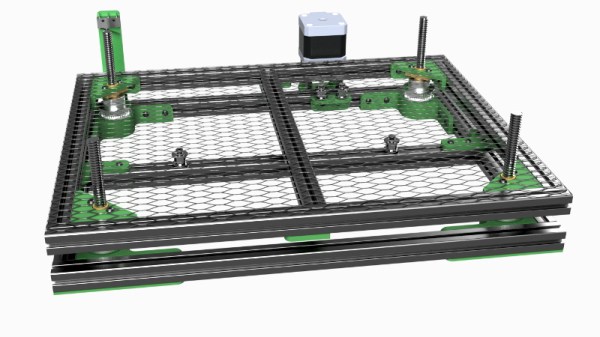
Laser engraving and cutting has something in common with focusing the sun’s rays with a magnifying glass: good focus is critical to results. If materials of varying thicknesses are used, focus needs to be re-set every time the material changes, and manual focusing quickly becomes a chore. [Scorch Works] has a clever solution to avoid constant re-focusing that doesn’t involve sensors or motors of any sort. The result is a self-adjusting bed that compensates for material height changes, ensuring that the top surface of the material is always a fixed distance from the laser’s head.

The way [Scorch Works] has done this is to make two spring-loaded clamps from angle aluminum and a few pieces of hardware. When a sheet of material is placed into the machine, the edges get tucked underneath the aluminum “lips” while being pushed upward from beneath. By fixing the height of the top layer of angle aluminum, any sheet stock always ends up the same distance from the laser head regardless of the material’s thickness.

[Scorch Works] shows the assembly in action in the video embedded below, along with a few different ways to accommodate different materials and special cases, so be sure to check it out.

Continue reading “Spring-Loaded Bed For K40 Laser Acts As An Auto-Focus”

Laser Noob: Getting Started With The K40 Laser

Why spend thousands on a laser cutter/engraver when you can spend as little as $350 shipped to your door? Sure it’s not as nice as those fancy domestic machines, but the plucky K40 is the little laser that can. Just head on down to Al’s Laser Emporium and pick one up.  Yes, it sounds like a used car dealership ad, but how far is it from the truth? Read on to find out!

Laser cutting and engraving machines have been around for decades. Much like 3D printers, they were originally impossibly expensive for someone working at home. The closest you could get to a hobbyist laser was Epilog laser, which would still cost somewhere between $10,000 and $20,000 for a small laser system. A few companies made a go with the Epilog and did quite well – notably Adafruit used to offer laptop laser engraving services.

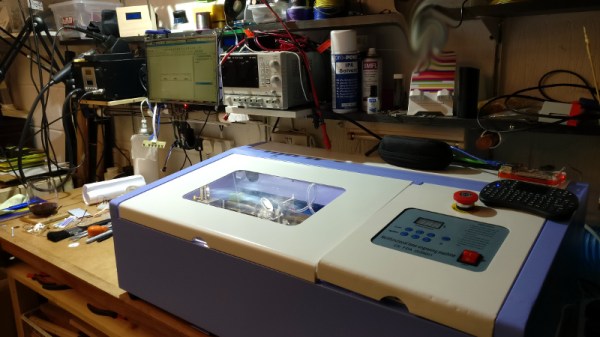
Over the last decade or so things have changed. China got involved, and suddenly there were cheap lasers on the market. Currently, there are several low-cost laser models available in various power levels. The most popular is the smallest – a 40-watt model, dubbed the K40. There are numerous manufacturers and there have been many versions over the years. They all look about the same though: A blue sheet metal box with the laser tube mounted along the back. The cutting compartment is on the left and the electronics are on the right. Earlier versions came with Moshidraw software and a parallel interface.
Continue reading “Laser Noob: Getting Started With The K40 Laser”

Expanding The K40 Laser Cutter With Aluminum Extrusion

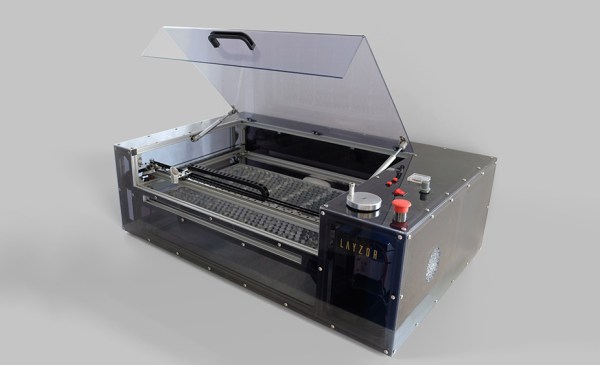
The K40 laser cutter is an excellent option if you need to laze some plywood or acrylic. It’s ubiquitous, it’s cheap, and there’s a vast community out there that will help you support any issue you could have. Unfortunately, the K40 laser cutter is lacking. It has a small bed, and it doesn’t have the latest technology like ‘switches’ that turn off the laser when you open the door.

[frederik] recently upgraded his K40 to something great. He’s calling it the Layzor, and it has a huge 600×400 mm bed area, a feed-through slot for even wider workpieces, and fancy technology [frederik] is calling an ‘E-stop’. Sounds expensive, doesn’t it?

The build began by scavenging the K40 laser cutter for the electronics and laser tube, then building a new frame out of aluminum extrusion. A few parts had to be custom made, including a few stepper motor mounts and something to hold the laser tube. All of this was tied up in a box with acrylic panels, and went together as easily as any other CNC machine.

The finished project is great. It’s a relatively powerful laser cutter capable of most hobby work, and it was cheap. The total cost for this build was under €500. That’s not including the scavenged K40, but that’s still an amazing price for a very capable laser cutter.

A Lesson In K40 Laser Repair

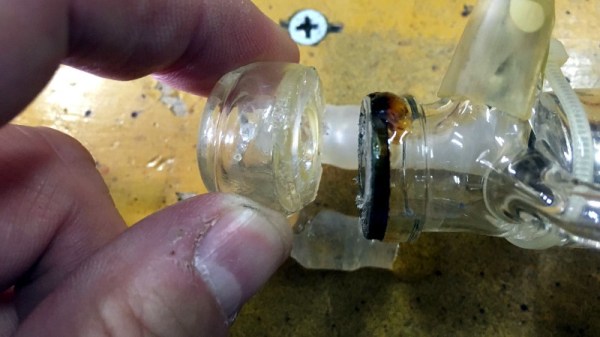
The K40 laser cutter has become ubiquitous in hackerspaces and well-equipped home workshops over the past few years, as a relatively inexpensive introduction to laser cutting and a machine that is readily hackable. Tokyo Hackerspace have one, but sadly their laser tube failed after relatively little use. Replacing a laser tube might be a routine component change for some readers, but it’s still worth looking at in some detail.

Their tube had failed at its output lens cooling cap, a component that is glued onto the end of the tube rather than bonded, and which had snapped off. There had been no mechanical stress upon it, but it was found  that the arrangement of their cooling system caused it to drain between uses and thus air bubbles could accumulate. The resulting cooling inefficiency caused enough thermal stress for the bond between the tube and the end piece to fail.

The in-depth analysis of what caused the failure and step-by-step description of the procedure should be of interest to any K40 owner. Little things such as ensuring that the tube is rotated to the right angle for all air bubbles to make their way out of it, or making sure that when the pump is switched off the water isn’t all pulled out of it by gravity seem obvious, but these are traps that will have caught more than one K40 owner.

We’ve covered many K40 stories over the years, but a good place to start for the novice might be this commissioning story, or even this tale of a hackerspace’s modifications to their model.

K40 Laser Cutter, Meet Raspberry Pi

The inexpensive Chinese K40 laser cutter has become the staple of many a small workshop within our community, providing a not-very-large and not-very-powerful cutter for a not-very-high price. As shipped it’s a machine that’s not without its flaws, and there is a whole community of people who have contributed fixes and upgrades to make these cutters into something a lot more useful.

[Alex Eames] bought a K40, and since he’s the person behind the Raspi.tv Raspberry Pi business, when he switched from the supplied Corel-based software to the popular open-source K40 Whisperer his obvious choice was to run it on a Raspberry Pi. Since K40 Whisperer is written in Python he reasoned that the Pi’s ARM platform would not prevent its use, so he set to work and documented the process and his workflow.

It’s a straightforward enough process, and his K40 now has a Pi into which he can SFTP his files rather than the inevitable old laptop that accompanies most K40s. With so many K40 improvements created by its community, we find it surprising that some enterprising Chinese manufacturer hasn’t seen the opportunity to make a quick buck or two extra and incorporate some of them into their products at the factory, including one of the many single board computers that could perform this task.

We’ve covered a lot of K40 stories over the years, if you are new to this machine you might like to take a look at this story of bringing one to life.

Hacking A K40 Laser Cutter

The distinctive blue-and-white enclosure of the Chinese-made K40 laser cutter has become a common sight in workshops and hackerspaces, as they represent the cheapest route to a working cutter that can be found. It’s fair to say though that they are not a particularly good or safe machine when shipped, and [Archie Roques] has put together a blog post detailing the modifications to make something better of a stock K40 performed at Norwich Hackspace.

After checking that their K40 worked, and hooking up suitable cooling and ventilation for it, the first task facing the Norwich crew was to install a set of interlocks. (A stock K40 doesn’t shut off the laser when you open the lid!) A switch under the lid saw to that, along with an Arduino Nano clone to aggregate this, a key switch, and an emergency stop button. A new front panel was created to hold this, complete a temperature display and retro ammeter to replace the modern original.

Norwich’s laser cutter has further to go. For example, while we secretly approve of their adjustable bed formed from a pile of beer mats, we concede that their plans to make something more practical have merit. The K40 may not be the best in the world, indeed it’s probable we should be calling it an engraver rather than a cutter, but if that means that a small hackerspace can have a cutter and then make it useful without breaking the bank, it’s good to see how it’s done.

This isn’t the first K40 enhancement we’ve featured. Norwich might like to look at this improved controller, or even extend their cutter’s bed. Meanwhile if [Archie]’s name rings a bell, it might be because of his Raspberry Pi laptop.