Overclock Your Raspberry Pi The Right Way

The Raspberry Pi came upon us as an educational platform. A credit card sized computer capable of running Linux from a micro SD card, the Raspberry Pi has proven useful for far more than just education. It has made its way into every nook and cranny of the hacker world. There are some cases, however, where it might be a bit slow or seem a bit under powered. One way of speeding the Raspi up is to overclock it.

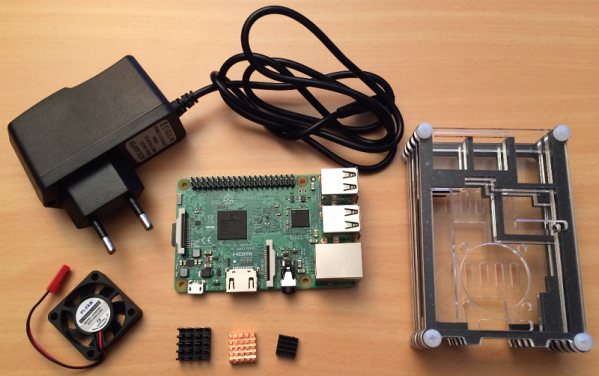
[Dmitry] has written up an excellent overclocking guide based upon Eltech’s write up on the subject. He takes it a bit further and applies the algorithm to both Raspi 2 and Raspi 3. You’ll need a beefier power supply, some heat sinks and fans – all stuff you probably have lying around on your workbench. Now there’s no excuse stopping you from ratcheting up the MHz and pushing your Pi to the limit!

We’ve seen several guides to overclocking the Raspi here on Hackaday, including the current record holder. Be sure to check out [dmitry’s] IO page for the overclocking details, and let us know of any new uses you’ve found by overclocking your Raspi in the comment below.

Add A Second SD Card To The Pi Zero

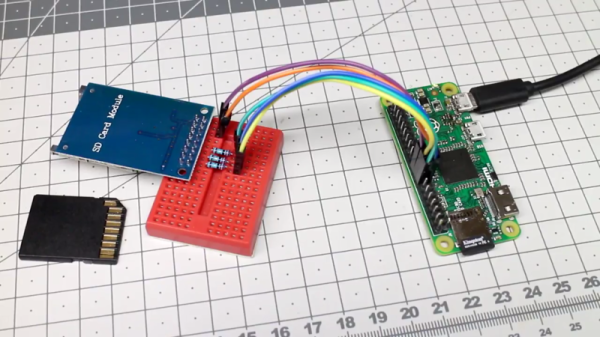
The Raspberry Pi Zero is a beautiful piece of hardware, fitting an entire Linux computer into a package the size of a pack of gum (don’t chew it, though). However, this size comes with limited IO options, which can be a complication for some projects. In this case, [Hugatry] wanted extra storage, and devised a smart method to add a second SD card to the Pi Zero.

The problem with the Pi Zero is that with only a single USB port, it’s difficult to add any other storage to the device without making things bulkier with hubs or other work arounds. Additionally, the main SD card can’t be removed while the Pi is running, so it makes sense to add an easy-to-use removable storage option to the Pi Zero.

It’s quite a simple hack – all that’s required to pull it off is a few resistors, an SD card connector, and some jumper wires. With everything hooked up, a small configuration change enables the operating system to recognise the new card.

Overall it’s great to see hacks that add further functionality to an already great platform. If you find it’s not powerful enough, you can always try overclocking one. 

Continue reading “Add A Second SD Card To The Pi Zero”

Best Product Entry: A HSDK For Ultrasound Imaging

As an entry into this year’s Best Product portion of the Hackaday Prize, [kelu124] is developing a hardware and software development kit for ultrasound imaging.

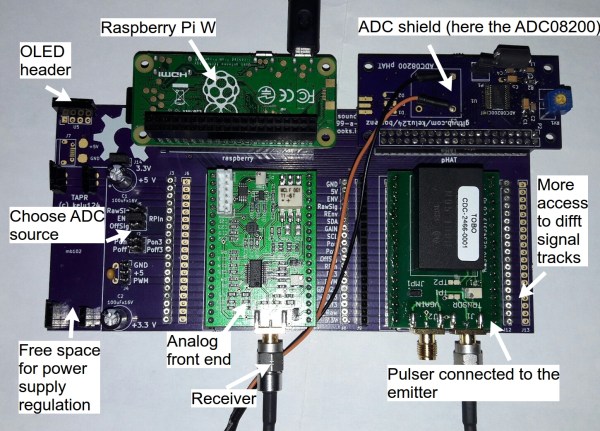
Ultrasound is one of the primary tools used in modern diagnostic medicine. Head to the doctor with abdominal pain, and you can bet you’ll be seeing the business end of an ultrasound system. While Ultrasound systems have gotten cheaper, they aren’t something everyone has in the home yet.  [kelu124] is working to change that by building a hardware and software development kit which can be used to explore ultrasound systems. This isn’t [kleu124’s] first rodeo. HSDK builds upon and simplifies Murgen, his first open source ultrasound, and an entry in the 2016 Hackaday prize. [kelu124’s] goal is to “simplify everything, making it more robust and more user-friendly”.

The system is driven by a Raspberry Pi Zero W. A custom carrier board connects the Pi to the pulser block, which sends out the ultrasonic pings, and the analog front end, which receives the reflected signals. The receiver is called Goblin, and is a custom PCB designed [kelu124] designed himself. It uses a variable gain amplifier to bring reflected ultrasound signals up out of the noise.

A system like this would be a boon both to hackers and medical professionals working in the field. Ultrasonics can do more than just imaging. You can decrease healing time with ultrasonics, or even levitate things!

Testing The Outernet Dreamcatcher SDR

What do you get when you cross an ARM-based Linux PC and an RTL-SDR? Sounds like the start of a joke, but the answer is Outernet’s Dreamcatcher. It is a single PCB with an RTL-SDR software defined radio, an L-band LNA, and an Allwinner A13 processor with 512MB of RAM and a 1 GHz clock speed. The rtl-sdr site recently posted a good review of the $99 board.

We’ll let you read the review for yourself, but the conclusion was that despite some bugs, the board was no more expensive than pulling the parts together separately. On the other hand, if you uses, for example, a Raspberry Pi 3, you might expect more support and more performance.

Despite the L-band hardware, there is a bypass antenna jack that allows you to receive other frequencies. There’s also two SD slots, one to boot from and another for storage. Several pieces of software had trouble running on the somewhat sluggish CPU, although some software that is optimized for the particular processor used fared better. You can read the details in the review.

The board is interesting, although unless you have a special packaging problem, you are probably as well off to combine a Pi and a dongle, as we have seen so many times before. If you have more horsepower you can even make the Pi transmit, although we’d suggest some filtering if you were going to do that for real.

Hackaday Prize Entry: Secure Storage On SD Cards

Here’s a puzzler for you: how do you securely send data from one airgapped computer to another? Sending it over a network is right out, because that’s the entire point of an airgap. A sneakernet is inherently insecure, and you shouldn’t overestimate the security of a station wagon filled with tapes. For his Hackaday Prize entry, [Nick Sayer] has a possible solution. It’s the Sankara Stones from Indiana Jones and the Temple of Doom, or a USB card reader that requires two cards. Either way, it’s an interesting experiment in physical security for data.

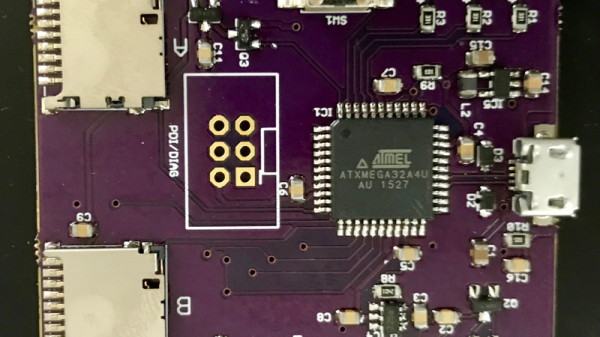
The idea behind the Orthrus, a secure RAID USB storage device for two SD cards, is to pair two SD cards. With both cards, you can read and write to this RAID drive without restriction. With only one, the data is irretrievable so they are safe during transit if shipped separately.

The design for this device is based around the ATXMega32A4U. It’s pretty much what you would expect from an ATMega, but this has a built-in full speed USB interface and hardware AES support. The USB is great for presenting two SD cards as a single drive, and the AES port is used to encrypt the data with a key that is stored in a key storage block on each card.

For the intended use case, it’s a good design. You can only get the data off of these SD cards if you have both of them. However, [Nick] is well aware of Schneier’s Law — anyone can design a cryptosystem that they themselves can’t break. That’s why he’s looking for volunteers to crack the Orthrus. It’s an interesting challenge, and one we’d love to see broken.

New Wisdom On Old Practices

Getting into machining is hard. From high-speed seel versus carbide to “old US iron” versus “new Asian manufacture” to simply choosing which drill bits to buy, many hard decisions must be made before one even has a chance to gain experience. Fear not, [Quinn Dunki] has created “a roadmap for how to get involved in this hobby.

We saw [Quinn’s] first entry in her lathe series back in January, and now the series is complete! Starting with the definition of a machine tool and ending with the famous Clickspring scriber and a multi-material pen, [Quinn] leaves no stone unturned. [Quinn’s] style contrasts with the likes of [ThisOldTony], [AvE] or [Clickspring], as she makes sure to include the gory details of everything, citing her dissatisfaction with most YouTube machinists as motivation:

they’re all about the money shots of chips flying, but thin on the actual work of machining, which is mostly work-holding setups, changing bits and dies around, etc. That’s where all the knowledge is. The machine does the work once you spend 20 minutes setting it up properly for the operation. Everyone skips that part. I scour Tubalcain videos for details like the angle of the compound for a facing operation, or how to drill a deep hole with a short tail stock without the carriage getting in the way. Simple things like that get glossed over, but stump a beginner.

Of the series, our favorite part was “Grinding tool bits.” When combined with [ThisOldTony’s] Grinding HSS Tools, the two form an education in high-speed steel tool grinding fit for a hacker. Need more than high-speed steel? We’ve got you covered.

Machinist Magic: Gauge Block Wringing

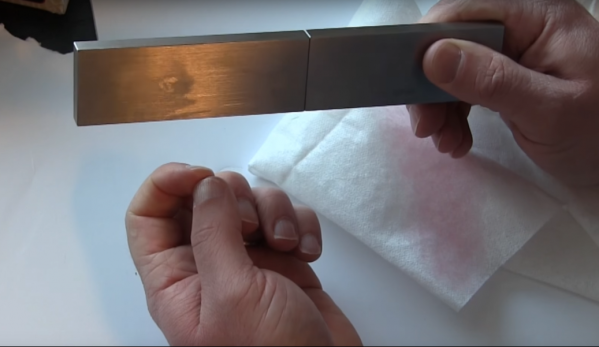
In this age of patent trolls and multi-billion dollar companies that make intellectual property claims on plant genes and photographing objects against a white background, you’d be forgiven for thinking that a patent on a plain steel block would be yet another recent absurdity. But no – [Carl Edvard Johansson] got a patent for his “Gauge Block Sets for Precision Measurement” in 1901. As [AvE] shows us with a video on how gauge blocks can be “wrung” together, there’s more to these little blocks than meets the eye.

Gauge block wringing is probably nothing new to experienced machinists, but for the rest of us, it’s a pretty neat trick. To start the show, [AvE] gives us a little rundown on “Jo blocks” and what they’re good for. Basically, each block is a piece of tool steel or ceramic that’s ground and lapped to a specific length. Available in sets of various lengths, the blocks can be stacked end to end to make up a very precise measuring stick. But blocks aren’t merely placed adjacent to each other – they physically adhere to each other via their lapped surfaces after being wrung together. [AvE] demonstrates the wringing technique and offers a few ideas on how this somewhat mysterious adhesion occurs. It’s pretty fascinating stuff and puts us in the mood to get a gauge block set to try it ourselves.

It’s been a while since we’ve seen [AvE] around Hackaday – last time out he was making carbon foam from a slice of bread. Rest assured his channel has been going strong since then, with his unique blend of laughs and insight into the secret lives of tools. Definitely worth checking out, and still skookum as frig.

Continue reading “Machinist Magic: Gauge Block Wringing”