Freeform Wire Frame Tulip Blooms To The Touch

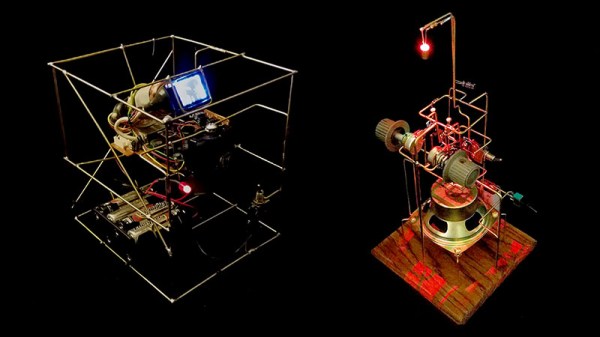
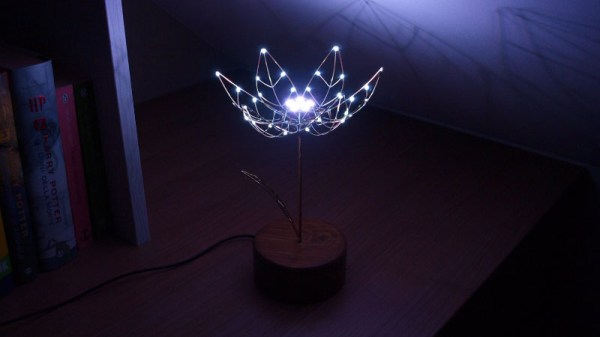
Holidays are always good for setting a deadline for finishing fun projects, and every Valentine’s Day we see projects delivering special one-of-a-kind gifts. Why buy a perishable bulk-grown biological commodity shipped with a large carbon footprint when we can build something special of our own? [Jiří Praus] certainly seemed to think so, his wife will receive a circuit sculpture tulip that blooms when she touches it.

via @jipraus

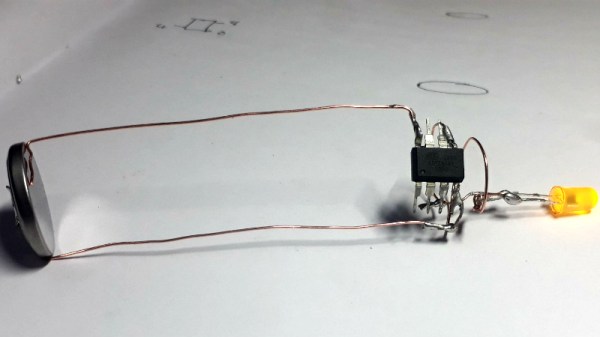
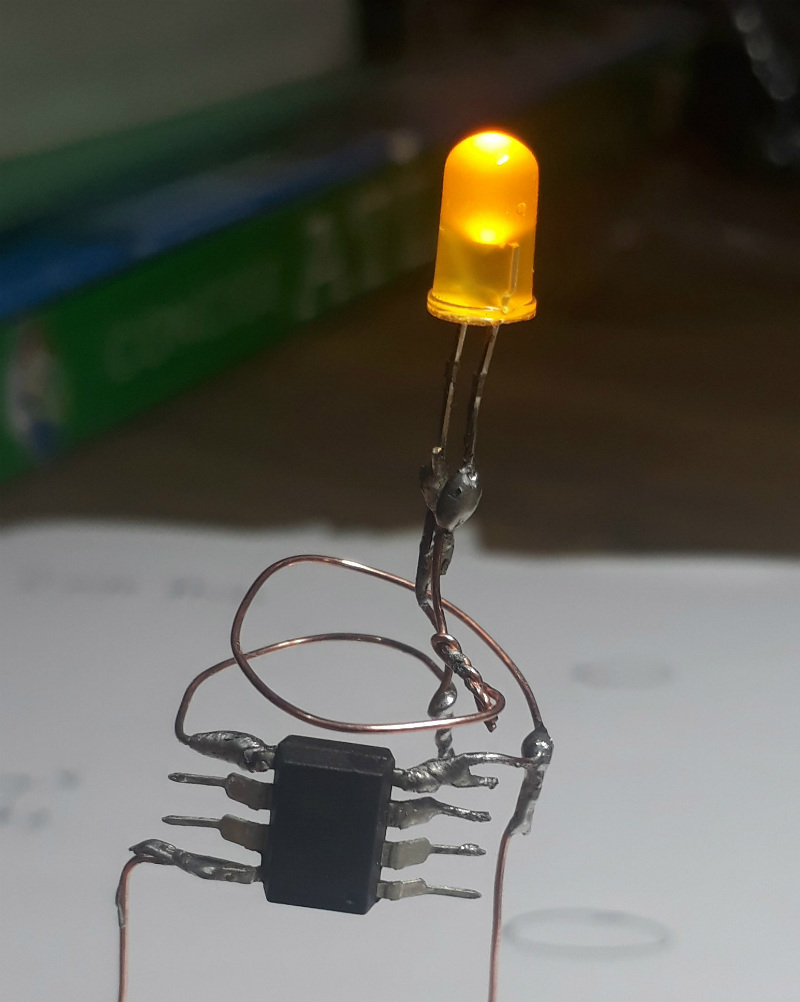
This project drew from [Jiří]’s experience with aesthetic LED projects. His Arduino-powered snowflake, with LEDs mounted on a custom PCB, is a product available on Tindie. For our recent circuit sculpture contest, his entry is a wire frame variant on his snowflake. This tulip has 7 Adafruit NeoPixel in the center and 30 white SMD LEDs in the petals, which look great. But with the addition of mechanical articulation, this project has raised the bar for all that follow.

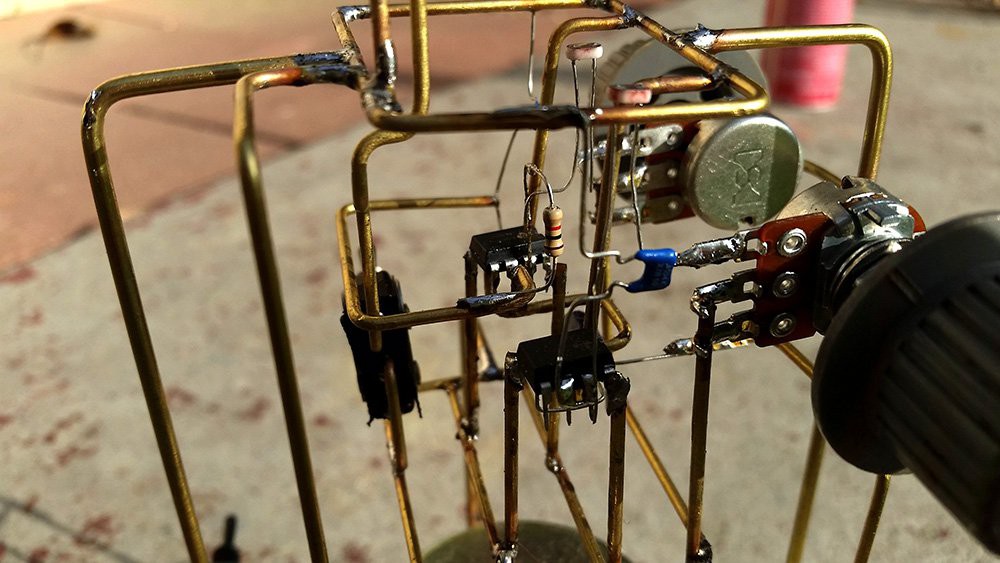
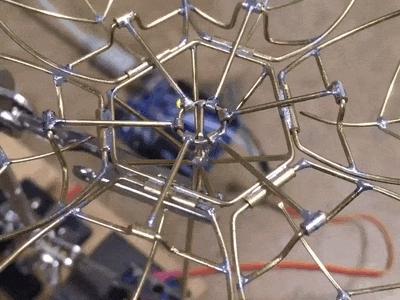
We hope [Jiří] will add more details for this project to his Hackaday.io profile. In the meantime, look over his recent Tweets for more details on how this mechanical tulip works. We could see pictures and short videos of details like the wire-and-tube mechanism that allowed all the petals to be actuated by a single servo, and the components that are tidily packaged inside that wooden base.

Need more digital expressions of love? We have no shortage of hearts. Animated LED hearts, illuminated acrylic hearts, and talking hearts. We’re a little short on flower projects, but we do have X-ray of a rose among others to accompany [Jiří]’s tulip.

Continue reading “Freeform Wire Frame Tulip Blooms To The Touch”

Hackaday Podcast 002: Curious Gadgets And The FPGA Brain Trust

In this week’s podcast, editors Elliot Williams and Mike Szczys look back on favorite hacks and articles from the week. Highlights include a deep dive in barn-door telescope trackers, listening in on mains power, the backstory of a supercomputer inventor, and crazy test practices with new jet engine designs. We discuss some of our favorite circuit sculptures, and look at a new textile-based computer and an old server-based one.

This week, a round table of who’s-who in the Open Source FPGA movement discusses what’s next in 2019. David Shah, Clifford Wolf, Piotr Esden-Tempski, and Tim Ansell spoke with Elliot at 35C3.

Take a look at the links below if you want to follow along, and as always, tell us what you think about this episode in the comments!

Direct download (60 MB or so.)

Continue reading “Hackaday Podcast 002: Curious Gadgets And The FPGA Brain Trust”

CNC Turns A Single PCB Into Origami Hemisphere

Trying to make a hemispherical surface out of a PCB is no easy feat. Trying to do that and make the result a working circuit is even harder. Doing it with one solid piece of FR4 seems impossible, right?

Not so much. [brainsmoke] came up with a clever way to make foldable, working PCBs that can be formed into hemispheres. The inspiration for this came from a larger project that resulted in a 32-cm diameter LED-studded sphere, which a friend thought would make a swell necklace if it was scaled down. That larger sphere was made somewhat like a PCB soccer ball, with individual panels soldered together. [brainsmoke] didn’t relish juggling dozens of tiny PCBs to make a necklace-sized version, so the unfolded pattern for half a deltoidal hexecontahedron was laid out as one piece on single-sided FR4. The etched boards were then cut out on a CNC mill, with the joints between the panels cut as V-grooves from the rear of the board. By leaving just enough material to act as a live hinge, [brainsmoke] was able to fold the pattern up into a hemisphere while leaving the traces intact. The process was fussy and resulted in a lot of broken FR4 and traces, but with practice and the use of thicker board material and heavier copper, the hemisphere came together. The video below shows the final product

This objet d’art is [brainsmoke]’s entry in the Circuit Sculpture Contest, which is just wrapping up wrapped up last week. We can’t wait to share some of the cool things people came up with in this contest, which really seemed to get the creative juices flowing.

Continue reading “CNC Turns A Single PCB Into Origami Hemisphere”

Hackaday Podcast 001: Seriously, We Know What We’re Doing

First podcast of the new year! Editors Elliot Williams and Mike Szczys look back on the most interesting hacks and can’t-miss articles from the past week (or so). Highlights include abusing IPv6 addresses, underclocking WiFi, taking Wii out of the livingroom, scratch built microphones, computer prophecy coming true, and the end of an automotive era. Full show notes below.

This week, Hackaday Contributor Bob Baddeley came on the show to discuss developments in facial recognition technology and its use in the wild.

Take a look at the links below if you want to follow along, and as always, tell us what you think about this episode in the comments!

Direct download (60 MB or so.)

Continue reading “Hackaday Podcast 001: Seriously, We Know What We’re Doing”

Freeforming The Atari Punk Console

This stunning piece of art is [Emily Velasco’s] take on the Atari Punk Console. It’s a freeform circuit that synthesizes sound using 555 timers. The circuit has been around for a long time, but her fabrication is completely new and simply incredible!

This isn’t [Emily’s] first rodeo. She previously built the mini CRT sculpture project seen to the left in the image above. Its centerpiece is a tiny CRT from an old video camera viewfinder, and it is fairly common for the driver circuit to understand composite video. And unlike CRTs, small video cameras with composite video output are easily available today for not much money. Together they bring a piece of 1980s-era video equipment into the modern selfie age. The cubic frame holding everything together is also the ground plane, but its main purpose is to give us an unimpeded view. We can admire the detail on this CRT and its accompanying circuitry representing 1982 state of the art in miniaturized consumer electronics. (And yes, high voltage components are safely insulated. Just don’t poke your finger under anything.)

With the experience gained from building that electrically simple brass frame, [Emily] then stepped up the difficulty for her follow-up project. It started with a sound synthesizer circuit built around a pair of 555 timers, popularized in the 1980s and nicknamed the Atari Punk Console. Since APC is a popular circuit found in several other Hackaday-featured projects, [Emily] decided she needed to add something else to stand out. Thus in addition to building her circuit in three-dimensional brass, two photocells were incorporated to give it rudimentary vision into its environment. Stimulus for this now light-sensitive APC were provided in the form of a RGB LED. One with a self-contained circuit to cycle through various colors and blinking patterns.

These two projects neatly bookend the range of roles brass rods can take in your own creations. From a simple frame that stays out of the way to being the central nervous system. While our Circuit Sculpture Contest judges may put emphasis the latter, both are equally valid ways to present something that is aesthetic in addition to being functional. Brass, copper, and wood are a refreshing change of pace from our standard materials of 3D-printed plastic and FR4 PCB. Go forth and explore what you can do!

Continue reading “Freeforming The Atari Punk Console”

Skeletal Robot Skips The Chassis

With the high availability of low-cost modular electronic components, building your own little robot buddy is easier and more affordable than ever. But while the electronics might be dirt cheap thanks to the economies of scale, modular robot chassis can be surprisingly expensive. If you’ve got a 3D printer you can always make a chassis that way, but what if you’re looking for something a bit more artisanal?

For his entry into the Circuit Sculpture Contest, [Robson Couto] has built a simple robot which dumps the traditional chassis for a frame made out of bent and soldered copper wire. Not only does this happen to look really cool in a Steampunk kind of way, it’s also a very cheap way of knocking together a basic bot with just the parts you have on hand. Not exactly a heavy-duty chassis, to be sure, but certainly robust enough to rove around your workbench.

The dual servos constrained within the wire frame have been modified for continuous rotation, which combined with the narrow track should make for a fairly maneuverable little bot. [Robson] equipped his servos with copper wheels built in the same style of the frame, which likely isn’t great for traction but really does help sell the overall look. If you aren’t planning on entering your creation into a contest that focuses on unique construction, we’d suggest some more traditional wheels for best results.

The brains of this bot are provided by an ATmega8 with external 16MHz crystal tacked onto the pins. There’s also a ultrasonic sensor board mounted to the servos which eventually will give this little fellow the ability to avoid obstacles. Of course, it doesn’t take a robotics expert to realize there’s currently no onboard power supply in the design. We’d love to say that he’s planning on using the copper loops of the frame to power the thing via induction, but we imagine [Robson] is still fiddling around with the best way to get juice into his wireframe creation before the Contest deadline.

Speaking of which, there’s still plenty of time to get your own Circuit Sculpture creation submitted. If it’s a functional device that isn’t scared to show off the goods, we’re interested in seeing it. Just document the project on Hackaday.io and submit it to the contest before the January 8th, 2019 deadline.

Lighting Up A Very Wiry Candle

Entries into the Circuit Sculpture Contest tend to be pretty minimalist by nature, and this LED candle by [Amal Mathew] is a perfect example. The idea here was to recreate the slim and uncomplicated nature of a real candle but with a digital twist, and we think he’s pulled it off nicely with a bare minimum part count and exaggerated wire length that gives it the look of a thin pillar candle.

To give the LED a fading effect, [Amal] uses a ATtiny85 programmed with the Arduino IDE. His code uses the analogWrite() in a loop to gradually increase and then decrease the PWM frequency. With the LED connected directly to one of the pins on the ATtiny85, the simple program achieves the fading effect without needing any additional components.

On the opposite side of the candle, connected by long copper wires, is the single CR2032 which provides power for the circuit. In a nice touch, [Amal] has turned the battery 90 degrees relative to the rest of the circuit, so it can serve as a weighted base. We imagine getting it to stand up might be a little fiddly from the looks of it, but once it’s up and merrily fading in and out, it really helps sell the candle idea.

The finished product might look fairly straight-forward, but in his write-up on Hackaday.io, [Amal] gives detailed instructions on how to build your own version if you’re not a bare microcontroller wizard. This includes direction on how to program the ATtiny85 using an Arduino Uno; a neat trick to know even if you aren’t planning on making any candles in the near future. The next logical step is making it so you can “blow out” the LED, which should only take the addition of a resistor and some updated code.

There’s still plenty of time to enter your own functional piece of art in the Circuit Sculpture Contest. Just write it up on Hackaday.io and submit it before the January 8th, 2019 deadline.

Continue reading “Lighting Up A Very Wiry Candle”