MIT Scratch 3.0 Opens New Doors For Users And Builders Alike

We typically feature projects from people sharing what they’ve learned while building something for themselves. But our community has a healthy contingent who deploy their skills for the benefit of future generations, developing a child’s natural curiosity for play into interest in understanding the technical world they will grow up in. This field is where MIT’s release of Scratch 3.0 can open up interesting possibilities.

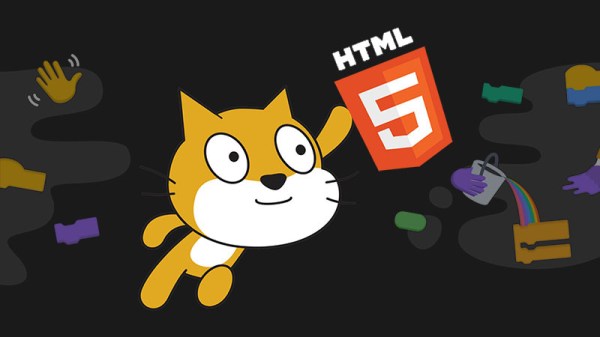
Scratch is a block-based programming language designed for elementary school children, letting them learn fundamental concepts while experimenting in an environment filled with visual and audible feedback. In an effort to make Scratch more widely available, version 2.0 in 2013 moved to the web. But it was built using interactive web technology of the time: Adobe Flash. As Flash has fallen out of favor and scheduled to be phased out in 2020, Scratch 3.0 used React to make the shift to HTML5.

The most immediate benefit is that Scratch can now be used on tablets, which all have modern browsers but very few of which have Flash. Another common educational hardware platform is the Raspberry Pi, which supported Scratch 2 via a convoluted software stack that was far from ideal. Now any hardware with a modern browser can run Scratch, no Flash binaries or custom wrappers are required. The Raspberry Pi foundation certainly seemed excited about this change.

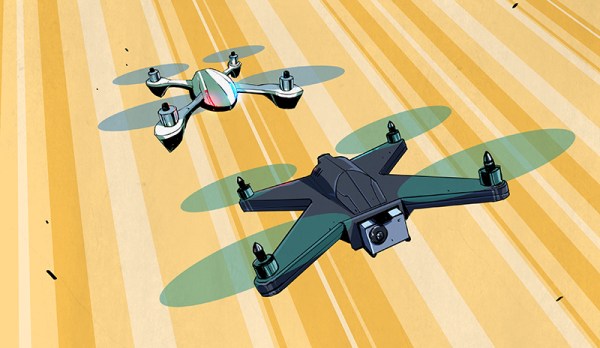
But a more exciting and longer term benefit is Scratch extensions, a mechanism for Scratch programs to communicate with external hardware and online resources. This has evolved in parallel with Scratch 2.0 under the experimental ScratchX umbrella and version 3.0 brings it into core. The launch featured a few official extensions (for connecting to micro:bit, LEGO Mindstroms EV3, etc.) with the promise that custom third-party extensions will soon be possible. This will significantly streamline building a Scratch interface for kid-friendly programmable hardware. Something we’ve seen done for a drone, for exploring SDR, and even for a dollhouse. We’ll be keeping an eye out for the official release of Scratch 3.0 custom extension API, but anyone not afraid of working with fluid pre-release code are certainly welcome to dive in right now.

Building An ESP8266 Doorbell On Hard Mode

It certainly seems as though it should be an easy enough project; all [Miguel De Andrade] wanted was to receive a notification when somebody was pressing his doorbell, and thought it would be a good project to get his feet wet in the wonderful world of ESP8266 hacking. But as fate would have it, not everything went according to plan. In the end he got it sorted out, but it’s an interesting look at how even the “easy” projects can call the gremlins out of hiding.

Arguably, the problems started when [Miguel] picked up an ESP-01 module from a local electronics retailer. While the convenience of buying the hardware in a brick and mortar store can’t be overstated, it did mean he was stuck with a slightly more spartan experience compared to the more common ESP “development boards”. Programming it externally with a Teensy ended up not being much of an obstacle, but it did mean he was stuck with only two GPIO pins.

At any rate, with ESP in hand, the next step was figuring out how the existing bell and intercom system even worked. Unfortunately, after some experimentation [Miguel] found there was a bit more going on there than he’d hoped. According to his multimeter, the one line from the intercom sits at approximately 5 VDC when it’s open, and drops down to 2.5 VDC when pressed. If that wasn’t bad enough, picking up the handset to answer the intercom sent the voltage up to a microcontroller-killing 12 VDC. To complicate maters further, the supply line for the intercom was 23 VAC, so he’d need to rectify that somehow if he wanted to avoid a separate power supply for the ESP.

To turn this jumble of voltages into a nice clean 0 – 3.3 V signal for the ESP8266, he came up with a circuit based around the LM358 comparator that utilizes an LM117 regulator to power itself and the ESP at the same time. A couple of diodes are there to block the AC component from causing trouble, and an A2N2222A transistor is used as a buffer amplifier to boost the output of the comparator so it registers as a digital HIGH on the ESP. The circuit took a bit of fiddling to get sorted out, but in the end [Miguel] says it seems to get the job done.

You might think the problems were solved, but this is where it gets really annoying. The system would work fine for awhile, and then inexplicably go silent. In diagnosing the problem he realized that his circuit connected to GPIO_0 was inadvertently putting the ESP8266 into programming mode, since it was holding the pin LOW unless the intercom button was pressed. He assumed he could just move the circuit to the other GPIO pin, but as that one has the board’s LED on it, that caused its own problems. For now, [Miguel] hasn’t come up with a solution to this issue, and has learned to live with the fact that the system won’t come back up cleanly should it lose power for any reason.

If you’re looking for a slightly classier look than a scrap of perfboard stuck on the wall with what appears to be chewing gum, we’ve also seen the ESP8266 used in some more ornate doorbell setups. Of course if you still haven’t gotten your head wrapped around the whole Internet-connected button thing, you can always start with something a little easier.

London Gatwick Airport Shuts Its Doors Due To Drone Sighting

If you could pick a news story you would prefer not to be woken with, it’s likely that a major airport being closed due to a drone sighting would be high on the list. But that’s the news this morning: London’s Gatwick airport has spent most of the night and into the morning closed due to repeated sightings. Police are saying that the flights appear to have been deliberate, but not terror-related.

We’ve written on reports of drone near-misses with aircraft here back in 2016, and indeed we’ve even brought news of a previous runway closure at Gatwick. But it seems that this incident is of greater severity, over a much longer period, and even potentially involving more than one machine. The effect that it could have on those in our community who are multirotor fliers could be significant, and thus it is a huge concern aside from the potential for mishap in the skies above London’s second largest airport.

It is safe to say that if there was indeed a multirotor above Gatwick last night then its operator should be brought to justice and face the appropriate penalty without delay. Responsible fliers are painfully aware of the rules involving multirotor flight, and that airports of any description are strictly off-limits. It matters not whether this was a drunken prank or a premeditated crime, we hope you’ll all join us in saying that anybody flying outside the law should be reported to the authorities.

Continue reading “London Gatwick Airport Shuts Its Doors Due To Drone Sighting”

Retro Wall Phone Becomes A Doorbell, And So Much More

We have to admit that this retasked retro phone wins on style points alone. The fact that it’s filled with so much functionality is icing on the cake.

The way [SuperKris] describes his build sounds like a classic case of feature creep. Version 1 was to be a simple doorbell, but [SuperKris] would soon learn that one does not simply replace an existing bell with a phone and get results. He did some research and found that the ringer inside the bakelite beauty needs much more voltage than the standard doorbell transformer supplies, so he designed a little H-bridge circuit to drive the solenoids. A few rounds of “while I’m at it” later, the phone was stuffed with electronics, including an Arduino and an NFR24 radio module that lets it connect to Domoticz, a home automation system. The phone’s rotary dial can now control up to 10 events and respond to alarms and alerts with different ring patterns. And, oh yes – it’s a doorbell too.

In general, we prefer to see old equipment restored rather than gutted and filled with new electronics. But we can certainly get behind any effort to retask old phones with no real place in modern telecommunications. We’ve seen a few of these before, like this desk telephone that can make cell calls.

Continue reading “Retro Wall Phone Becomes A Doorbell, And So Much More”

Photon Door Lock Swaps Keys For A POST Request

At this point we’re all well aware of the fact that there is some inherent danger involved when bringing “things” onto the Internet. Nobody wants to come home to a smoldering pile of ruble because their Internet connected toaster oven decided to get stuck on “Hades.” But even with the risks, occasionally we see projects that prove at least some intrepid hackers are managing to navigate the Internet of Things to solve real-world problems.

[Daniel Andrade] writes in to tell us about the Internet controlled entry system he’s setup at his new apartment, and while we imagine it’s not for everyone, we can’t deny it seems like it has improved his quality of life. Rather than giving all of his friends a copy of his key, he’s setup a system where anyone who has the appropriate link can “buzz” themselves in through the building’s existing intercom system.

Thanks to the old-school intercom setup, the hardware for this project is simple in the extreme. All [Daniel] needed was a relay to close the circuit on the door buzzer, and a way to fire it off. For his controller he chose the Photon from Particle, which is perhaps a bit overkill, but we all tend to work with what we’re personally comfortable with.

Most of the work went into the software, as [Daniel] ended up coming with two distinct ways to control the door lock over the Internet. The first method uses Blynk, which allows you to create slick visual interfaces for mobile devices. His second version is controlled with a POST request to a specific URL, which he likes because it gives him more flexibility as to how he can interact with the lock. Currently he has a simple web page setup that lets friends and family open the door by just clicking a button.

We’ve seen a similar setup using the Photon to open a garage door, and plenty of people have taken to using Blynk to control their home automation setups. All the tools are available for you to roll your own IoT gadgets, you just need to figure out what to do with the things…

What’s Behind The Door? An IoT Light Switch

We’re not sure who designed [Max Glenister]’s place, but they had some strange ideas about interior door positioning. The door to his office is right next to a corner, yet it opens into the room instead of toward the wall. Well, that issue’s been taken care of. But the architect and the electrician got the last laugh, because now the light switch is blocked by the open door.

Folks, this is the stuff that IoT is made for. [Max] here solved one problem, and another sprang up in its place. What better reason for your maiden voyage into the cloud than a terrible inconvenience? He studied up on IoT servo-controlled light switching, but found that most of the precedent deals with protruding American switches rather than the rockers that light up the UK. [Max] got what he needed, though. Now he controls the light with a simple software slider on his phone. It uses the Blynk platform to send servo rotation commands to a NodeMCU, which moves the servo horn enough to work the switch. It’s simple, non-intrusive, and it doesn’t involve messing with mains electricity.

His plan was to design a new light switch cover with mounting brackets for the board and servo that screws into the existing holes. That worked out pretty well, but the weight of the beefy servo forced [Max] to use a bit of Gorilla tape for support. He’s currently dreaming up ways to make the next version easily detachable.

Got those protruding American switches? [Suyash] shed light on that problem a while back.

Rover V2 Handles Stairs As Easily As The Outdoors

Rover V2 is an open-source, 3D-printable robotic rover platform that has seen a lot of evolution and development from its creator, [tlalexander]. There are a number of interesting things about Rover V2’s design, such as the way the wheel hubs themselves contain motors and custom planetary gearboxes. This system is compact and keeps weight down low to the ground, which helps keep a rover stable. The platform is all wheel drive, and moving parts like the suspension are kept high up, as far away from the ground as possible. Software is a custom Python stack running on a Raspberry Pi that provides basic control.

The Rover V2 is a full mechanical redesign of the previous version, which caught our attention with its intricate planetary gearing inside the wheel hubs. [tlalexander]’s goal is to create a robust, reliable rover platform for development that, thanks to its design, can be mostly 3D printed and requires a minimum of specialized hardware.