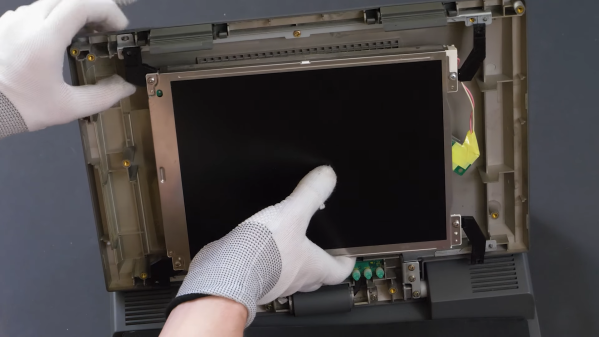
The LCD being replaced in an old laptop

Hackaday Prize 2022: Repairing A Vintage Laptop With Modern Components

Laptop computers may be ubiquitous today, but there was a time when they were the exclusive preserve of rich businesspeople. Back in the early ’90s, the significant added cost of portability was something that few were willing to pay. As a result, not many laptops from those days survive; for those that do, keeping them running can be quite a challenge due to their compact construction and use of non-standard components.

[Adalbert] ran into these problems when he got his hands on a Toshiba T3200SXC from 1991. As the first laptop ever to feature a color TFT display, it’s very much worth preserving as an historical artifact. Sadly, the original display was no longer working: it only displayed a very faint image and went completely blank soon after. Leaky capacitors then destroyed the power supply board, leaving the laptop completely dead. [Adalbert] then began to ponder his options, which ranged from trying to repair the original components to ripping everything out and turning this into a modern-computer-in-an-old-case project.

In the end he went for an option in between, which we as preservationists can only applaud: he replaced the display with a modern one of the correct size and resolution and built a new custom power supply, keeping the rest of the computer intact as far as possible. [Adalbert] describes the overall process in the video embedded below and goes into lots of detail on his hackaday.io page.

Connecting a modern LCD screen was not as difficult as it might seem: where the old display had an RGB TTL interface with three bits per color, the new one had a very similar system with six bits per color. [Adalbert] made an adapter PCB that simply connected the three bits from the laptop to the highest three bits on the screen. A set of 3D-printed brackets ensured a secure fit of the new screen in the classic case.
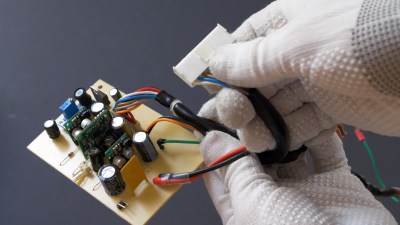
The internal power supply module of a laptopFor the power supply [Adalbert] took a similar approach. He designed a PCB with several DC/DC converters that fit easily inside the computer’s case, leaving enough space to add a battery. This made the old Toshiba more portable than it ever was — believe it or not, the original T3200SXC could only be used with a mains connection.

Once the laptop was restored to working order, [Adalbert] added a few finishing touches: a sound card and speakers made it suitable as a gaming platform, and a network card gave it rudimentary online capabilities. The end result is a T3200SXC that looks and feels exactly the way it did when it was new, but with a few added features. That’s a really satisfying result: many classic laptop projects add modern computing hardware, or even completely replace the original contents. You might also want to check out [Adalbert]’s unusual 3D printer based PCB manufacturing technique that he used for the new power supply.

Continue reading “Hackaday Prize 2022: Repairing A Vintage Laptop With Modern Components”

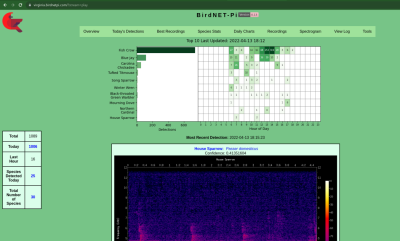
picture of a brambling (a small bird), with "BirdNET-Pi" written above it

Neural Network Identifies Bird Calls, Even On Your Pi

Recently, we’ve stumbled upon the extensive effort that is the BirdNET research platform. BirdNET uses a neural network to identify birds by the sounds they make, and is a joint project between the Cornell Lab of Ornithology and the Chemnitz University of Technology. What strikes us is – this project is impressively featureful and accessible for a variety of applications. No doubt, BirdNET is aiming to become a one-stop shop for identifying birds as they sing.

There’s plenty of ways BirdNET can help you. Starting with likely the most popular option among us, there are iOS and Android apps – giving the microphone-enabled “smart” devices in our pockets a feature even the most app-averse hackers can respect. However, the BirdNET team also talks about bringing sound recognition to our browsers, Raspberry Pi and other SBCs, and even microcontrollers. We can’t wait for someone to bring BirdNET to a RP2040! The code’s open-source, the models are freely available – there’s hardly a use case one couldn’t cover with these.

Screenshot of the BirdNET-Pi interface, showing a chart of bird chirp occurences, and a spectrogram below itAbout that Raspberry Pi version! There’s a sister project called BirdNET-Pi – it’s an easy-to-install software package intended for the Raspberry Pi OS. Having equipped your Pi with a USB sound card, you can make it do 24/7 recording and analysis using a “lite” version of BirdNET. Then, you get a web interface you can log into and see bird sounds identified in real-time. Not just that – BirdNET-Pi also processes the sounds and creates spectrograms, keeps the sound in a database, and can even send you notifications.
The BirdNET-Pi project is open, too, of course. Not just that – the BirdNET-Pi team emphasizes everything being fully local, unless you choose otherwise, and perhaps decide to share it with others. Many do make their BirdNET-Pi instances public, and there’s a lovely interactive map that shows bird sounds all across the world!

BirdNET is, undoubtedly, a high-effort project – and a shining example of what a dedicated research team can do with a neural network and an admirable goal in mind. For many of us who feel joy when we hear birds outside, it’s endearing to know that we can plug a USB sound card into our Pi and learn more about them – even if we can’t spot them or recognize them by sight just yet. We’ve covered bird sound recognition on microcontrollers before – also using machine learning.

Bare Metal Gives This Pi Some Classic Synths

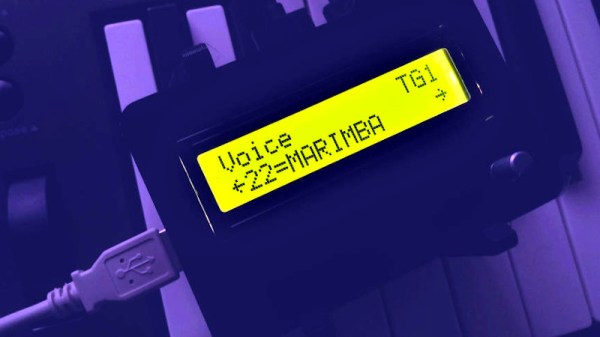
We’re used to seeing the Raspberry Pi crop up in a wide range of the projects we show you here, but it’s fair to say that they usually feature some sort of operating system. There’s another way to use a Pi, more akin to using a microcontroller such as the Arduino: by programming it directly, so-called bare-metal programming. MiniDexed is an example, and it copies a classic Yamaha professional synthesiser of the 1980s, by emulating the equivalent of eight of the company’s famous DX7 synthesisers in one unit. It takes almost any Pi, and with the addition of an audio board, a rotary encoder, and an LCD display, makes a ready-to-go unit. Below the break is a video of it in operation.

It’s fair to say that we’re not experts in Raspberry Pi bare metal programming, but it’s worth a diversion into the world of 1980s synthesisers to explore the DX7. This instrument was a staple of popular music throughout the 1980s and was a major commercial success for Yamaha as an affordable FM synthesiser. This was a process patented at Stanford University in the 1970s and subsequently licensed by the company, unlike other synths of the day it generated sound entirely digitally. It’s difficult to overestimate the influence of the DX7 as its sound can be heard everywhere, and it’s not impossible that you own a Yamaha FM synth even today if you have in your possession a sound card.

Curious about the DX7? Master chip-reverse-engineer [Ken Shirriff] exposed its secrets late last year.

Continue reading “Bare Metal Gives This Pi Some Classic Synths”

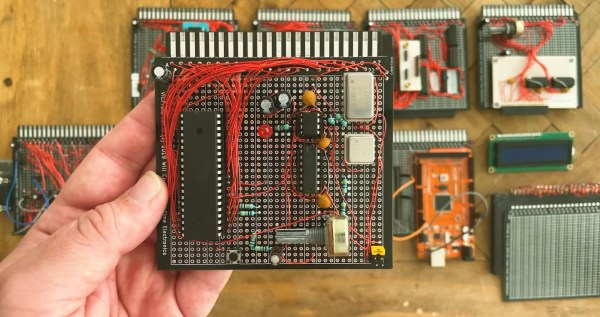
A Z80 CPU board built on a piece of prototype board with an edge connector

Designed From Scratch And Fully Handmade: The Modular Coleman Z80 Computer

While the phrase “I built my own computer” might sound impressive to the uninitiated, anyone with an interest in modern computer hardware knows that there’s really not much to it: buy a case, a motherboard with a CPU, some RAM and peripherals, and you’re pretty much there. What’s way more impressive is designing a complete computer system from the ground up, as [Joshua Coleman] just did when he built the Coleman Z80.

And when we say “from the ground up”, we mean it: everything down to the system bus was hand-drawn by [Joshua] himself. It does share something with modern PCs though: a strictly modular design. There’s a Z80 CPU board, a ROM and RAM board, and even two modules that you could describe as a video card and a sound card. All of these are built on prototyping boards with a 40-pin edge connector and hooked up to a single backplane carrying the main system bus.

Designed as an experimentation platform, the Coleman Z80 has many features that enable testing and debugging, such as an adjustable clock generator and a few beautiful vintage LED displays that show the status of the main bus. Input and output are mainly through a serial link and a 16×2 LCD, but [Joshua] is already planning a keyboard interface and composite video output to give it that proper 1980s home computer vibe. The software is currently limited to a ROM monitor that enables basic I/O commands, but with 256 KB of RAM there’s plenty of potential for writing useful software.

Just as impressive as the design itself is the fact that this was [Joshua]’s first electronic design project; we’ve certainly seen worse first projects! Over the years we’ve featured several cool homebrew Z80 computers, such as a super-minimalistic board, a modular system based on the powerful eZ80, and this cute little one that fits inside an Altoids tin.

Continue reading “Designed From Scratch And Fully Handmade: The Modular Coleman Z80 Computer”

Custom Macintosh With A Real 486

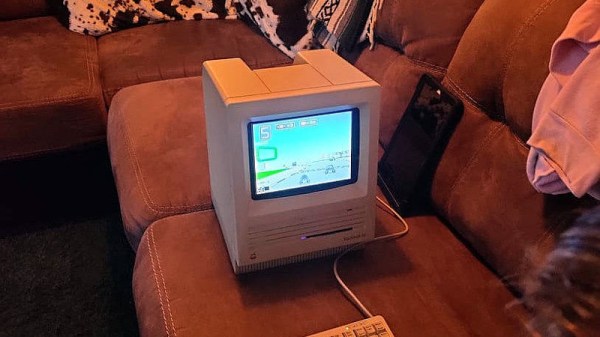
Older Apple computers can often be something of a collector’s item, with the oldest fetching an enormously high price in auctions. The ones from the late ’80s and early ’90s don’t sell for quite as much yet, but it’s possible that museums and collectors of the future will one day be clamoring for those as well. For that reason, it’s generally frowned upon to hack or modify original hardware. Luckily, this replica of an Apple Macintosh didn’t harm any original hardware yet still manages to run software on bare metal.

The computer is built around a single-board computer, but this SBC isn’t like the modern ARM machines that have become so ubiquitous. It’s a 133MHz AMD 486 which means that it can run FreeDOS and all of the classic DOS PC games of that era without emulation. In order to run Apple’s legacy operating system, however, it does require the use of the vMac emulator, but the 486 is quite capable of handling the extra layer of abstraction. The computer also sports a real SoundBlaster ISA sound card, uses a microSD card for its hard drive, and uses an 800×600 LCD screen.

As a replica, this computer is remarkably faithful to the original and even though it doesn’t ship with a Motorola 68000 it’s still fun to find retro PC gamers that are able to run their games on original hardware rather than emulation. It reminds us of another retro 486 that is capable of running old games on new hardware without an emulator as well.

Retro Gaming With Retro Joysticks

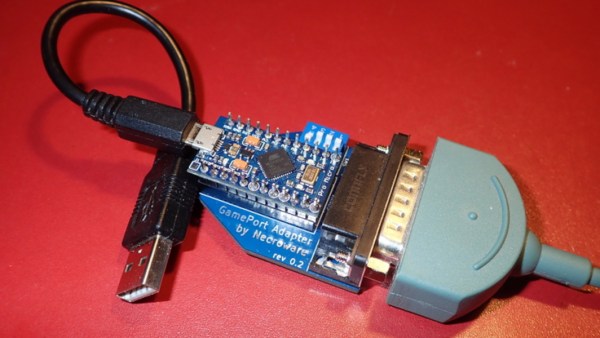
One of the biggest reasons for playing older video games on original hardware is that emulators and modern controllers can’t replicate the exact feel of how those games would have been originally experienced. This is true of old PC games as well, so if you want to use your original Sidewinder steering wheel or antique Logitech joystick, you’ll need something like [Necroware]’s GamePort adapter to get them to communicate with modern hardware.

In a time before USB was the standard, the way to connect controllers to PCs was through the GamePort, typically found on the sound card. This has long since disappeared from modern controllers, so the USB interface [Necroware] built relies on an Arduino to do the translating. Specifically, the adapter is designed as a generic adapter for several different analog joysticks, and a series of DIP switches on the adapter select the appropriate mode. Check it out in the video after the break. The adapter is also capable of automatically calibrating the joysticks, which is necessary as the passive components in the controllers often don’t behave the same way now as they did when they were new.

Plenty of us have joysticks and steering wheels from this era stored away somewhere, so if you want to experience Flight Simulator 5.0 like it would have been experienced in 1993, all it takes is an Arduino. And, if you want to run these programs on bare metal rather than in an emulator, it is actually possible to build a new Intel 486 gaming PC, which operates almost exactly like a PC from the 90s would have.

Continue reading “Retro Gaming With Retro Joysticks”

Old Firewall Reborn As Retro PC

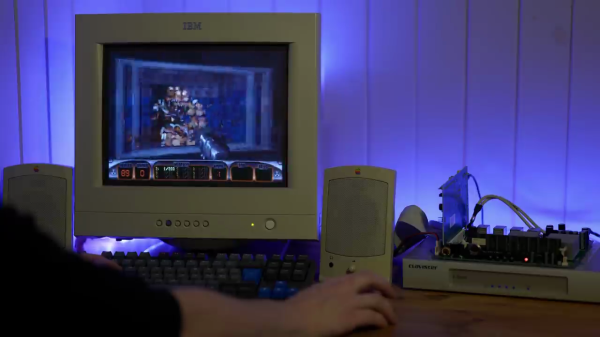
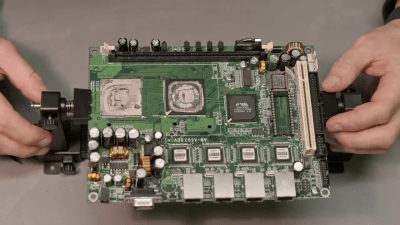
We like projects where old gear is given a new life. [Splashdust] has a twenty-year old business firewall that’s build like a tank. He cracks it open and finds a complete x86 embedded motherboard inside, and sets off to restore it and turn it into a retro gaming computer (see the video from his Odd & Obsolete YouTube channel below the break).

This business firewall and router box is from a small Swedish firm Clavister, part of their S-Series from the early 2000s. The motherboard appears to be a generic one used in other equipment, and is powered by a VIA Eden ESP 4000 running at 400 MHz. The Eden line of x86 processors were low-power chips targeting embedded applications. The graphics chip is a Twister T by S3 Graphics which was purchased by VIA in 2000. After replacing the electrolytic capacitors, and making a few cables, [Splashdust] pops in a PCI sound card and boots up into Windows 98 from a CF card (we like the compact PCB vise he uses).

In two follow-up videos (here and here), he builds an enclosure (instructions on Thingiverse) and tries out several other operating systems. He was able to get the Tiny Core Linux distribution running with the NetSurf browser, but failed to get Windows 2000 or XP to work. Returning to Windows 98, he tweaks drivers and settings and eventually has a respectable retro-gaming computer for his efforts. The next time you’re cleaning out your junk bins, have a peek inside those pizza-box gadgets first — you may find a similar gem.

Continue reading “Old Firewall Reborn As Retro PC”