Drastic Plastic: Enclosure Rebuild Uses Donor Material

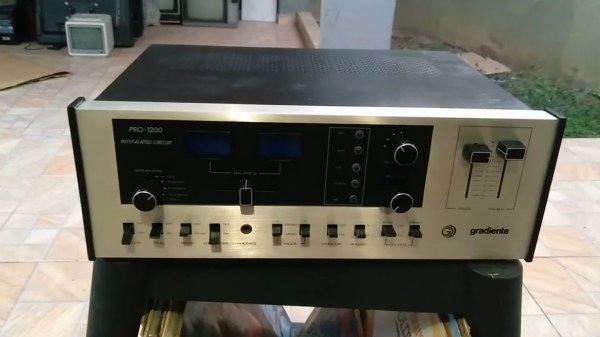
Although 3D printers are great, people tend to use them as a universal hammer wherein almost everything becomes a nail that’s just begging to be struck. So as hacker appetites become finicky with the same old fare, it’s refreshing to see an enclosure restoration done in such an old-school fashion. To wit: [Doidão Santos]’ classic repair of the crumbling side fairings on a vintage amplifier.
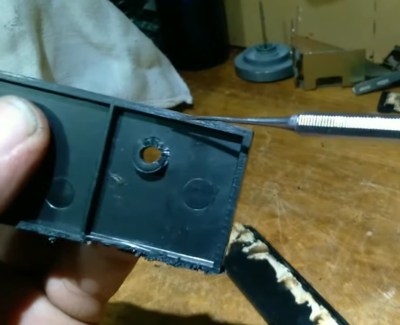
Yes, instead of designing replacement pieces, printing them, and hiding the layered evidence with paint or an acetone blur, [Doidão] called upon a broken sound system whose chassis bore a relief in the corners similar to that of the amplifier.

After cutting out two matched pieces of donated plastic, [Doidão] taped them together and welded ’em with a soldering iron outfitted with a curved-but-flattened spade tip that looks ideal for this purpose. Although the donor enclosure provided much-needed relief, one corner was lacking in this aesthetic, so [Doidão] cast a little bit of molten plastic using the relief as a mold.

Once the pieces were tacked together, [Doidão] filed them down, sanded them, polished them to a nice shine, and installed them on the amplifier. They look great, and no one will be the wiser. But if we were in [Doidão]’s shoes, we’d tell everyone what we’d done. Be sure to check it out after the break.

Ready for more fantastic plastic resto-hacks? Let us introduce you to [drygol].

Continue reading “Drastic Plastic: Enclosure Rebuild Uses Donor Material”

TRS-80 Luggable Gets Fresh Face, New Gear

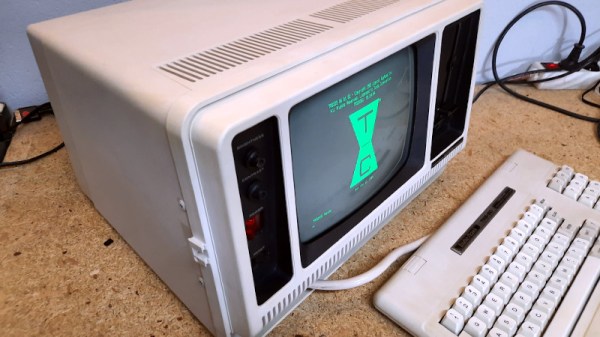
It’s true that this TRS-80 Model 4P “luggable” was in better shape than many of the vintage machines that pass through the hands of [Drygol], but that doesn’t make the end result of its refurbishment and upgrade process any less impressive. After all, not every rebuild has to be a once-in-a-lifetime achievement.

No, the case didn’t have to get pieced back together by hand, and the board didn’t need to have half of its traces recreated. But the outer plastic was certainly in need of a good retrobright treatment, the keyboard was overdue for a cleaning, and the capacitors in the PSU were predictably due for retirement. After [Drygol] got through with it, the machine was back in like-new condition. But then, we can do a little better than that…

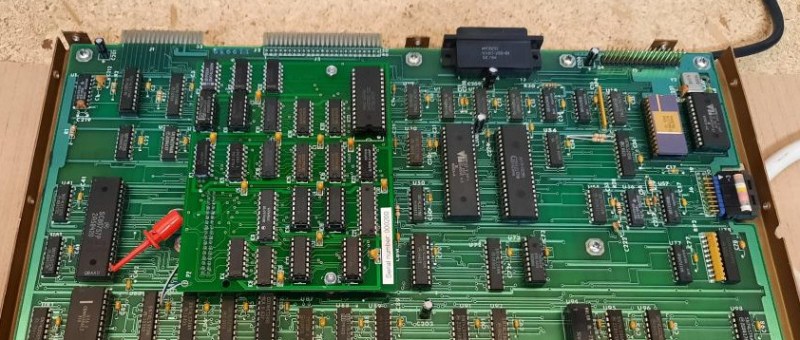
Installation of the new Grafyx board.

So into the refreshed computer went several community-developed modifications, including a M3SE expander that adds Compact Flash and Ethernet support to the TRS-80 and a high-resolution Grafyx video board. In classic [Drygol] style, every effort was made to integrate these upgrades as seamlessly as possible. After struggling for a bit to find a 5.25″ drive that would write a disk the TRS-80 would actually read, all the necessary files to get the upgrades working were transferred over, and the system was booting into TRSDOS.

We’ve covered a lot of [Drygol]’s restorations, and never get tired of seeing how these old and broken machines get a new lease on life once they come out the other end. Whether it’s a relatively easy task of swapping out some dud chips, or using every trick in the book to piece together what’s left of a computer’s case, they always show an incredible level of dedication and attention to detail that you can’t help but admire.

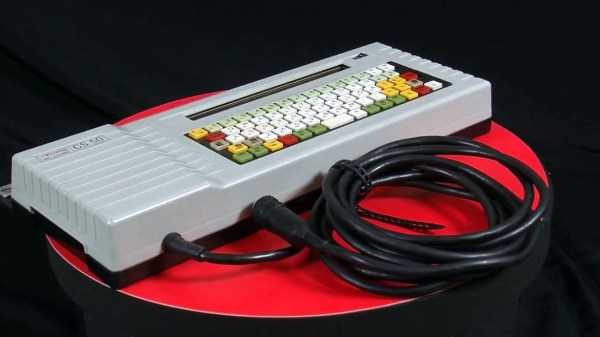
A r0tring CS-50 scriber. You type, it writes the letters with a pen on your blueprint or technical drawing.

Plotting To Restore A R0tring CS-50

If you’re of a certain vintage and have ever done any technical drawing, chances are good that you used a r0tring of some kind, be it pencil or pen. Well, r0tring makes more than writing implements.  They also made electronic scribers — a small plotter that pens ISO lettering on technical drawings based on typed input. This was a huge time saver over doing it freehand or stenciling each letter. The CS-50 is designed to hold the top-of-the-line r0tring drawing pen, which turned out to be the most expensive part of this restoration aside from the time spent sniffing out issues.

[Atkelar] likes to open things up and give them a visual inspection before powering them on. We think this is good practice, even if the suspense kills you. But really, [Atkelar] did so much more than that. He started by replacing the likely late-80s-era coin cell even though it registered north of 3 V. Then he swapped out all the electrolytic caps and one tantalum, cleaned the rubber dome keyboard parts with a cheap electric toothbrush, (another great idea), and completely disassembled the x-y mechanism to clean and re-oil it.

Continue reading “Plotting To Restore A R0tring CS-50”

Chip Transplant Brings Timex 2048 Back From Grave

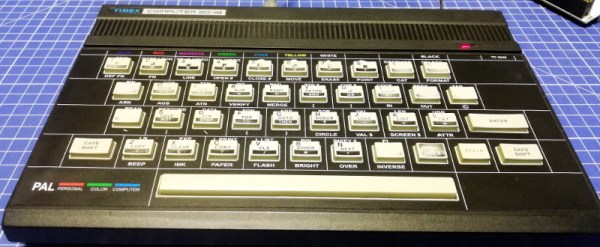
The 1984 Timex Computer 2048 that [Drygol] recently got his hands on was in pretty poor shape. Not only did it have the mangled exterior that comes from several decades of hard use and furious typing, but the internals appeared to be shot as well, with the machine showing nothing but vertical lines when powered up. Thankfully, this retro computer virtuoso was more than up to the challenge of bringing it back from the brink.

After a good cleaning and the installation of a reproduction front panel, the Timex was already looking much better. Unfortunately [Drygol] says he doesn’t currently have the equipment necessary to touch up the graphics and lettering on the key caps, but the fact that he had to qualify that statement with “currently” has us all sorts of excited to see what he’s planning down the line.

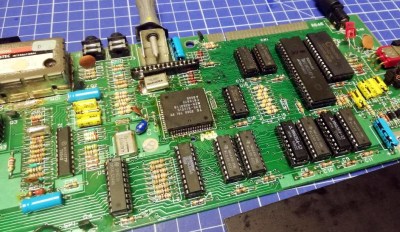
A bevy of fresh chips.

Of course beauty is only skin deep, and this particular TC-2048 was still bad to the bone. [Drygol] had a hunch its Z80 processor was dead, but after swapping it and its socket out, the machine still wouldn’t start. Though he did note that the garbled graphics shown on the screen had changed, which made him think he was on the right track. He then replaced all the RAM on the board, but that didn’t seem to change anything.

There isn’t a whole lot else to go wrong on these old machines, so the final step was to try and replace the ROM. Sure enough, after installing a new Winbond W27C512 chip with the appropriate software burned onto it, the nearly 40 year old computer sprang back to life.

Another classic computer saved from the trash heap, but it’s all in a day’s work for [Drygol]. Over the years we’ve seen him perform meticulous repairs on computer hardware that any reasonable person would have given up on. Even if you’re not into retro hardware, his restorations are always full of fascinating tips and tricks that can be applied when repairing gadgetry from whatever era happens to tickle your fancy.

See Acorn Archimedes Get Repaired And Refurbished, In Glorious Detail

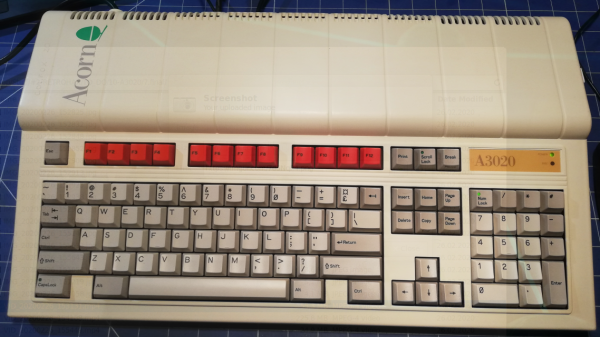
Want to see a 90s-era Acorn Archimedes A3020 home computer get opened up, refurbished, and taken for a test drive? Don’t miss [drygol]’s great writeup on Retrohax, because it’s got all that, and more!

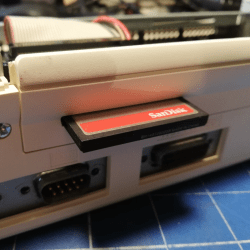
A modern upgrade allowing the use of a CF card in place of an internal hard drive, via a CF2IDE adapter and 3D-printed fixture.

The Archimedes was a line of ARM-based personal computers by Acorn Computers, released in the late 80s and discontinued in the 90s as Macintosh and IBM PC-compatible machines ultimately dominated. They were capable machines for their time, and [drygol] refurbished an original back into working order while installing a few upgrades at the same time.

The first order of business was to open the machine up and inspect the internals. Visible corrosion gets cleaned up with oxalic acid, old electrolytic capacitors are replaced as a matter of course, and any corroded traces get careful repair. Removing corrosion from sockets requires desoldering the part for cleaning then re-soldering, so this whole process can be a lot of work. Fortunately, vintage hardware was often designed with hand-assembly in mind, so parts tend to be accessible for servicing with decent visibility in the process. The keyboard was entirely disassembled and de-yellowed, yielding an eye-poppingly attractive result.

Once the computer itself was working properly, it was time for a few modern upgrades. One was to give the machine an adapter to use a CF card in place of an internal IDE hard drive, and [drygol] did a great job of using a 3D-printed piece to make the CF2IDE adapter look like a factory offering. The internal floppy drive was also replaced with a GOTEK floppy emulator (also with a 3D-printed adapter) for another modern upgrade.

The fully refurbished and upgraded machine looks slick, so watch the Acorn Archimedes A3020 show off what it can do in the video (embedded below), and maybe feel a bit of nostalgia.

Continue reading “See Acorn Archimedes Get Repaired And Refurbished, In Glorious Detail”

The Amiga 2000 You Always Wanted

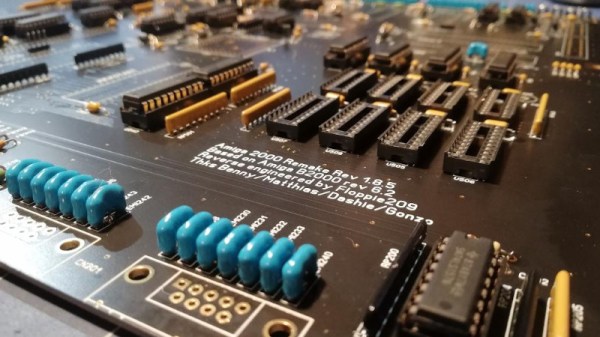
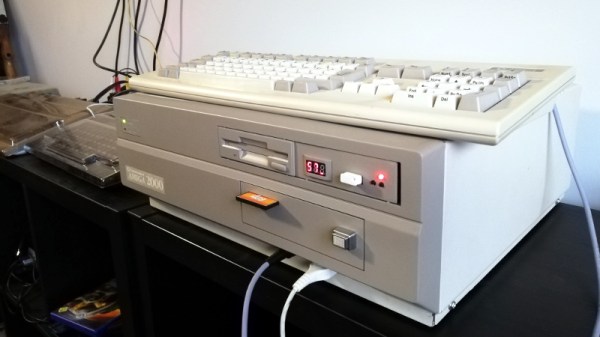
Back in the late 1980s, Commodore pulled the masterstroke of selling several models and generations of Amiga that were all powered by essentially the same speed 68000 and associated chipset. Sure, there were differences in the RAM and other options you could fit and later models had a few extra graphics modes. Still, the entry-level A500 did substantially the same as the high-end A2000. No matter, we the fans all wanted a 2000 anyway, though we typically found ourselves unable to afford one. It’s 2021 now though, so if you never achieved the dream of owning your own A2000, now you can build one of your own! It’s the task [Drygol] has taken on, with an A2000 made entirely from new components, save for a few salvaged Commodore-specific chips and connectors.

At its heart is a beautiful recreation of the original PCB that we’re guessing will be of great interest to owners whose NiCd batteries have leaked and corroded their originals. It’s all through-hole, but the sheer size of a motherboard still makes it a daunting prospect to solder by hand. There are a huge quantity of decoupling and ESD components that all have to be held with tape before the board is flipped over for soldering, and then all the chips are socketed. A Fat Agnes address generator was fitted on a RAM expansion daughterboard, leading to some significant problems as it proved not to be compatible and had to be removed.

The whole is put in a very low-profile PC case with appropriate risers for the Zorro slots, and then in goes a set of upgrades probably not seen in the same place since about 1993. We don’t recognize them all, but we can see accelerators, a floppy emulator, an HDD emulator using a CF card, and is that a network card we spy? This machine is still a work in progress, but we can guarantee it would have been an extreme object of desire thirty years ago. See it in action in the video below the break.

If rebuilding an Amiga interests you, we took a look at the state of the remanufactured parts scene for the platform last year.

Continue reading “The Amiga 2000 You Always Wanted”

Smashed Amiga 2000 Gets New Lease On Life

For most people, opening up a package and seeing that the Amiga 2000 you purchased on eBay had been smashed up by the delivery carrier would be a heartbreaking moment. But not [Drygol]. If you live and breathe vintage computer restorations like he does, finding your latest acquisition is in need of more repairs and upgrades than you originally anticipated is actually a bonus.

The first issue that needed sorting out was the broken case. This Amiga must have had one wild ride, as there were several nasty cracks in the front panel and whole chunks had been broken off. We’ve seen [Drygol] repair broken computer cases before, but it seems like each time he comes up with some new tricks to bring these massacred pieces of plastic back to like-new condition. In this case plastic welding is used to hold the parts together and fill in the gaps, and then brass mesh is added to the backside for strength. The joints are then sanded, filled in with polyester putty, and finally sprayed with custom color matched paint. While he was in the area, he also filled in a hole the previous owner had made for a toggle switch.

Then [Drygol] moved onto the internals. Some of the traces on the PCB had been corroded by a popped battery, a socket needed to be replaced, and as you might expect for a machine of this vintage, all of the electrolytic capacitors were suspect and needed to go. Finally, as the system didn’t have a power supply, he wired in a picoPSU. That got the 34 year old computer back up and running, and at this point, the machine was almost like new again. So naturally, it was time to start with the upgrades and modifications.

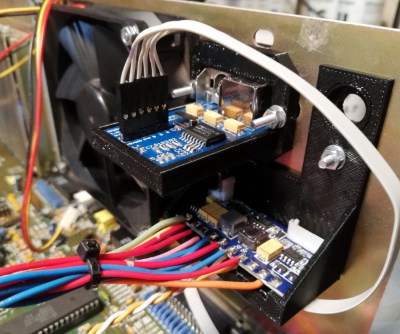
Case fan, video adapter, and picoPSU.

[Drygol] added an IDE interface and connected a CompactFlash adapter as the computer’s primary drive. For the secondary, he installed a GoTek floppy drive emulator that lets you replace a mountain of physical disks with a USB flash drive full of images. Between the two, all of the computer’s storage needs are met with nary a moving part.

The emulator was given its own 3D printed front panel to fit with the Amiga’s visual style, and he also printed out a holder for the RGB4ALL S-Video/Composite adapter installed on the rear of the machine. To help keep all this new gear cool, he finished things off with a new case fan.

Some will no doubt complain about the addition of the extra gadgetry, but to those people, we suggest you just focus on the phenomenal case restoration work. While you might not agree with all of the modifications [Drygol] makes, there’s no question that you can learn something by going through his considerable body of work.