Workbench Eye Candy From Around The World

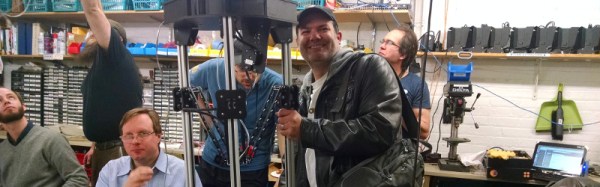
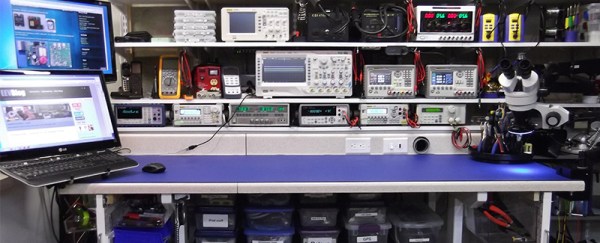
The workbench. We’re always looking for ways to make the most out of the tools we have, planning our next equipment purchase, all the while dealing with the (sometimes limited) space we’re allotted. Well, before you go off and build your perfect electronics lab, this forum thread on the EEVblog should be your first stop for some extended drooling research.

You’ll find a great discussion about everything from workbench height, size, organization, shelf depth, and lighting, with tons of photos to go with it. You’ll also get a chance to peek at how other people have set up their labs. (Warning, the thread is over 1000 posts long, so you might want to go grab a snack.)

We should stop for a moment and give a special note to those of you who are just beginning in electronics. You do not need to have a fancy setup to get started. Most of these well equipped labs is the result of being in the industry for years and years. Trust us when we say, you can get started in electronics with nothing more than your kitchen table, a few tools, and a few parts. All of us started that way. So don’t let anything you see here dissuade you from jumping in. As proof, we’ve seen some amazingly professional work being done with the most bare-bones of tools (and conversely, we seen some head-scratching projects by people with +$10,000 of dollars of equipment on their desk.)

Here’s some links that you might find handy when setting up a lab. [Kenneth Finnegan] has a great blog post on how his lab is equipped. And [Dave Jones] of the EEVblog has a video covering the basics. One of the beautiful things about getting started in electronics is that used and vintage equipment can really stretch your dollars when setting up a lab. So if you’re looking into some vintage gear, head on over to the Emperor of Test Equipment. Of course no thread about workbenches would be complete with out a mention of Jim Williams’ desk. We’ll leave the discussion about workbench cleanliness for the comments.

Crazy Whirlwind Pre-Hackaday Prize Launch Tour

The Hackaday Prize was about to launch but the date wasn’t public yet. I decided to do a pre-launch tour to visit a few places and to drop in on some of the Hackaday Prize Judges. It started in Chicagoland, looped through San Francisco for a hardware meetup and Hardware Con, then finished with visits to [Ben Krasnow’s] workshop, [Elecia White’s] studio, and the Evil Mad Scientist Laboratories.

The Prize is now running and it’s time for you to enter. Look at some of the awesome hacking going on at the places I visited and then submit your own idea to get your entry started. Join me after the break for all the details of the adventure.

Continue reading “Crazy Whirlwind Pre-Hackaday Prize Launch Tour”

Hackaday Links: April 6, 2014

hackaday-links-chain

Back in September we saw this awesomesauce wristwatch. Well, [Zak] is now kitting it up. Learn more about the current version, or order one. [Thanks Petr]

Home automation is from the future, right? Well at [boltzmann138’s] house it’s actually from The Next Generation. His home automation dashboard is based on the LCARS interface; he hit the mark perfectly! Anyone thinking what we’re thinking? This should be entered in the Hackaday Sci-Fi Contest, right? [via Adafruit]

PCB fab can vary greatly depending on board size, number of layers, number of copies, and turn time. PCBShopper will perform a meta-search and let you know what all of your options are. We ran a couple of tests and like what we saw. But we haven’t verified the information is all good so do leave a note about your own experience with the site in the comments below. [via Galactic Studios]

We recently mentioned our own woes about acquiring BeagleBone Black boards. It looks like an authorized clone board is poised to enter the market.

Speaking of the BBB, check out this wireless remote wireless sensor hack which [Chirag Nagpal] is interfacing with the BBB.

We haven’t tried to set up any long-range microwave communications systems. Neither has [Kenneth Finnegan] but that didn’t stop him from giving it a whirl. He’s using Nanobridge M5 hardware to help set up a system for a triathlon happening near him.

DIY Electricity And Internet For Burning Man

bmPowerInet

Despite this being [Kenneth Finnegan’s] first Burning Man, the guy came prepared and stayed connected by setting up a beefy electricity supply and a faint yet functional internet connection. If you saw [Kenneth’s] Burning Man slideshow, you know that the desert is but a mild deterrent against power, water, and even temporary runways.

He borrowed a 20V 100W solar panel from Cal Poly and picked up a bargain-price TSMT-20A solar charge controller off eBay. The controller babysits the batteries by preventing both overcharging and over-discharging. The batteries—two Trojan-105 220Ah 6V behemoths—came limping out of a scissor lift on their last legs of life: a high internal resistance ruled out large current draws. Fortunately, the power demands were low, as the majority of devices were 12VDC or USB. [Kenneth] also had conveniently built this USB power strip earlier in the year, which he brought along to step down to 5VDC for USB charging.

Internet in the desert, however, was less reliable. A small team provides a microwave link from civilization every summer, which is shared via open access points in 3 different camps. [Kenneth] pointed his Ubiquiti NanoStation at the nearest one, which provided a host of inconvenient quirks and top speeds of 2-20kBps: enough, at least, to check emails.

Accelerometer Poi

accelerometerPoi

Even if you’ve never attended a rave, you have probably seen one portrayed on film or television. Those glowing spheres-on-a-string being swung around are called poi, and [Matt Keeter] has designed a pair with an accelerometer upgrade. Poi have a long history and were originally made from plants, but contemporary examples usually feature some kind of light, whether it’s fire, LEDs, or even glowsticks tied to shoelaces.

This build required double-sided PCBs and [Matt] had to custom make the protective covering that slips over the board. The poi are powered by 2 AA batteries fed into a 5V boost regulator. But wait, no microcontroller and no PWM? Actually, we think it’s quite clever that [Matt] took the output from the accelerometer and fed into an inverting amplifier. This keeps the voltage constant while allowing the accelerometer to vary the current. Had he used PWM, the fast motion of the swinging poi would instead produce a blinking effect.

An additional trimmer potentiometer accounts for variability in the accelerometers’ output by adjusting the default brightness. If the recent recap of Burning Man has you excitedly planning to attend next summer, you’d probably find plenty of opportunities to use these in the desert.

Build Your Own Dumb USB Power Strip

diy-usb-power-strip

Here’s a USB charging center which [Kenneth Finnegan] built using parts from his junk bin. We’d like to reiterate our claim that he must have the most magical of junk bins (the last thing we saw him pull out of it was a 24-port managed Ethernet switch).

The jack on the side accepts the barrel connector from a 12V wall wart. [Kenneth] mentions that the 2.1mm jack is a standard he uses in all of his projects. Inside there’s a switch mode power supply that provides the regulated 5V to each USB port. We really like the fact that he added some protection; diy is no fun if you end up frying your beloved multi-hundred dollar devices. The yellow components are polyfuses which will cut the power if 600 mA of current is exceeded. This works great for almost all of his devices, but his iPod 4G doesn’t like the system. It sees the voltage dip just a bit and stops charging entirely.

Cracking Open A 24-port Switch So You Don’t Have To

hp-procurve-ethernet-switch-teardown

[Kenneth Finnegan’s] post about this 24-Port HP ProCurve 2824 Ethernet Switch teardown was a delight to read. He’s taking an introduction to networking class at California Polytechnic State University. One of their labs included virtual machines shooting thousands of new MAC addresses at the thing all at once. Despite it’s ability to switch data at a blazing fast rate, it’s ability to deal with that many new hardware identifiers was less than impressive. He wanted to find out why and it just so happened he had one of these in his parts bin at home (which he refers to as if it’s a high-powered RPG character).

The mainboard is divided into three major blocks: the power supply, the switching hardware, and the processor that makes this a manged switch. Although he covers all of these pieces (and the switching stuff is very interesting to learn about) it is the processor section that was causing the aforementioned slowdown. It’s a 266MHz PowerPC chip with a measly 64 MB of RAM. Of course this doesn’t need to be any more powerful since all traffic from previously ‘learned’ MAC addresses gets handled by the switching block and never touches the processor portion.

Don’t miss the end of his post where he discusses how the filtering caps, and semi-isolated ground planes help to tame the beast created from all of this high-speed switching.