Upgrading A Laminator For Toner Transfer PCBs

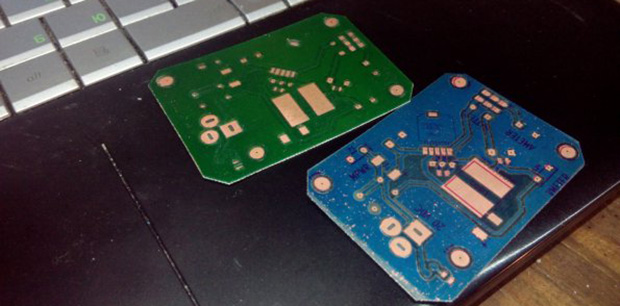
If you need a circuit board now, you’re probably looking at a toner transfer process; all you need to make a PCB is a copper clad board, a laser printer, some special paper, and the usual etching chemicals. The quality of these boards is highly dependant on the quality of transferring toner to the copper, and getting the process right is as much an art as it is a science. A clothes iron is the easy way of transferring the toner to the board, but if you’re looking for repeatability, you’ll probably want a laminator.

Laminators, too, also vary in quality. The king of toner transfer laminators is the Apache AL13P. With four heated rollers and a steel chassis, it’s enough to do some serious heating. [mosaicmerc] came up with an amazing mod for his Apache laminator that takes all the guesswork out of the settings, and does it all in one pass for maximum repeatability and PCB quality.

The Apache laminator in question is a beast of a machine that drives four rollers with a synchronous motor and also has a ‘reverse’ button that sends the laminations out the front end of the printer. Stock, a toner transfer PCB would require dozens of passes through the Apache, but [merc]’s mod takes care of everything for you.

The addition that makes this possible is a small board with a PIC12 microcontroller. This microcontroller connects the motor driver board and the display interface together, triggering the reverse button to move the board 5/8″ forward and 1/2″ back, giving the laminator an effective speed reduction of 12:1. This method also has the bonus of not tampering with the motor or control circuitry, and allows for multiple passes in the same run.

With this modification, the Apache AL13P becomes the perfect solution to transferring toner to a piece of copper, with the ability to transfer 10mil traces on 1oz copper. The board also offers some other features like thermal sensor failure shutdown and a cool-down mode that overrides the heater. If you’re looking for an easy way to step up your toner transfer PCBs, you can’t do much better than this mod.

Toner Transfer PCBs, Double Sided, With Color Silkscreen

Silk

Making a few PCBs with the toner transfer method is a well-known technique in the hacker and maker circles. Double-sided PCBs are a little rarer, but still use the same process as their single-sided cousins. [Necromancer] is taking things up a notch and doing something we’ve never seen before – double-sided PCBs made at home, with color silkscreens, all make with a laser printer.

For laying down an etch mask, [Necro] is using a Samsung ML-2167 laser printer and the usual toner transfer process; print out the board art and laminate it to some copper board.

The soldermasks use a similar process that’s head-slappingly similar and produces great results: once the board is etched, he prints out the solder mask layer of his board, laminates it, and peels off the paper. It’s so simple the only thing we’re left wondering is why no one thought of it before.

Apart from the potential alignment issues for multiple layers, the only thing missing from this fabrication technique is the ability to do plated through holes. Still, with a laser printer, a laminator, and a little bit of ferric or copper chloride you too can make some very nice boards at home.

Toner Transfer For Resist And Silk Screen Using Printable Vinyl

This toner transfer method uses a different material than we normally see. The red sheet being peeled back isn’t toner transfer paper. It’s printable vinyl used for both the resist and the silk screen.

The application process is almost the same as any other toner transfer PCB fabrication material. The printable vinyl stick is first adhered to a piece of paper before feeding it through a laser printer. It is acceptable to clean the vinyl with alcohol before printing if you think there may be a finger print or other oil on its surface. After printing it is carefully aligned with the board and ironed on.

[Mincior Vicentiu] thinks there are a few big benefits to this material. It seems that as you heat the toner it expands and hardens, but the vinyl actually softens to make room for this. We can imagine that this helps alleviate the smudging that sometimes occurs when ironing toner that is simply printed on paper. The other advantage is that the vinyl peels off quite easily after ironing, where as you need to soak paper in water and carefully massage it off of the toner.

[via Dangerous Prototypes]

Make Your Own Toner Transfer Paper

Who would have thought that some corn starch could be made into toner transfer paper? We’re not sure of the advantages (perhaps its cheaper?), but if you have a lot of time or just love to get sticky [Matthew Sager] shows the proper method for making the paper, printing, and then etching a PCB.

If you’re just getting started making PCBs, we recommend you check out these DIY circuit etching videos to get a better grasp on the printing and etching steps.

Print Toner Directly To A PCB

We use the toner transfer method to fabricate printed circuit boards. The most difficult part of this is printing, ironing, and removing the paper from the toner that is used as an etchant resist material. [Mark Lerman] is developing a method to apply toner directly to the copper clad using a laser printer. Each of the photos in his gallery have comments that take us through his process. A laser printer has been modified to negatively charge the copper plate, thereby attracting the positively charged toner to it. Once the toner has been applied, the board is baked in an oven, then run through a laminator. This process can yield 2 mil traces and it looks like the potential for incredibly clean boards is just around the corner. The question is, will this be easier and take less time than using photo resist?

We’ve contacted [Mark] in hopes of getting more details. If you can’t wait for a follow-up, take a look at this thread concerning his work.

[Thanks Komradbob]

PCB Toner Transfer With Dowel

Pulsar Professional FX has a neat tip on their site for getting a really even toner transfer when making your own PCBs. First, the PCB is cut to size, and the paper is tacked to the board. Then, the PCB is placed paper up onto a dowel and rolled back and forth with the iron. Since the board bends slightly over the dowel the toner sticks evenly to the copper. After that, just remove the paper as usual and etch with your preferred method.

PCB Fuser For Toner Transfer Etching

fuser

We’ve covered the toner transfer method for creating circuit boards before. Instead of using an iron, Rich uses the fuser out of a laser printer to get consistent results. He wired a dimmer to the power supply to regulate the temperature. The fuser has a built in thermistor, so you can read the temp using an ohm meter. For rate control he built a stepper controller that connects to a parallel port. Using a simple program he’s able to control both speed and direction.

[thanks Fredasp]

Continue reading “PCB Fuser For Toner Transfer Etching”