This Frequency Generator Knows How To Get Down

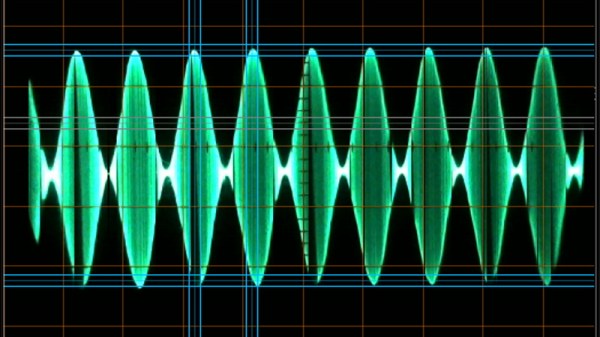
What kind of clever things could you do with a signal that had a period of 2 hours? Or 20? Any ideas? No seriously, tell us. Because [Joseph Eoff] has come up with a way to produce incredibly low frequency signals that stretch out for hours, and we’d love to figure out what we can do with it.

To be fair, it’s not like [Joseph] has any ideas either. He thought it would be an interesting project, and figures now that he has the technology, maybe some application will come to him. They say that if you’ve got a hammer everything looks like a nail, so maybe the next project he sends our way will be a sinusoidal fish feeder.

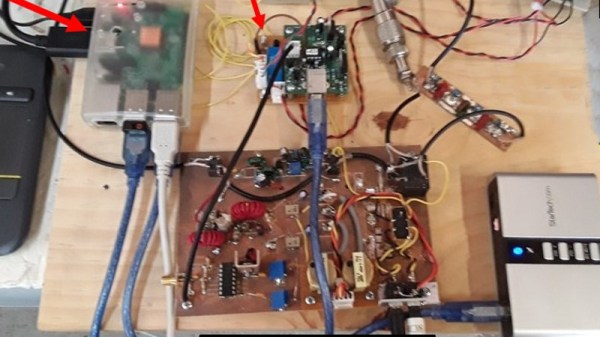
[Joseph] says doing the software side of things with Pure Data wasn’t a problem, but getting it out of the computer proved to be tricky. It turns out that your average computer sound card isn’t equipped to handle frequencies down into the millihertz range (big surprise), so they need to be coaxed out with some extra hardware. Using a simple circuit not unlike an AM demodulator, he’s able to extract the low-frequency signal from a 16 kHz carrier.

So if you ever find yourself in need of a handful of hertz, now you’ve got the tool to generate them. At least it’s more practical than how they used to generate low frequency signals back in the 1900s.

Gold Cables Really Do Work The Best

As a writer, I have long harboured a dream that one day an editor will buy me a top-of-the-range audio analyser, and I can set up an audio test lab and write pieces debunking the spurious claims made by audiophiles, HiFi journalists, and the high-end audio industry about the quality of their products. Does that amp really lend an incisive sibilance to the broader soundstage, and can we back that up with some measurable figures rather than purple prose?

An Audio Playground You Didn’t Know You Had

An Audio Precision APx525 audio analyser.
An Audio Precision APx525 audio analyser. Bradp723 (CC-BY-SA 3.0)

Sadly Hackaday is not an audio magazine, and if Mike bought me an Audio Precision he’d have to satisfy all the other writers’ test equipment desires too, and who knows where that would end! So there will be no Hackaday audio lab — for now. But that doesn’t mean I can’t play around with audio analysis.

Last month we carried a write-up of a Supercon talk from Kate Temkin and Michael Ossmann, in which they reminded us that we have a cracking general purpose DSP playground right under our noses; GNU Radio isn’t just for radio. Once I’d seen the talk my audio analysis horizons were opened up considerably. Maybe that audio analyser wouldn’t be mine, but I could do some of the same job with GNU Radio.

It’s important to stress at this point that anything I can do on my bench will not remotely approach the quality of a professional audio analyser. But even if I can’t measure infinitesimal differences between very high-end audio circuitry, I can still measure enough to tell a good audio product from a bad one.

Continue reading “Gold Cables Really Do Work The Best”

Sweet Streams Are Made Of These: Creating Music On The Command Line

There are countless ways to create music. In the simplest form, it won’t even require any equipment, as evidenced by beatboxing or a capella. If we move to the computer, it’s pretty much the same situation: audio programming languages have been around for as long as general-purpose high-level languages, and sound synthesis software along with them. And just as with physical equipment, none of that is particularly necessary thanks to sed. Yes, the sed, the good old stream editor, as [laserbat] shows in her music generating script.

Providing both a minified and fully commented version of Bach’s Prelude 1 in C major as example, [laserbat] uses a string representation of the sheet music as the script’s starting point, along with a look-up table of each transformed note’s wavelength. From here, she generates fixed length PCM square wave signals of each of the notes, to be piped as-is to the sound card via ALSA’s aplay or SoX’s play. To keep things simple enough, she stays within the region of printable characters here, using space and tilde as low and high values respectively, providing highest possible volume at the same time this way.

The concept itself is of course nothing new, it’s how .au and .wav files work, as well as these little C lines. And while the fixed note duration takes away some of the smoothness in [laserbat]’s version, adding variable duration might just be a hint too much for a sed implementation, although we’ve certainly seen some more complex scripts in the past.

[via r/programming]

An SDR Transceiver The Old-School Way

Software-defined radios or SDRs have provided a step-change in the way we use radio. From your FM broadcast receiver which very likely now has single-application SDR technology embedded in a chip through to the all-singing-all-dancing general purpose SDR you’d find on an experimenter’s bench, control over signal processing has moved from the analogue domain into the digital. The possibilities are limitless, and some of the old ways of building a radio now seem antiquated.

[Pete Juliano N6QW] is an expert radio home-brewer of very long standing, and he’s proved there’s plenty of scope for old-fashioned radio homebrewing in an SDR with his RADIG project.  It’s an SDR transceiver for HF which does all the work of quadrature splitting and mixing with homebrewed modules rather than the more usual technique of hiding it in an SDR chip. It’s a very long read in a diary format from the bottom up, and what’s remarkable is that he’s gone from idea to working SDR over the space of about three weeks.

A block diagram of the N6QW SDR

So what goes into a homebrew SDR? Both RF preamplifier, filters, and PA are conventional as you might expect, switched between transmit and receive with relays. A common transmit and receive signal path is split into two and fed to a pair of ADE-1 mixers where they are mixed with quadrature local oscillator signals to produce I and Q that is fed to (or from in the case of transmit) a StarTech sound card. The local oscillator is an Si5351 synthesiser chip in the form of an SDR-Kits USB-driven module, and the 90 degree phased quadrature signals are generated with a set of 74AC74 flip-flops as a divider.

Running the show is a Raspberry Pi running Quisk, and though he mentions using a Teensy to control the Si5351 at the start of his diary it seems from the pictures of the final radio that the Pi has taken on that work. It’s clear that this is very much an experimental radio as it stands with wired-together modules on a wooden board, so we look forward to whatever refinements will come. This has the feel of a design that could eventually be built by many other radio amateurs, so it’s fascinating to be in at the start.

If I and Q leave you gasping when it comes to SDR technology, maybe we can help.

Thanks [Bill Meara N2CQR] for the tip!

DIY Raspberry Pi Multi FX Stomp Box

From building your own analog effects pedal to processing audio through micro controllers, a lot of musicians love building their own boxes of sound modification. In his entry for the 2019 Hackaday Prize, [Craig Hissett] has a project to build an all-in-one multi-effects stomp box.

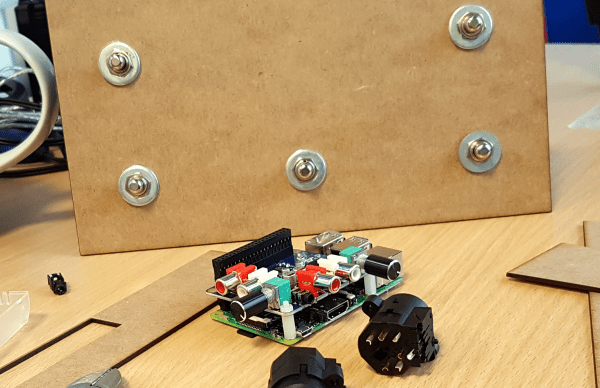
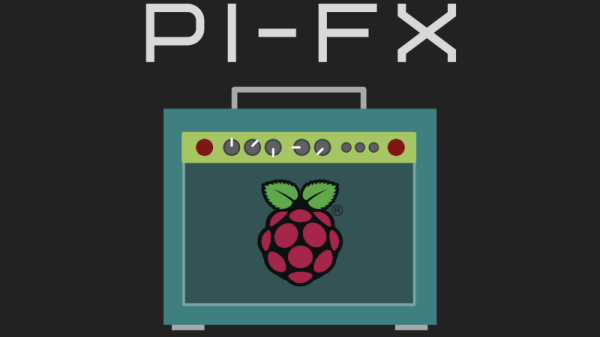
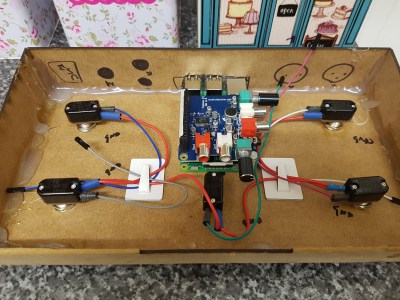
At the center of the box is a Raspberry Pi with an AudioInjector stereo sound card.  The card takes care of stereo in and out, and passing the signal to the Pi. The software is Modep, an open source audio processor that allows the setup of a chain of digital effects plugins to be run on the Pi. After finding some foot switches, [Craig] connected them to an Arduino Pro Micro which he set up as a MIDI device that sends MIDI messages to the Modep software running on the Pi.

There are still a few steps to go, but [Craig] has the basic layout covered. Next up is wiring it up and building a proper case for it, as well as working on latency. A few years ago, another multi-effects stomp box was featured in the Hackaday Prize, and last year, this multi-effects controller was featured.


PiFX, The Pi-Powered Pedal Board

Since the beginnings of the Raspberry Pi, [Tibbbbz] has wanted to build a DIY guitar effects board and amp simulator. A device like this, and similar ones sold by Boss and Kemper, put a bunch of processing power inside a metal enclosure with some footswitches and a pair of quarter inch jacks for input and output. Mash some buttons and wicked toanz come out the other end. Now this is actually possible with a Pi, and it’ll sound great too.

Because this is an audio application, latency is critical. It doesn’t really matter if you have 200 milliseconds of latency when scrolling through your Facebook feed, but for real-time audio processing anything over five milliseconds is disorienting and nearly unusable. [Tibbbbz] is using a standard, off-the-shelf USB audio adapter that gets the latency down to about that level. A Raspberry Pi is never going to have latency as low as a handful of transistors in a analog effects pedal, but it’s close enough.

For the audio system, it’s all about JACK audio: a wonderful frontend for the Linux audio system. The actual pedal emulation is happening with Guitarix. For the hardware part of this build, there’s actually not that much going on here apart from a USB sound card and a touch screen display. The footswitches are the most interesting as they’re wired up as buttons in a repurposed USB keyboard controller board. This repurposing of a USB keyboard is rather interesting, because it vastly simplifies the entire build. All of this is wrapped up in a wedge-shaped walnut pedalboard that’s sturdy enough to live on the stage at least part of the time. You can check out the demos here.

Fallout Inspired Display Is Ready For The Apocalypse

We’ve seen more projects based on books, TV shows, movies, and video games than we could ever hope to count. Hackers and makers derive inspiration from what they see around them, and it turns out there’s considerable overlap between the folks who sit in their labs building stuff all day and the ones who spend their free time playing games or watching movies. Big surprise, right? But among them, few can match the influence of the Fallout franchise.

As the latest entry in a long line of incredible Fallout-inspired builds, we present the Octoglow VFD by [Michał Słomkowski]. While this build isn’t trying to replicate anything directly from the games, it captures all the hallmarks that make up the game’s distinctive post-apocalyptic chic : antiquated vintage components, exposed internals, and above all, a dirty, industrial look. It’s supposed to look like somebody built the stuff out of parts they found in the trash, primarily because that’s exactly what they would’ve needed to do.

So what is it? Well, that’s a little hard to nail down. Frankly we’d say it’s a little more like art than anything, but it does have some useful functions. Currently it shows the time, date, weather information, and various RSS feeds on its dual vacuum fluorescent displays. There’s also a real-life Geiger-Müller counter onboard, because what says Fallout more than a little radiation?

The build itself is absolutely fascinating, and [Michał] leaves no stone unturned in his comprehensive write-up. Every module of the Octoglow has its own page on his site, and each one is bristling with hardware details, schematics, and firmware documentation. Reading along you’ll run into all sorts of interesting side notes: like how he reverse engineered a wireless temperature sensor with his sound card, or devised his own ten-pin bus to interconnect all the modules.

If the Octoglow doesn’t quite scratch that Vault-Tec itch, there’s plenty more where that came from. How about this replica of the wall terminals from Fallout 4, or this radiation monitor perfect for roaming the wastelands? Don’t forget to bring along this 3D printed Thirst Zapper for protection.