Review: LimeSDR Mini Software Defined Radio Transceiver

It’s fair to say that software-defined radio represents the most significant advance in affordable radio equipment that we have seen over the last decade or so. Moving signal processing from purpose-built analogue hardware into the realm of software has opened up so many exciting possibilities in terms of what can be done both with more traditional modes of radio communication and with newer ones made possible only by the new technology.

It’s also fair to say that radio enthusiasts seeking a high-performance SDR would also have to be prepared with a hefty bank balance, as some of the components required to deliver software defined radios have been rather expensive. Thus the budget end of the market has been the preserve of radios using the limited baseband bandwidth of an existing analogue interface such as a computer sound card, or of happy accidents in driver hacking such as the discovery that the cheap and now-ubiquitous RTL2832 chipset digital TV receivers could function as an SDR receiver. Transmitting has been, and still is, more expensive.

The LimeSDR Mini's chunky USB stick form factor.
The LimeSDR Mini’s chunky USB stick form factor.

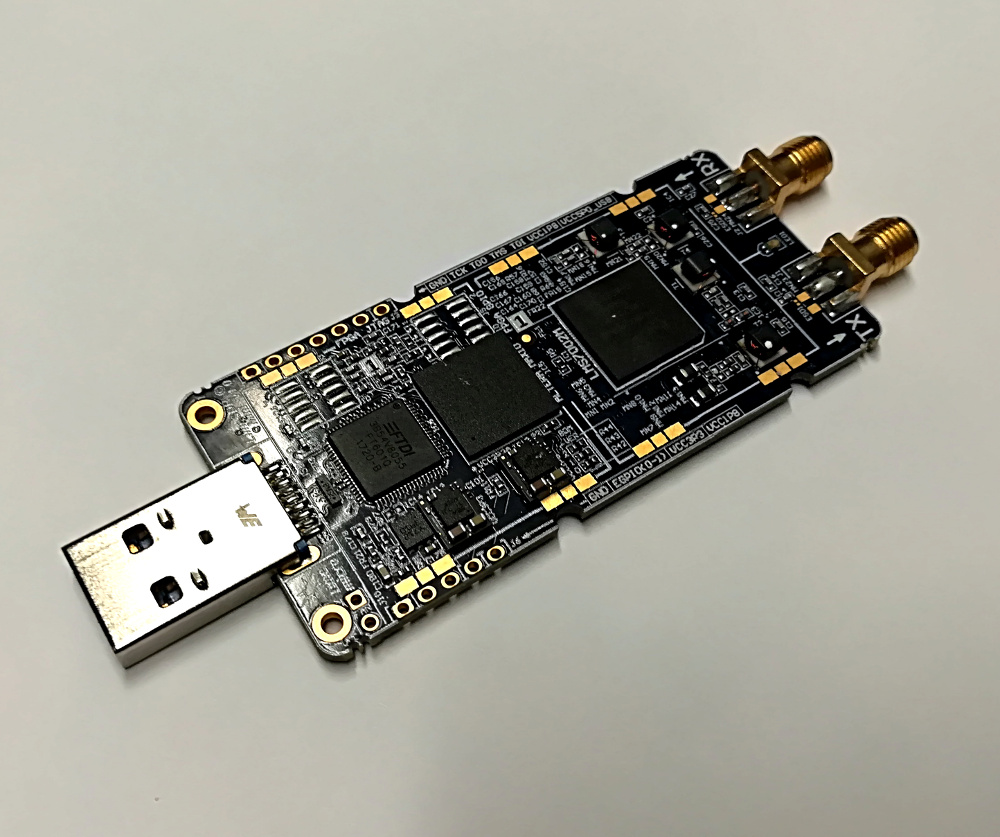
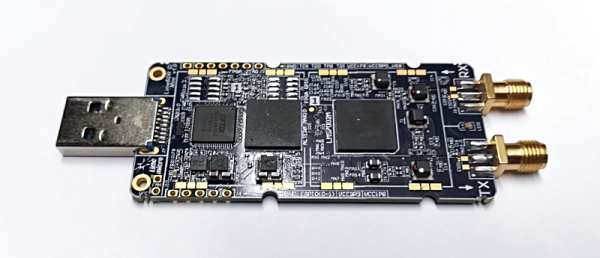
A new generation of budget SDRs, as typified by today’s subject the LimeSDR Mini, have brought down the price of transmitting. This is the latest addition to the LimeSDR range of products, an SDR transceiver and FPGA development board in a USB stick format that uses the same Lime Microsystems LMS7002M at its heart as the existing LimeSDR USB, but with a lower specification. Chief among the changes are that there is only one receive and one transmit channel to the USB’s two each, the bandwidth of 30.72 MHz is halved, and the lower-end frequency range jumps from 100 kHz to 10 MHz. The most interesting lower figure associated with the Mini though is its price, with the early birds snapping it up for $99 — half that of its predecessor. (It’s now available on Kickstarter for $139.)

Continue reading “Review: LimeSDR Mini Software Defined Radio Transceiver”

AM ultrasonic transmitter and receiver

AM Ultrasonic Transmitter And Receiver

Most often ultrasonic transducers are used for distance measurements, and in the DIY world, usually as a way for robots to detect obstacles. But for a weekend project, [Vinod.S] took the ultrasonic transmitter and receiver from a distance-meter module and used amplitude modulation to send music ultrasonically from his laptop to a speaker, essentially transmitting and receiving silent, modulated sounds waves.

The transmitter and receiver

For the transmitter, he turned an Arduino Pro Micro into a USB sound card which he could plug into his laptop. That outputs both the audio signal and a 40 kHz carrier signal, implemented using the Arduino’s Timer1. Those go to a circuit board he designed which modulates the carrier with the audio signal using a single transistor and then sends the result out the ultrasonic transmitter.

He took care to transmit a clear signal by watching the modulated wave on an oscilloscope, looking for over-modulation and clipping while adjusting the values of resistors located between the transistor, a 5 V from the Arduino and the transmitter.

He designed the receiver side with equal care. Conceptually the circuit there is simple, consisting of the ultrasonic receiver, followed by a transistor amplifier for the modulated wave, then a diode for demodulation, another transistor amplifier, and lastly a class-D amplifier before going to a speaker.

Due to the low 40 kHz carrier frequency, the sound lacks the higher audio frequencies. But as a result of the effort he put into tuning the circuits, the sound is loud and clear. Check out the video below for an overview and to listen to the sound for yourself. Warning: Before there’s a storm of comments, yes the video’s shaky, but we think the quality of the hack more than makes up for it.

Continue reading “AM Ultrasonic Transmitter And Receiver”

Old Modem, New Internet.

Do you remember the screeching of a dial-up modem as it connected to the internet? Do you miss it? Probably not, but [Erick Truter] — inspired by a forum post and a few suggestions later — turned a classic modem into a 3G Wi-Fi hotspot with the ubiquitous Raspberry Pi Zero.

Sourcing an old USRobotics USB modem — allegedly in ‘working’ condition — he proceeded to strip the modem board of many of its components to make room for the new electronic guts. [Truter] found that for him the Raspberry Pi Zero W struggled to maintain a reliable network, and so went with a standard Pi Zero and a USB  Wi-Fi dongle dongle. He also dismantled a USB hub to compensate for the Zero’s single port. Now,  to rebuild the modem — better, faster, and for the 21st century.

Continue reading “Old Modem, New Internet.”

Crankshaft: Open Source Car Computer

Modern cars and head units are pretty fancy gadget-wise. But what if your car still has an 8-track? No problem. Just pick up a Raspberry Pi 3 and a seven-inch touchscreen, and use Crankshaft to turn it into an Android Auto setup.

The open source project is based on OpenAuto which, in turn, leverages aasdk. The advantage to Crankshaft is it is a plug-and-play distribution. However, if you prefer, you can build it all yourself from GitHub.

Continue reading “Crankshaft: Open Source Car Computer”

Cramming A Pi Zero Into A Cheap Handheld Game

At this point, we’ve seen the Raspberry Pi jammed into what amounts to every retro game system, handheld or otherwise, that was ever released. While they’re always fun builds, invariably somebody will come along who is upset that the original hardware had to be gutted to create it. It seems as if with each post, a classic gaming aficionado out there has his or her heart broken just a bit more. Will no one put an end to the senseless slaughter of Game Boys?

As it so happens, not all hardware modders are such unconscionable brutes. [Starfire] recently sent his latest creation into the tip line, and it’s designed specifically to address the classic gaming massacre in which Hackaday has so shamefully been a collaborator.  His build sacrifices a portable Genesis built by AtGames, and turns it into a Raspberry Pi Zero portable running RetroPie.

Opening up the back panel of his portable Pi shows an incredible amount of hardware smashed into the tiny package. Beyond the obvious Pi Zero, there’s a iUniker 2.8-inch LCD, a 2,200 mAh battery, a two-port USB hub, a Teensy microcontroller, a USB sound card, an audio amplifier, a LiPo charging module, and a boost converter. [Starfire] measured peak power consumption to be 500 mA, which should give about a 3.5 hour run time on the 2,200 mAh battery.

This is all the more impressive when you realize the original AtGames PCB is still in the system, albeit with the center cut out for the Pi’s LCD to fit in. Rather than having to figure out a new way to handle input, [Starfire] simply connected the existing inputs to the digital pins on the Teensy and used some code to convert that into USB HID for the Pi. A few case modifications were necessary, namely the removal of the battery compartment from the back panel and covering up the original SD card slot and ports; but otherwise the finished product looks completely stock.

If you don’t mind tearing into a real Game Boy to make your portable Pi, you can check out a few of the stand out examples which we’ve covered here in the past.

Continue reading “Cramming A Pi Zero Into A Cheap Handheld Game”

Making A Covox Speech Thing Work On A Modern PC

Long ago, when mainframes ruled the earth, computers were mute. In this era before MP3s and MMUs, most home computers could only manage a simple beep or two. Unless you had an add-on device like the Covox Speech Thing, that is. This 1986 device plugged into your parallel port and allowed you to play sound. Glorious 8-bit, mono sound. [Yeo Kheng Meng] had heard of this device, and wondered what it would take to get it running again on a modern Linux computer. So he found out in the best possible way: by doing it.

Continue reading “Making A Covox Speech Thing Work On A Modern PC”

Hackaday Links Column Banner

Hackaday Links: Not A Creature Was Stirring, Except For A Trackball

Hey, did you know Hackaday is starting an Open Access, peer-reviewed journal? The Hackaday Journal of What You Don’t Know (HJWYDK) is looking for submissions detailing the tools, techniques, and skills that we don’t know, but should. Want to teach everyone how to make sand think? Write a paper and tell us about it! Send in your submissions here.

Have you noticed OSH Park updated their website?

The MSP430 line of microcontrollers are super cool, low power, and cheap. Occasionally, TI pumps out a few MSP430 dev boards and sells them for the rock-bottom price of $4.30. Here ya go, fam. This one is loaded up with the MSP430FR2433.

lol, Bitcoin this week.

Noisebridge, the San Francisco hackerspace and one of the first hackerspaces in the US, is now looking for a new place. Why, you may ask? Because San Francisco real estate. The current price per square foot is triple what their current lease provides. While we hope Noisebridge will find a new home, we’re really looking forward to the hipster restaurant that’s only open for brunch that will take its place.

The coolest soundcards, filled with DOS blips and bloops, were based on the OPL2 and OPL3 sound chips. If you want one of these things, you’re probably going to be digging up an old ISA SoundBlaster soundcard. The OPL2LPT is the classic sound card for computers that don’t have an easily-accessible ISA bus, like those cool vintage laptops. The 8-Bit Guy recently took a look at this at this neat piece of hardware, and apart from requiring a driver to work with any OPL2-compatible game, this thing actually works.

NVIDIA just did something amazing. They created a piece of hardware that everyone wants but isn’t used to turn electricity into heat and Bitcoin. This fantastic device, that is completely original and not at all derivative, is sold in the NVIDIA company store for under five dollars. Actually, the green logo silk/art on this PCB ruler is kinda cool, and I’d like to know how they did that. Also, and completely unrelated: does anyone want ten pounds of Digikey PCB rulers?