Serializing Dickens To LEDs

ch00fmas12

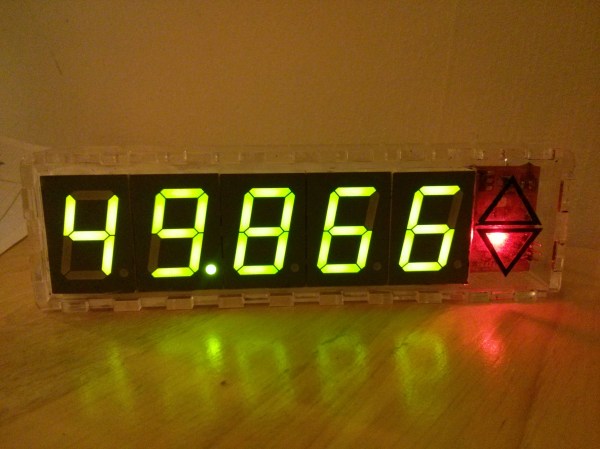
[ch00f] managed to capture some holiday spirit this year by translating all of A Christmas Carol to scrolling text. Dickens’s work has long since entered public domain, which led [ch00f] to wire up a GeekCatch programmable display from Amazon. It has a low refresh rate, which means videos look a bit goofy, but it’s perfectly acceptable for text. [ch00f] ditched the remote control and instead used the display’s serial connection to program in the novella. Unfortunately, he could not find any documentation for the serial protocol, but he was able to reverse engineer it with some freeware applications found online.

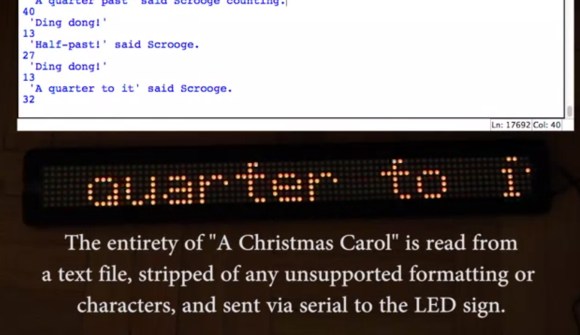
It takes over six hours for the sign to spit out the entirety of A Christmas Carol, which easily surpassed the display’s limited text buffer. [ch00f] instead had to send text to the display one paragraph at a time via a custom Python script. This solution takes advantage of the sign’s fixed-width font to estimate the time it takes for each character to scroll by, then immediately feeds the sign a new line.

Check out the blog post for a quick teardown of the display itself and for a detailed description of the protocol in case you decide to use this display for a project. Stick around for a video below!

Continue reading “Serializing Dickens To LEDs”

Aluminum Bitcoin Keychain

mVCyX2K

Here’s a cool way to bring a physical presence to your Bitcoins: a custom CNC milled QR code Bitcoin address!

[ch00f], one of our occasional writers here at Hack a Day, has just finished this slick aluminum Bitcoin QR code keychain. He started by creating a vanity Bitcoin address using a program called OCLVanitygen, consisting of his dad’s first initial and last name at the beginning, followed by a random string of numbers. It only took his Radeon HD6790 6 hours to solve, which amounted to approximately half a trillion guesses in order to find the address! 

He then took his shiny new Bitcoin address and created a QR code from it using an web-based generator. [ch00f] then increased the resolution of the image in Photoshop and imported it into a CNC program called CamBam. A converted CNC Taig mill got to work tracing out the code with a 0.049″ carbide end. The total milling time was just over 2 hours. A bit of black spray paint, some sanding, and a few layers of clear coat later and the keychain is done!

[via Reddit]

Mains Frequency Display

[James] lives in the UK where the frequency of electricity is suppose to be 50Hz, but it tends to fluctuate based on supply and demand. He decided he wanted a display to track this.

Now, the National Grid Website shows a real-time graph of the last 60 minutes. But that’s way too easy. Time to bust out the soldering iron!

Armed with pencil and paper [James] scribbled down some ideas on how to count the frequency — he settled on counting 200 cycles, which means that at 50.000Hz, it would take exactly 4 seconds. The next problem was getting a timing source that was accurate enough for the job. An ATtiny84 wouldn’t do the trick (too inaccurate), nor would an external crystal (too expensive) — But a real-time clock? That’s the ticket! He’s using a DS3231 RTC chip, which at +/- 2ppm 32.768kHz is more than precise enough.

Some math, programming, and soldering later and the display is complete! He’s even added an up/down arrow to show the most recent trend of the electricity.

Nice one [James]! Last year [Ch00f] did a similar project, where he tore down a 194 discrete transistor clock kit to see how it worked — as an aside, he needed to know how accurate the 60Hz coming out of his wall was!

An Engineer’s Emergency Business Card

breakout_3

We’ve seen lots of circuit board business cards before, but none quite like this. [Saar] calls it the Engineer’s Emergency Business Card.

Since he actually makes a living from making circuit boards, it made sense for him to make a truly functional card. But unlike some of the fancier cards we’ve seen, you can’t plug it into your computer, or even open a beer with it! In fact, all it does is light up when a voltage is applied across the main pins.

But wait — why are all the components in through holes? Well, according to [Saar], that’s because it’s designed to be the electrical engineers emergency kit!

When all hope is lost, the MacGuyver engineer could snap out one of the components and save the day. Recall the countless times you desperately needed a 1 KOhm resistor to fix an amplifier at a party, only to see the girl you were trying to impress slip away with an OCaml programmer? Never again with this little kit. You even have 2 cm of solder in there to make sure the connection’s electrically solid!

We love it. Whether or not anyone will ever successfully use it in an emergency situation such as [Saar’s] hypothetical one is another question altogether. But we do have to give him creativity points for it, the artistic traces look awesome!

Light Up Earrings

light up earrings

Unfortunately [ch00f’s] been too busy to write for Hack a Day lately, but he has finished off an awesome little project — Christmas LED earrings!

As with all his projects, there is a brilliant write up that covers everything — even for the stuff that didn’t work. But what we really have to admire about this project in particular is the scale at which he was working. The tiny battery squished in between the two boards? A mere 19mAh. Which is actually enough to power the earrings for a few hours, but is only the size and thickness of a few microSD cards!

The second thing that really popped out at us was the boards themselves, there’s just no room for a programming header! To work around this [ch00f] actually made the PCBs in 3 segments, programmed it, and then cut off the programming header section! If that’s not enough ingenuity, how about this – He also included hall effect sensors on-board to turn them off while charging! Not to mention an intricate wood box to charge them in…

Stick around after the break to see the great demo video, it even has some classy music from the 1930’s which really sets the mood.

Continue reading “Light Up Earrings”

Hackaday Staff Update

2013-08-15-Hackaday-Staff

It’s been just over three weeks since Supply Frame bought Hackaday and a lot has been going on. Almost all of it has been behind the scenes as we make our way through the scaffolding that was built up over the years to run the site. I’ll share more on that as things develop. But now I’d like to introduce you to the staff.

We’ve actually had a staff page for about a year but I’m not sure it was ever announced. Check out the Staff roll call to see a picture and bio of each of our team members. [Brian Benchoff] and I make up the editorial team. [Eric Evenchick] joins us once again as a writer. And over the last couple of weeks we hired [Mathieu Stephan] (aka Limpkin), [Josh Marsh], and [Michael Ciuffo] (aka ch00f). The six of us come from a wide range of backgrounds. We have interests and skill sets that complement each other, and as we get used to working as a team this will equate to better features and more original content. Please join me in welcoming the new writers, and long live Hackaday!


Ghostly Images Captured Only On Camera

is that a logo

A while back our good buddy [Ch00f] built a QR code clock, unreadable to both humans and computers. A human couldn’t read the clock because of the digital nature of a QR code, and because the clock used persistence of vision in driving the LEDs, a digital camera can’t capture all the pixels in the QR code at the same time. It’s a highly useless but impressive art piece. Now, [Ch00f] is turning that build on its head. He created a rudimentary display that is invisible to the human eye, but easily detected with a digital camera.

This build exploits a basic property of CMOS digital cameras – the rolling shutter. Because it takes time to get pixels off a modern digital image sensor, each picture is actual a composite of many different strips, each taken slightly out of sequence. You can see this for yourself by taking a picture of something rotating very fast with your camera phone; a picture of an airplane propeller will make the blades appear curved, or look like [Dr. Seuss] has an aeronautical engineering degree.

To create his display, [Ch00f] found a few inexpensive fiber optic lights. By aligning a few of these into columns and lighting them up in a precise sequence, he can exploit the rolling shutter and make an image appear. To the human eye, it looks like a solid wall of illuminated fiber optics.

As for how practical this build is, [Ch00f] says not much. For cell phone cameras, you’d need to have a very, very short exposure time for this to work. The only way to do that is to make this display unbelievably bright, or just put it out in the sun. We can’t see that being practical for any potential use case, but we’d be more than happy to see a large-scale attempt at displaying images with this technique.