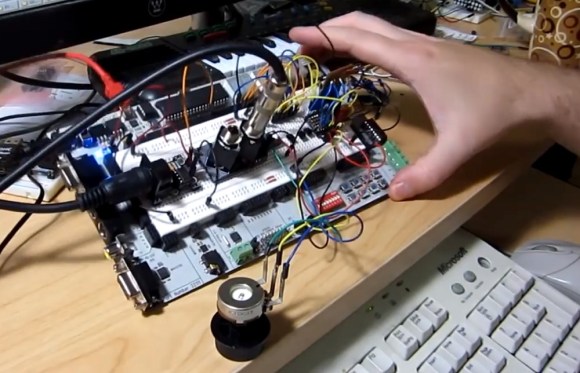
Circuit Bent Keyboard Is Pretty In Pink

If you’re anything like us, more than a few of your projects were borne out of the fact that you had some crusty bit of gear that was badly in need of a second lease on life. Whether it was a hand-me-down or pulled out of the garbage, we’ve all at one time or another had some piece of hardware in our hands that might not be worth anything in its current form, but would make an awesome excuse for warming up the soldering iron.

That’s what happened when [joekutz] got his hands on this exceptionally juvenile keyboard toy. In its original state, it was so janky it couldn’t even reliably detect two keys being pressed at the same time; sort of a problem for a keyboard. So he decided to pull it apart and use it as a circuit bending playground. Thanks in part to how much free space was inside of the case, he was able to pack in a number of interesting modifications which he’s kindly detailed on Hackaday.io.
[joekutz] started by adding a headphone jack to the device, as well as a switch to disable the keyboard’s speaker. That allows not only listening to digital jams in private, but makes it possible to capture high-quality audio when connected to the computer. He then started poking around the PCB with a resistor and listening for changes. When the pitch of the keyboard changed, he soldered a potentiometer into its place and now had a way to adjust it on the fly.

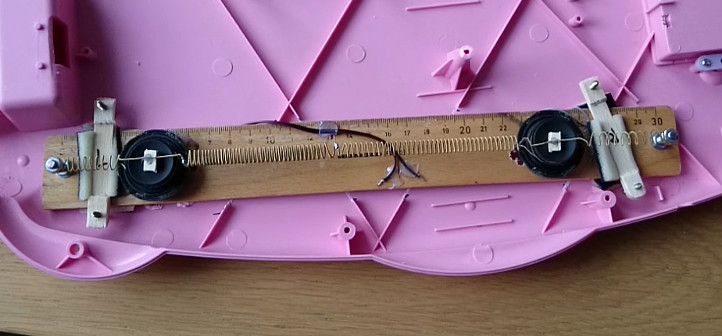
Of particular note is the clever physical reverb he came up with. A microphone and speaker are connected to each other with a spring made out of an old guitar string. Audio from the keyboard’s PCB is played on the speaker and a TDA2022 low-voltage amplifier boosts the signal from the microphone. The end result is a very cool ethereal metallic effect.

If you’re looking for a slightly larger DIY reverb, we’ve covered a few builds in the past which should give you some inspiration. You might want to check the dumpster behind the abandoned local Toys R’ Us for some donor keyboards while you’re at it.


Continue reading “Circuit Bent Keyboard Is Pretty In Pink”

Circuit Bent Casio SK-1 Gets An Arduino Brain

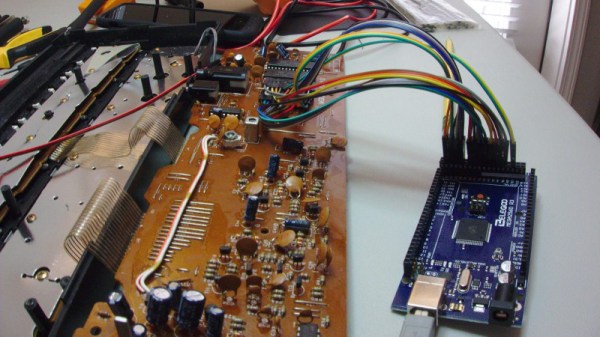
The Casio SK-1 keyboard is fairly well-known in the “circuit bending” scene, where its simple internals lend themselves to modifications and tweaks to adjust the device’s output in all sorts of interesting ways. But creating music via circuit bending the SK-1 can be tedious, as it boils down to fiddling with the internals blindly until it sounds cool. [Nick Price] wanted to do something a bit more scientific, and decided to try replacing his SK-1’s ROM with an Arduino so he could take complete control it.

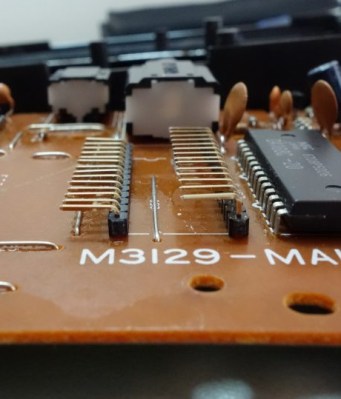
Replacing the ROM chip with header pins.

That’s the idea, anyway. Right now he’s gotten as far as dumping the ROM and getting the Arduino hooked up in place of it. Unfortunately the resulting sound conjures up mental images of a 56K modem being cooked in a microwave. Clearly [Nick] still has some work ahead of him.

For now though, the progress is fascinating enough. He was able to pull the original NEC 23C256 chip out of the keyboard and read its contents using an Arduino and some code he cooked up, and he’s even put the dump online for any other SK-1 hackers out there. He then wrote some new code for the Arduino to spit data from the ROM dump back to the keyboard when requested. In theory, it should sound the same as before, but with the added ability to “forge” the data going back to the keyboard to make new sounds.

The result is what you hear in the video linked after the break. Not exactly what [Nick] had in mind. After some snooping with the logic analyzer, he believes the issue is that the Arduino can’t respond as fast as the original NEC chip did. He’s now got an NVRAM chip on order to replace the original NEC chip; the idea is that he can still use the Arduino to reprogram the NVRAM chip when he wants to play around with the sound.

We’ve covered some pretty fancy circuit bent instruments here in the past, but if you’re looking for something a bit easier to get your feet wet we ran a start-to-finish guide back in the Ye Olden Days of 2011 which should be helpful.

Continue reading “Circuit Bent Casio SK-1 Gets An Arduino Brain”

The Components Are INSIDE The Circuit Board

Through-hole assembly means bending leads on components and putting the leads through holes in the circuit board, then soldering them in place, and trimming the wires. That took up too much space and assembly time and labor, so the next step was surface mount, in which components are placed on top of the circuit board and then solder paste melts and solders the parts together. This made assembly much faster and cheaper and smaller.

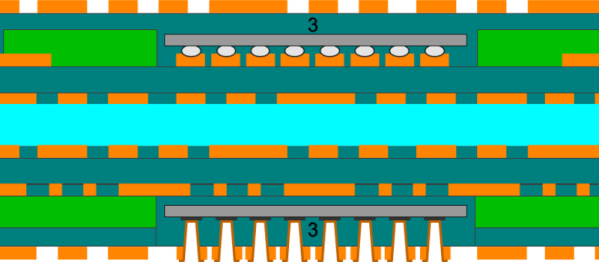
Now we have embedded components, where in order to save even more, the components are embedded inside the circuit board itself. While this is not yet a technology that is available (or probably even desirable) for the Hackaday community, reading about it made my “holy cow!” hairs tingle, so here’s more on a new technology that has recently reached an availability level that more and more companies are finding acceptable, and a bit on some usable design techniques for saving space and components.

Continue reading “The Components Are INSIDE The Circuit Board”

BionicANTs from FESTO

Robot Ants Wear Circuitry As Exoskeleton

[FESTO] keeps coming up with new tricks that make us both envious and inspired. Take their bionicANTs for example. Watching a group of them cooperate to move objects around looks so real that you’re instantly reminded of the pests crawling across your floor, but looking at them up close they’re a treasure trove of ideas for your next robot project.

Ant exoskeleton as circuit board

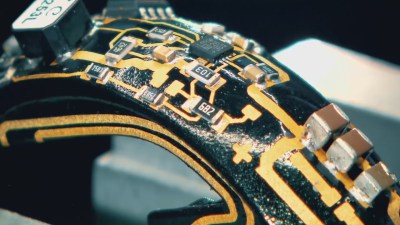
The exoskeleton is 3D printed but they then use the outer surface of that exoskeleton as a circuit board for much of the circuitry. The wiring is “painted on” using a 3D MID (Molded Interconnect Device) process. While FESTO didn’t give specifics about their process, a little research shows that 3D MID involves the 3D printed object being made of a special non-conductive metal material, a laser then “drawing” the traces in the material, and then dipping the object in various baths to apply copper, nickel and gold layers. We mortal hackers may not have the equipment for doing this ourselves in our workshops but seeing the beautiful result should be inspiration enough to get creative with our copper tape on the outer surfaces of our 3D printed, CNC’d, or hand-carved parts.

We also like how they took a the mouse sensor from under a regular computer mouse and attached it to the ant’s underside, pointing down for precision dead reckoning. For the legs they used three piezo bending transducers. However, these give a deflection of only 1.5mm in both directions, not enough for walking. They increase this to over 10mm with the addition of a plastic hinge, another idea to keep in mind when building that next tiny robot. And there are more ideas to be taken advantage of in their ants, which you can see being built in the video below.

Continue reading “Robot Ants Wear Circuitry As Exoskeleton”

Circuit Bent CD Player Is Glitch Heaven

Circuit bending is the art of creatively short circuiting low voltage hardware to create interesting and unexpected results. It’s generally applied to things like Furbys, old Casio keyboards, or early consoles to create audio and video glitches for artistic effect. It’s often practiced with a random approach, but by bringing in a little knowledge, you can get astounding results. [r20029] decided to apply her knowledge of CD players and RAM to create this glitched out Sony Discman.

Continue reading “Circuit Bent CD Player Is Glitch Heaven”

Circuit Bent Toy Keyboard Is MIDI Controlled

tymkrsKeyboard
The [Tymkrs] crew has come up with a pretty neat circuit bent toy keyboard hack. It’s been a while since we’ve seen a good circuit bending hack. This project started as a way to demo the [Tymkrs] “MIDI In Me” kit. A cheap toy keyboard was sacrificed for its sound generator board. Like many cheap mass-produced toys, this board is based upon a COB (chip on board) package. The silicon die of the main ASIC is placed directly on the PCB and bonded out to pads. A round epoxy blob keeps everything protected.

The [Tymkrs] found a number of the chip’s pads were unused in their keyboard. The inputs appeared to trigger drums, possibly for use in a different toy. These inputs, coupled with the ‘demo song’ buttons turned out to be the basis of this hack. MIDI input is sent to a Parallax Propeller. The prop runs a program that will set its I/O pins based upon MIDI Note On/Off commands. The I/O pins then drive transistors which inject signals into the button inputs of the keyboard.

The [Tymkrs] even went so far as to use a voltage divider on the main clock circuit of the keyboard. Changing the main clock causes a sort of pitch bend effect often heard with circuit bent toys. As with the buttons, a MIDI signal commands the prop to enable or disable oscillator signal injection. A potentiometer is used to tweak the oscillator frequency.

Continue reading “Circuit Bent Toy Keyboard Is MIDI Controlled”

LED Headgear Is Marvel Of Free-formed Circuitry

Hackaday contributor [Nick Schulze] popped out an impressive set of LED headgear for a hat-themed party.

[Nick] is no stranger to working with LEDs. Previously he built a blue 8x8x8 cube something like this other 512 node full color version. He had a bunch of LEDs left over from that project and decided to put them to good use.

The first part of the build is the frame itself, made from thick fencing wire. He just started bending it around his head and got an uncomfortable head-shaped hoop to which he could solder. From there, enameled copper wire wraps its way through the system, supplying logic levels to all of the LEDs. Everything is done without a circuit board of any kind. The LED drivers themselves are attached by first using a zip tie to affix a resistor to the frame, then by soldering the TLC5916 chip to that resistor. Even the ATmega8 is included dead-bug style by soldering it to the frame which we think servers as ground. Program it with the free-floating female pin header and you’ll get the fantastic animations seen in the video after the break.

Continue reading “LED Headgear Is Marvel Of Free-formed Circuitry”