Domino Clock Uses An Electromechanical Display

This clock concept uses big dominos with changing faces to display the time. As far as we can tell they haven’t made it through to a finished product yet, but we loved the explaination of the engineering that went into the prototype. After the break you can watch [Eric] explain how he accomplished the design requirements of a slowly changing digit that uses no power to keep its state, which also uses low-power when changing state. To accomplish this he designed a flipping circle that stays put in both the white and black positions once set. When it’s time to change the digits, a coil is energized to push against a magnet in what he calls a single poled motor. Whatever the name, we want to build one ourselves!

Continue reading “Domino Clock Uses An Electromechanical Display”

A Look Inside The Geochron Clock

There are plenty of cool clocks out there, and maps by their very essence are cool, too. But a map that’s also a clock — or is it a clock that’s also a map? — has to be the coolest thing ever.

Of course we’re talking about the Geochron, a world clock that makes the relationship between the Earth and the Sun clear and has graced the offices of executives who want to impress visitors with the global nature of their importance for decades. [Attoparsec] has long coveted one of these electromechanical beauties, and when a used one popped up online for a pittance, at least compared to what they cost new, he jumped at the chance.

The Geochron he ended up with was in need of some TLC, but surprisingly little considering its mid-1980s vintage. The real treat in the video below is getting to see how these wonderful devices work. They’re basically simple slide projectors. While we here in the future would simply do everything in software on a nice flat-screen display, the base map, night-day terminators, and calendar are all contained on transparent elements that move under the power of a synchronous motor across a lighted platen. The analemma display is particularly cool; an indicator tracks the Sun’s position over the Earth with a cam that encodes the equation of time in its shape, moving through its familiar bi-lobed loop as the seasons progress.

Any clock that comes with a set of blueprints for installation purposes is alright in our book, and kudos to [Attoparsec] for landing this prize and getting it back in shape. His description of it as “the greatest clock of all time” is apt, but perhaps with a little competition. Or maybe a lot.

Continue reading “A Look Inside The Geochron Clock”

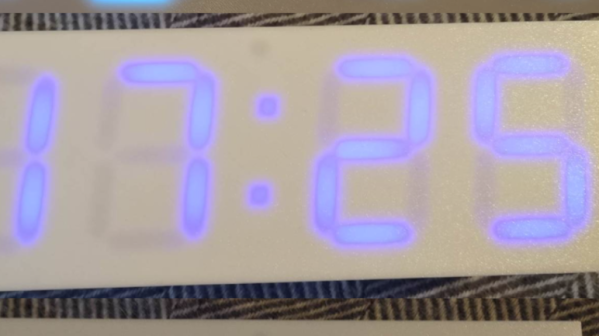
Simple NTP Clock Uses Custom RGB 7-Segment Displays

A great majority of hackers build a clock at some point. It’s a great way to get familiar with electronics and (often) microcontrollers, and you get to express some creativity along the way. Plus, you get something useful when you’re done! [Tadas Ustinavičius] recently trod this well-worn path and built a neat little NTP clock of their own.

The build uses an ESP 12F as the core of the operation. It’s charged with querying an NTP time server via its WiFi connection in order to maintain accurate timekeeping around the clock. For display, it drives a series of custom 7-segment displays that [Tadas] built using 3D-printed housings. They use WS2812B addressable LEDs and thus can display a rainbow of colors.

For initial configuration, the phone creates its own WiFi hotspot with a web interface for changing settings. Once configured, it connects to the Internet over WiFi to query an NTP server at regular intervals.

It’s a simple build that does a simple job well. Projects like these can be very valuable, as they teach you all kinds of useful skills. If you’ve been working on your own clock design, don’t hesitate to let us know. You can use a microcontroller, relays, or even a ball.

Kinetic Clock Is A Clean Modern Way To Tell Time

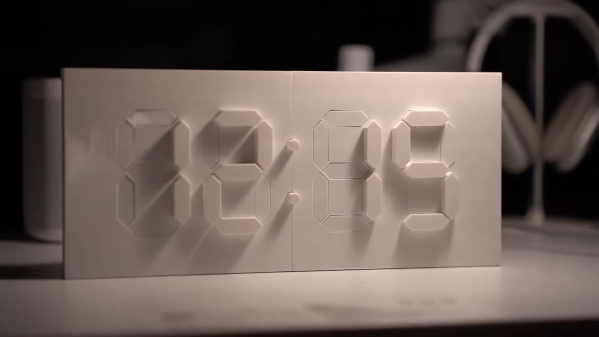
Hackers and makers aren’t usually too interested in basic round analog clocks. They tend to prefer building altogether more arcane and complicated contraptions to display numbers for the telling of time. [alstroemeria] did just that with this nifty kinetic clock build.

The basic concept of the kinetic clock is to have a flat plate, which individual segments raise out of to create a physical (instead of illuminated) 7-segment display. This is achieved with servos which push the segments in and out using a small rack mechanism. It’s not a sophisticated build; it simply uses 30 servos to handle all the segments needed to tell time. Thus, the Arduino Mega was the perfect tool for the job. With a sensor shield added on, it has an abundance of IO, driving a ton of servos is a cinch. There’s also a DS3231 real time clock to help it keep accurate time.

Incidentally, it’s a hefty thing to print, according to YouTuber [Lukas Deem] who replicated the project. It took around 85 hours to print, and a total of 655 grams of filament – not counting mistakes and trashed parts.

And if you think you’re having deja-vu, you might well be. We’ve seen a take on this exquisite design before. We liked it then, and we like it now.

Overall, it’s a stylish build that looks as good as your 3D printer’s output will allow. A resin printer would be a massive boon in this regard. Video after the break.

Continue reading “Kinetic Clock Is A Clean Modern Way To Tell Time”

Clock Escapement Uses Rolling Balls

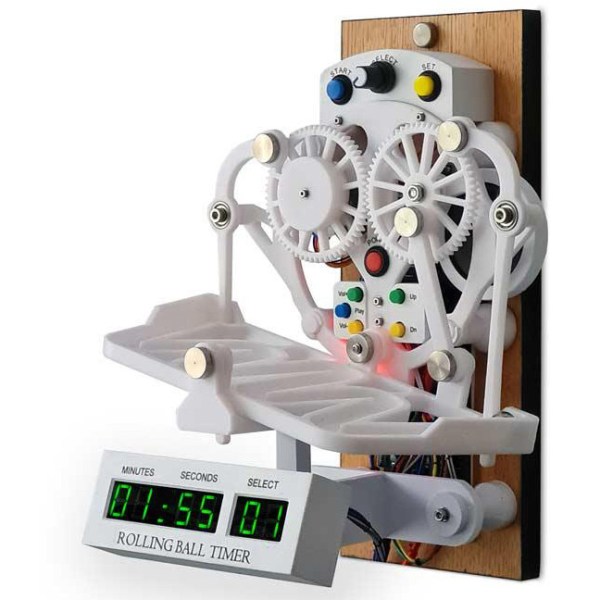
The escapement mechanism has been widely used for centuries in mechanical clocks. It is the mechanism by which a clock controls the release of stored energy, allowing it to advance in small, precise intervals. Not all mechanical clocks contain escapements, but it is the most common method for performing this function, usually hidden away in the clock’s internals. To some clockmakers, this is a shame, as the escapement can be an elegant and mesmerizing piece of machinery, so [Brett] brought his rolling ball escapement to the exterior of this custom clock.

The clock functions as a kitchen timer, adjustable in 10-second increments and with several preset times available. The rolling ball takes about five seconds to traverse a slightly inclined, windy path near the base of the clock, and when it reaches one side, the clock inverts the path, and the ball rolls back to its starting place in another five seconds. The original designs for this type of escapement use a weight and string similar to a traditional escapement in a normal clock. However, [Brett] has replaced that with an Arduino-controlled stepper motor. A numerical display at the bottom of the clock and a sound module that plays an alert after the timer expires rounds out the build.

The creation of various types of escapements has fascinated clockmakers for centuries, and with modern technology such as 3D printers and microcontrollers, we get even more off-the-wall designs for this foundational piece of technology like [Brett]’s rolling ball escapement (which can also be seen at this Instructable) or even this traditional escapement that was built using all 3D-printed parts.

Continue reading “Clock Escapement Uses Rolling Balls”

Low-Power Challenge: Making An Analog Clock Into A Calendar With A 50-Year Life

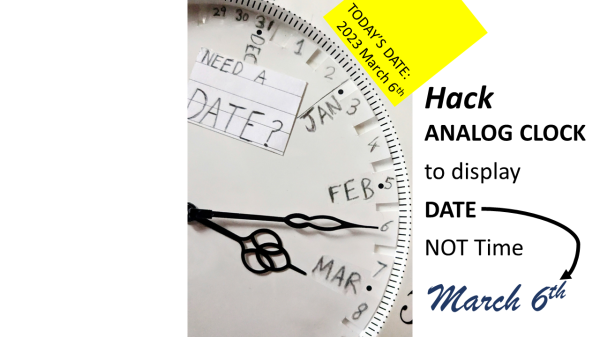
You have to be pretty ambitious to modify a clock to run for 50 years on a single battery. You also should probably be pretty young if you think you’re going to verify your power estimates, at least in person. According to [Josh EJ], this modified quartz analog clock, which ticks off the date rather than the time, is one of those “The March of Time” projects that’s intended to terrify incentivize you by showing how much of the year is left.

Making a regular clock movement slow down so that what normally takes an hour takes a month without making any mechanical changes requires some clever hacks. [Josh] decided to use an Arduino to send digital pulses to the quartz movement to advance the minute hand, rather than let it run free. Two pulses a day would be perfect for making a 30-day month fit into a 60-minute hour, but that only works for four months out of the year. [Josh]’s solution was to mark the first 28 even-numbered minutes, cram 29, 30, and 31 into the last four minutes of the hour, and sort the details out in code.

As for the low-power mods, there’s some cool wizardry involved with that, like flashing the Arduino Pro Mini with a new bootloader that reduces the clock speed to 1 MHz. This allows the microcontroller and RTC module to run from the clock movement’s 1.5 V AA battery. [Josh] estimates a current draw of about 6 μA per day, which works out to about 50 years from a single cell. That’s to be taken with a huge grain of salt, of course, but we expect the battery will last a long, long time.

[Josh] built this clock as part of the Low-Power Challenge contest, which wrapped up this week. We’re looking forward to the results of the contest — good luck to all the entrants!

Decorative Clock Uses LED Strips To Beautiful Effect

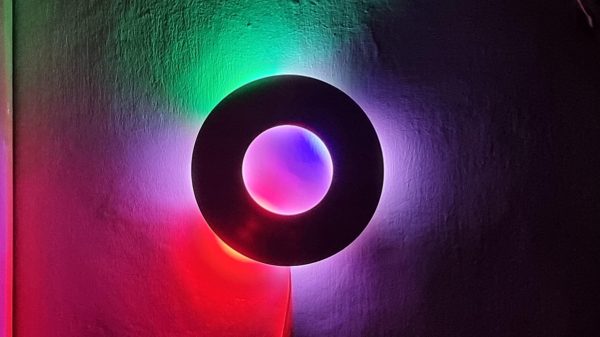
Clocks used to be dowdy old things with mechanical hands and sometimes even little cuckoo birds that would pop out to chime the hour. [David] built something altogether more modern that uses shifting colors on LED strips to tell the time.

The core of the build is an ESP8266, which queries an NTP time server to keep itself synced up with the current time as accurately as possible. It then controls a WS2812B LED strip to display the time. The strip itself is hidden in a 3D-printed housing behind an opaque wooden ring, with the light from the LEDs diffusing out nicely on to the wall upon which the clock is mounted.

The display shows three “hands” in the colors it projects on the wall. The red second hand is projected inside and outside the ring. The minute hand is green, and projects outside the ring. Meanwhile, the hour hand is blue, and projects inside the ring. Without any numerical markings, you won’t get an exact reading of the time, but you can figure it out closely enough. As a bonus, the clock looks like a stylish light-based wall sculpture and your guests may not even realizes it tells the time.

We’ve featured [David’s] work before too, in the form of the handy ESP8266 breadboard socket. Video after the break.

Continue reading “Decorative Clock Uses LED Strips To Beautiful Effect”