A Look At All The Badge Hacks Of Supercon 2023

For those of you who’ve had the opportunity to join us in Pasadena for Supercon, you’ll know it’s a wild ride from start to finish. Singling out a single moment as our favorite is pretty much impossible, but certainly the Sunday Badge Hacking Ceremony has to rank up there. It’s the culmination of ~78 hours of intense hardware and software hacking, and that’s not even counting the pre-show work that attendees often put into their creations. Every year, without fail, this community manages to pull off badge hacks that are beyond anything we could have imagined — and we’re the ones who made the thing in the first place.

Unfortunately, in the mad rush, we’ve never had a chance to actually photograph the hacked badges and share them with the Hackaday readers. This year, at the urging of some of the badge hackers themselves, we were able to throw together a suitable overhead light at the last minute and actually snapped shots of each badge after it was presented to the audience.

The resulting images, sorted by badge hacking category, are below. While some proved difficult to photograph, especially with an impromptu setup, we’re happy to at least have a complete record of this year’s creations. Hopefully we’ll be able to improve on our technique for 2024 and beyond. If yours shows up, or if you’d like to share your appreciation, sound off in the comments below!

Continue reading “A Look At All The Badge Hacks Of Supercon 2023”

Hackaday Superconference 2023: First Round Of Speakers Announced!

Hackaday Supercon 2023 is almost upon us, and looking over the roster of fantastic talks gets us in the mood already.  We hope that it has the same effect on you too.

Supercon is the Ultimate Hardware Conference and you need to be there! We’ll announce the rest of the speakers, the workshops, and give you a peek at the badge over the next couple weeks. Supercon will sell out so get your tickets now before it’s too late. And stay tuned for the next round of reveals on Tuesday! Continue reading “Hackaday Superconference 2023: First Round Of Speakers Announced!”

Building A WiFi Picture Frame With An EInk Display

LCD photo frames never really caught on — by emitting light, they didn’t seamlessly blend in with a home’s decor in the way printed photos do. [Sprite_tm] decided to see if a color e-Ink screen could do any better, and whipped up a WiFi-enabled photo frame using a Waveshare display.

The part in question is a 5.65-inch display with 640 x 448 resolution, and is capable of displaying seven colors. It’s not designed to display photorealistic images, so much as display simple graphics with block colors. However, with some dithering, [Sprite_tm] suspected it might do an okay job. An algorithm that uses Floyd-Steinberg diffusion and the CIEDE2000 color space takes regular RGB images and breaks them down into dithered images that are displayed using the screen’s 7 available colors.

The build relies on an ESP32-C3, which drives the display and fetches new images daily over WiFi. Thanks to the e-Ink screen, which uses zero power when not updating, the whole setup runs off two AA batteries and a Natlinear LN2266 boost converter.

There are some limitations; the screen’s color space is altogether quite limited, and images don’t look very high-fidelity in such low resolution. However, it does an able job of displaying photos for a device that was never designed to do so. It looks rather handsome all wrapped up as a 3D printed picture frame, and [Sprite_tm]’s monkey test photos are very cute.

Files are on GitHub for those that wish to roll their own. We’ve seen similar works before, like this e-Ink wall-hanging newspaper display that keeps up with the times. If you’ve got your own neat e-ink build, hit us up on the tipsline!

Merry Christmas! Rip And Tear!

If you want a little mayhem on your Christmas tree, you can check out [Sprite_tm]’s tiny PC Christmas ornament. With 3D printing, that isn’t such a tall order, but [Sprite]’s does have a unique ability: it plays DOOM, as you can see in the video below.

The device uses an ESP32, and while [Sprite] had ported the iconic shooter to the microcontroller before, he decided to use a Game Boy port that is more lightweight instead. There were a few reasons for the choice, including the ability to do Bluetooth so you could connect controllers so you can play the game. The only catch was he had to pull off the flash memory and replace it with a larger one (see the second video below).

Granted, the screen is tiny, so it is sort of a novelty. But if you want to have a go, the files are all there. As you might expect, there is a tiny battery and the circuitry required to recharge it, as well. We’d probably make an adapter to let it charge from the Christmas lights, but that can wait for version 2.

The input device handling is a bit strange. Bluetooth BLE devices will automatically grab an input device that is in pairing mode. There is no provision for connecting using the “normal” Bluetooth mechanism. A fun project and you could use the case for some other tiny projects, too. A larger flash on an ESP32 has lots of possibilities, as well.

If you need a primer on the ESP32, we got it. If you want to play DOOM on something truly strange, try seven-segment displays.

Continue reading “Merry Christmas! Rip And Tear!”

Surprisingly Stomp-able Soft Switches

Competition sure brings out the brute in people, doesn’t it? So what do you do when you need a bunch of switches you can let people fist-pound or stomp on repeatedly without them taking damage? You could look to the guitar pedal industry and their tough latching switches, or you could simply build your own smash-resistant buttons as [wannabemadsci] has done.

The main thing about these switches is that they aren’t easily destroyed by shoes or angry fists. That’s because the shiny red push-me part of the button is made by cutting a foam ball in half.

Not easily crush-able Styrofoam, mind you — squishy, coated foam like an indoor football. This is mounted to the top of a sandwich made of hardboard and a couple pieces of easily-compressible foam from craft paintbrushes.

A brass washer is mounted to the middle of both pieces of hardboard, and these have wires soldered to them to read button presses. Then it’s just a matter of hooking it to a microcontroller like any other momentary.

There are all kinds of things you could cut in half for the top, like maybe tennis balls. Or, do what [Sprite_TM] did and use inverted plastic bowls.

The BGA chip in question flipped onto a piecce of breadboard, all its pins broken out with magnet wire.

Heroic Efforts Give Smallest ARM MCU A Breakout, Open Debugger

In today’s episode of Diminutive Device Technology Overview, [Sprite_TM] is at it again – this time conquering the HC32L110. A few weeks ago, we have highlighted the small ARM Cortex M0+ microcontroller, which is outstanding because of its exceptionally small size. We also pointed out a few hurdles, among them – hard-to-approach SDK and documentation, and difficulties making and assembling a PCB for such a small BGA. Today, we witness how [Sprite_TM] bulldozed through all of these hurdles for all of us, and added a few pictures to our collective “outrageous soldering” galleries while at it.

First, he figured out an example layout for this MCU that’s achievable for us even on a cheapest 2-layer board from JLCPCB, keeping distances within the generic tolerance standards by snubbing out a few pins. As a result, we only lose access to four GPIOs – those will have to be kept as inputs, so that nothing burns out. However, that’s the kind of tradeoff we are okay making if it helps us keep our PCB small and lightweight for projects where these factors matter. After receiving the resulting board, he also recorded a short tutorial on soldering such packages at home with a mere hot air gun and a few bare necessities like flux and tweezers – embedded below.

It doesn’t end there, however, as he decided to work around the GPIO fanout limitation in a non-intended way. Evidently, [Sprite_TM] decided to have some fun, taking a piece of regular 0.1″ spacing protoboard and deadbugging the chip with magnet wire, much to our amusement. The resulting contraption, pictured above, worked – and this is ever something you’d like to be able to achieve yourself in times of dire need, whether you make something work or simply to be entertained by making use of a cursed mounting technique, there’s an one-hour-long livestream recording of how this magnet wire contraption came to be. And, of course, that wasn’t the last thing to be shared.

Continue reading “Heroic Efforts Give Smallest ARM MCU A Breakout, Open Debugger”

Peek Behind The Curtains: Conference Badge Design

In the before-times, back when we could have in-person Hackaday Supercons, there was always the problem of the badge. Making a few hundred small electronic thingies, for a smart but broad range of hackers, is tricky. We always want it to do something all on its own, but also ideally to allow enough free range that the motivated badge hacker can make it into something exquisite. Add in the fact that some attendees are hardware types and some are software types, and toss in a price constraint too. Oh, and it has to look good. Tough problem.

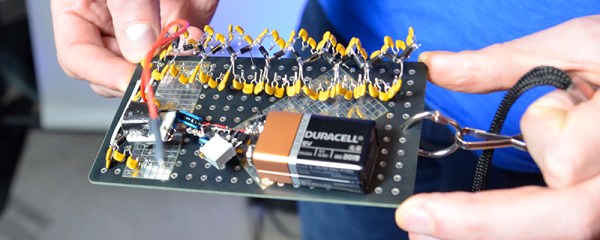
Here’s one extreme solution: the badge at the first Supercon. Faced with essentially zero budget and a tight time constraint, the Hackaday team punted — and produced a prototype board, but had tons of parts on hand for everyone to draw from. And the Hackaday crowd delivered. This was the badge that demonstrates what happens if you leave everything open.

Contrast with the 2018 Belgrade and Supercon badges, which were essentially the same except for color. Here, the hardware interface was limited to a 9-pin header, but the badge itself was a fully functional microcomputer, complete with keyboard and screen. Most of the hacks were written in the native BASIC, though a few hearty souls played around with the alternative CP/M system. This was our most software badge.

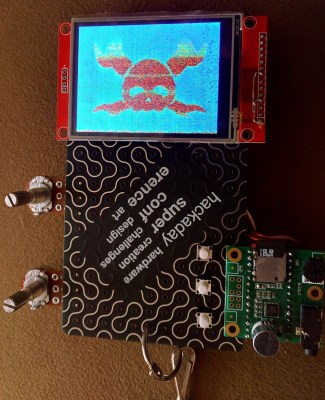
Our last in-person badge, the 2019 Supercon badge, was free rein for both hardware and software hackers. The whole thing was based on an FPGA, with completely custom gateware written by Sprite_tm running RISC-V, but based loosely on the Z80 architecture. This was probably also the badge with the highest hurdle to hackers, but you all came through with inventive hardware add-ons, but also a team that came through with a custom Linux OS running on this never-before-seen virtual environment, enabled by a hardware SDRAM cartridge hack.

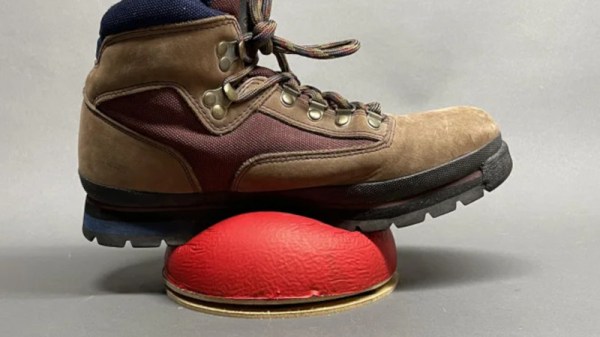
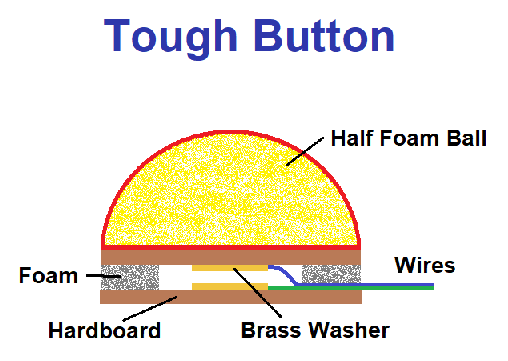
And finally, even before the global supply crisis, even a tight-knit conference like ours could stock-out the world’s supply of a given component. The untold story of the 2016 Belgrade badge is that Voja Antonic bought out the world’s supply of Kingbright 8×8 common-cathode LED matrixes, and had to redesign the board in the last minute to incorporate the common-anode parts too. (Or was it vice-versa?) Lesson learned, the 2016 Supercon badge traded out the LED modules for discrete LEDs. Not gonna stock out on red LEDs.

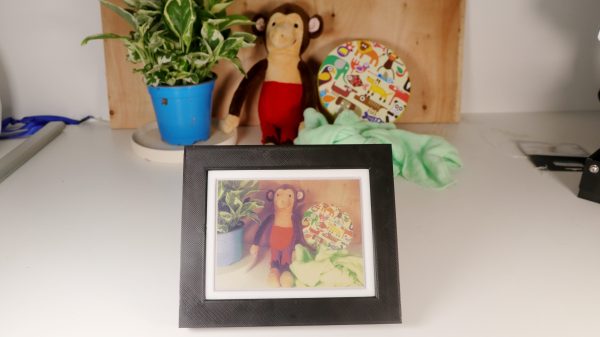
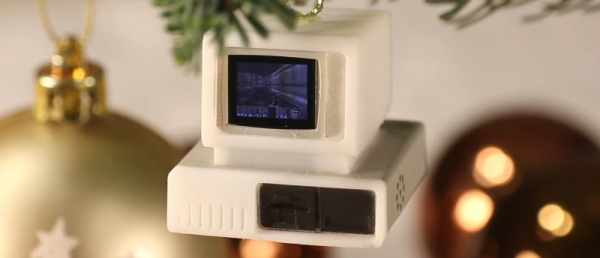
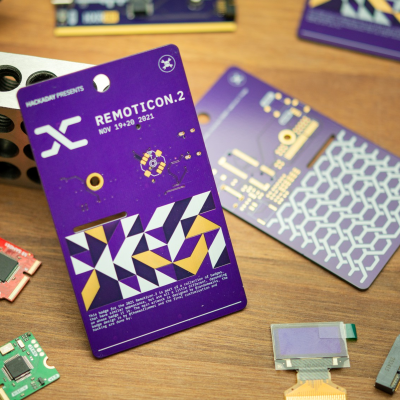
So that’s a long-winded introduction to Thomas Flummer’s unofficial Remoticon 2 badges. With the parts crisis and a virtual conference, you’re on your own to source the badge. Splitting the freedom vs. in-built functionality problem like Samson, he’s got two boards — one a breadboard and the other fully populated. And like all his badges, they both look great. If you manage to get one made by Remoticon next week, be sure to show it off in the Bring-a-Hack. And if you don’t get it in time, bring it by in person to the 2022 Supercon!