Acrylic Light Puzzle Has A Point

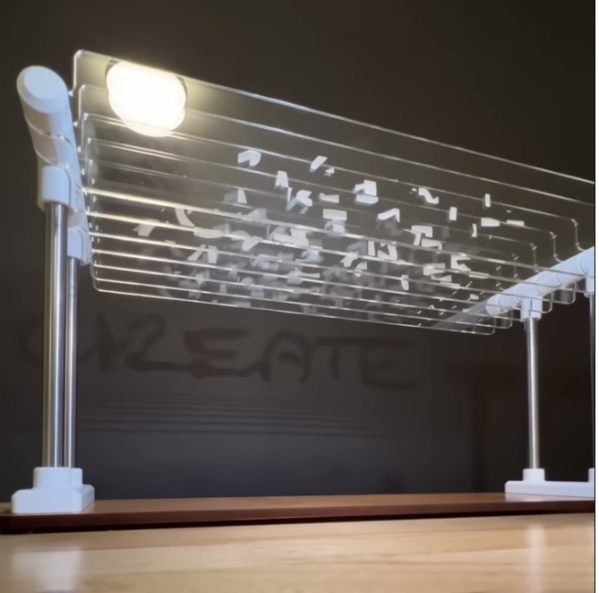
[JBV Creative] recently became a proud owner of a laser cutter and, like most of us, started to think about what they could make with it. The answer was simple, a clever little piece of art or puzzle made of stacked acrylic.

He created some text and extruded it from a single point, but not every part intersected with every plate, giving each plate an indecipherable appearance. This allows a small light source (like the LED likely on the back of your phone) to cast a shadow on the wall. With some 3D printed brackets and spacers, it was mounted to a nice piece of cherry plywood. Overall, the technique is quite simple and easy to understand. [JBV Creative] didn’t include more detail on the process, which is a shame because it looks like a beautiful effect to recreate for some puzzles.

These glowing coasters are fantastic if you’re looking for engraved acrylic with a light source. Or this puzzle that lights up as the pieces are placed.

Continue reading “Acrylic Light Puzzle Has A Point”

3d printed escalator, from side, showing mechanism

Tiny 3D Printed HO Scale Escalator That Works

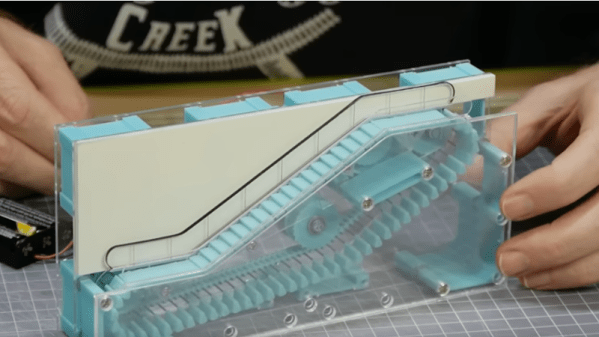
[Luke Towan] has a cool HO scale Escalator mostly made of 3D printed parts, with some laser cut acrylic, for a station on his HO model railroad.

Escalators are mesmerizing to watch – there’s something magical about the stairs unfolding at the bottom and folding up at the top. But they’re very hard to model.

[Luke Towan] has done it – his 3D printed version closely resembles the real thing mechanically. Pins are carried around, cantilevered out from a 3D printed chain. A stair swivels on each pin – at the bottom each stair’s free end rests on a ‘bottom’ far enough down for the stairs to be level, while on the incline the ‘bottom’ is just below the pins. It’s a tricky build.

If you like pushing the envelope of what 3D printing can do this is an interesting project, even if you’re not planning to build an escalator. There are lots of tips for making small mechanisms with 3D printing, and for making small mechanisms that work reliably without stuttering.

He’s not the first to build an escalator. Back in 2015 we covered this wooden escalator for slinkies,  and just recently this 3D printed version from [AlexY].


Prototyping The Prototype

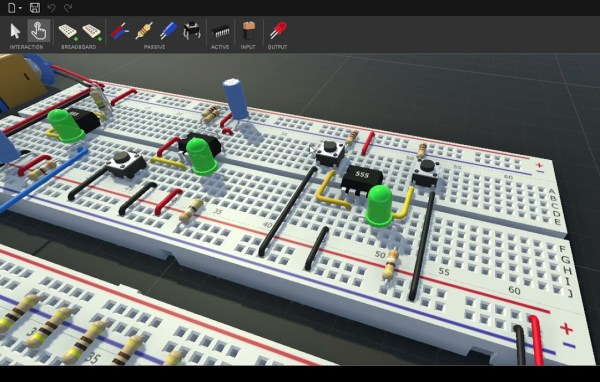
For basic prototyping, the go-to tool to piece together a functioning circuit is the breadboard. It’s a great way to prove a concept works before spending money and time on a PCB. For more complex tasks we can make use of simulation software such as SPICE. But there hasn’t really been a tool to blend these two concepts together. That’s what CRUMB is hoping to solve as a tool that allows simulating breadboard circuits.

Currently, most basic circuit functions are working for version 1.0. This includes passive components like resistors, capacitors, switches, some LEDs, and potentiometers, as well as some active components like transistors and diodes. There are some logic chips available such as 74XX series chips and 555 timers, which opens up a vast array of circuit building. There’s even an oscilloscope feature, plus audio output to incorporate buzzers into the circuit simulation. Currently in development is an LCD display module and improvements to the oscilloscope.

Besides prototyping, this could be useful for anyone, students included, who is learning about circuits without the need to purchase any hardware. The major downside to this project is that it there doesn’t seem to have a free or trial version, the source is not available, and it’s only for sale on Steam, Apple Store, and Google Play. That being said, there is a forum available for users to discuss problems and needs for future versions, so it’s possible that a community could build up around it. We’ve seen previously non-free versions of circuit simulation software become more open after some time, so it’s not out of the realm of possibility.

Thanks to [Thomas] for the tip!

Standing Desk With A Clever Flair

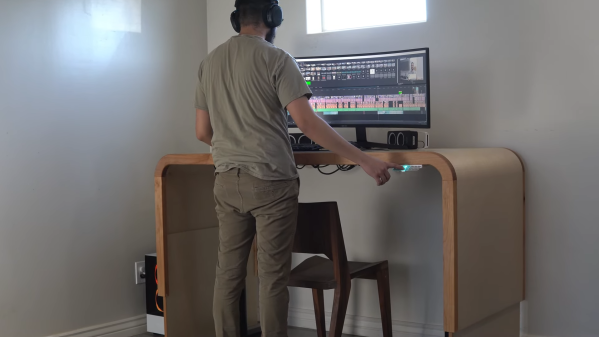
Standing desks (also known as sit-stand desks) are somewhat polarizing. The height is adjustable, but the idea is that you move between sitting and standing while you work. Hundreds of manufacturers are out there, but they’re all the same. Two metal legs that extend and one or more motors to move the legs up and down. [JAR Made] tried to make something slightly different for their standing desk with an extending curved surface.

The build started with some gorgeous alder that was milled into square with a track saw and a planer — no jointer was required. However, he wanted long boards and was debating how to butt join the pieces together and decided on pocket holes with dowels to try and clamp the boards together while the glue dried. The resulting product was one that [JAR Made] was unhappy with. He pivoted on his feet by switching Baltic birch plywood for the main desk surface. Which was bent using a kerf-cutting technique (though just using a track saw rather than a CNC bit).

Here is where you can see him learn from his earlier mistakes. He routed a half lap in the plywood for the butt joint to give it more strength and devised a clever clamping mechanism using CA glue and painter’s tape to get good clamping pressure. The alder from earlier came in use to serve as a front edge for the plywood and a groove to hold the sliding piece of plywood that extends and retracts as the desk goes up and down.

Regular old standing desk legs screw into the underside of the desk and allow it to move up and down. Overall, it’s a wonderful build of a gorgeous desk. We love seeing people make mistakes and then pivot and learn from them. Perhaps the next step is to automate the desk to move on its own.

Continue reading “Standing Desk With A Clever Flair”

VR Sickness: A New, Old Problem

Have you ever experienced dizziness, vertigo, or nausea while in a virtual reality experience? That’s VR sickness, and it’s a form of motion sickness. It is not a completely solved problem, and it affects people differently, but it all comes from the same root cause, and there are better and worse ways of dealing with it.

If you’ve experienced a sudden onset of VR sickness, it was most likely triggered by flying, sliding, or some other kind of movement in VR that caused a strong and sudden feeling of vertigo or dizziness. Or perhaps it was not sudden, and was more like a vague unease that crept up, leaving you nauseated and unwell.

Just like car sickness or sea sickness, people are differently sensitive. But the reason it happens is not a mystery; it all comes down to how the human body interprets and reacts to a particular kind of sensory mismatch.

Why Does It Happen?

The human body’s vestibular system is responsible for our sense of balance. It is in turn responsible for many boring, but important, tasks such as not falling over. To fulfill this responsibility, the brain interprets a mix of sensory information and uses it to build a sense of the body, its movements, and how it fits in to the world around it.

These sensory inputs come from the inner ear, the body, and the eyes. Usually these inputs are in agreement, or they disagree so politely that the brain can confidently make a ruling and carry on without bothering anyone. But what if there is a nontrivial conflict between those inputs, and the brain cannot make sense of whether it is moving or not? For example, if the eyes say the body is moving, but the joints and muscles and inner ear disagree? The result of that kind of conflict is to feel sick.

Common symptoms are dizziness, nausea, sweating, headache, and vomiting. These messy symptoms are purposeful, for the human body’s response to this particular kind of sensory mismatch is to assume it has ingested something poisonous, and go into a failure mode of “throw up, go lie down”. This is what is happening — to a greater or lesser degree — by those experiencing VR sickness.

Continue reading “VR Sickness: A New, Old Problem”

DIY Self-Assembling 4D Printing

A 4D printed object is like a 3D printed object, but it changes shape or self-assembles when its environment changes. [Teaching Tech] has been reading about this technology and decided to try to replicate it using his conventional 3D printer.

His attempts to make a joint that changes when submerged in the water looked at several options: material that can absorb water, material that expands with temperature, and — the selected option — a dissolvable locking mechanism. Essentially, a hinge is held open by a water-soluble lock. When water dissolves the lock, the hinge can spring to its natural position.

Like most experiments, this one had a few false starts. But you always learn something each time. The final design had a TPU hinge and spring with PLA structural beams. The TPU required flat printing, so various pieces have to be rotatable so they can be placed in their final orientation after printing.

Usually, multi-material setups are for printing different colors of the same kind of plastic, it’s possible to use different plastics, but it can be tricky. As a compromise, [Teaching Tech] did one print using PLA and TPU, but printed the PVA locks in a separate pass and installed them on the print at the end. The first finished 4D print wasn’t entirely successful. The hot water slowly dissolved the PVA, but it also deformed the PLA. A redesign of the lock made a big difference.

We aren’t sure this is practical yet, but we are sure someone has a need for this technique and it could be made very practical with a little work. The last time we saw 4D printing, there were magnets involved. We think this is an exciting time where people aren’t just trying to get conventional printing to work well, but are pushing the envelope with new techniques like conical slicing, for example.

Continue reading “DIY Self-Assembling 4D Printing”

A Handy Guide To The Humble BBS

Some of us who’ve been online since the early days fondly remember the web of yore — with its flashing banners, wildly distracting backgrounds, and automatic side-scrolling text. But there was a time before the worldwide web and the Internet as we recognize it today, and the way of communicating in this before-time was through Bulletin Board Systems, or BBS. There are still some who can cite this deep magic today, and this page is perhaps the definitive guide to this style of retrocomputing.

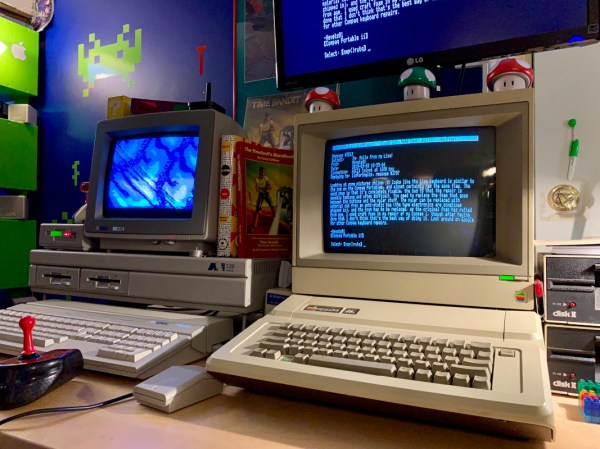
This how-to is managed by [Blake.Patterson] who is using a wide variety of antique machines and some modern hardware in order to access the BBSes still in service. He notes in this guide that it’s possible to use telnet and a modern computer to access them, but using something like an Amiga or Atari will give you the full experience. There are some tools that convert the telephone modem signals from that original hardware to something that modern networking equipment can understand, and while the experience might be slightly faster as a result, it does seem to preserve the nostalgia factor quite well.

For those looking for more specific guides, we’ve featured [Blake]’s work a few times in the past, once with an antique Epson PX-8 laptop and again with a modern ESP8266. It doesn’t take much computing power to get connected to these old services, so grab whatever you can and start BBSing!