Showing a new generation ATTiny on an SMD breakout plugged into a breadboard, being programmed

Come Learn About New ATtiny Generations

As the chip shortage hit, a lot of the familiar ATtiny chips have become unavailable and overpriced, and it mostly stayed the same since then. If you ever searched for “ATtiny” on your favourite electronics component retailer website, however, you’d notice that there’s quite a few ATtiny chips in stock most of the time – just that they’re from a much newer generation than we commonly see, with incompatible pinouts, slightly different architecture and longer model numbers like 412 and 3227. [David Johnson-Davies] from [technoblogy] is here to clarify things, and provide a summary of what the new ATtiny generations have to offer.

In 2019, he posted about 0- and 1-series ATtiny chips, comparing them to the ATtiny series we knew, decyphering the part numbering scheme for us, and providing a comparison table. Now, he’s returned to tell us about the 2- series ATtiny chips, merging the comparison tables together so that you can quickly evaluate available parts by their ROM/RAM size and the SMD package used. He also describes which peripherals are available on which series, as well as nuances in peripheral operation between the three generations. In the end, he reminds us of a simple way to program all these new parts – as it stands, you only need a USB-UART adapter and a 4.7K resistor.

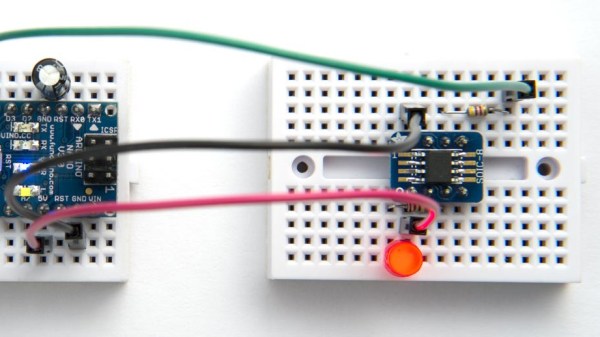
Over the last decades, we’ve seen plenty of inspiring ATtiny projects – squeezing out everything we could out of 5 GPIOs, or slightly more for larger-package ATtiny chips. [David] has been setting an example for us, bringing projects like this function generator, this continuity tester, or an IR receiver with an OLED screen for diagnostics – all with an ATtiny85. It’s not the just pin count that’s a constraint, but the RAM and flash amounts as well – nevertheless, people have fit machine learning and an entire graphics stack into these chips before. If you’re stuck at home unable to do anything, like many of us were during lockdowns, you can always breadboard an ATtiny and see just how much you can get done with it.

I’ve Got Two Turntables And A Laser Engraver

Digital media provides us with a lot of advantages. For something like recording and playing back music, digital copies don’t degrade, they can have arbitrarily high quality, and they can be played in a number of different ways including through digital streaming services. That being said, a number of people don’t feel like the digital experience is as faithful to the original sound as it could be and opt for analog methods instead. Creating analog copies of music is a much tougher matter though, as [Marco] demonstrates by using a laser engraver to produce vinyl records.

[Marco] started this month-long project by assembling and calibrating the laser engraver. It has fine enough resolution to encode analog data onto a piece of vinyl, but he had to create the software. The first step was to generate the audio sample, then process it through a filter to remove some of the unwanted frequencies. From there, the waveform gets made into a spiral, accounting for the changing speed of the needle on the record as it moves to the center. Then the data is finally ready to be sent to the laser engraver.

[Marco] did practice a few times using wood with excellent success before moving on to vinyl, and after some calibration of the laser engraver he has a nearly flawless 45 rpm record ready to hit the turntable. It’s an excellent watch if not for anything than seeing a working wood record. We’ve actually seen a similar project before (without the wood prototyping), and one to play records from an image, but it’s been quite a while.

Thanks to [ZioTibia81] for the tip!

Continue reading “I’ve Got Two Turntables And A Laser Engraver”

I Need A Hackation

In recent times, the “staycation” became a popular alternative to forays far afield: you could take time off and enjoy your local surroundings without having to get stamps in your passport. But I don’t need to go to a museum or visit an amusement park, much less catch up on Stranger Things. I’ve got a project burning in my brain, and what I need is a few days of good solid time in the basement workshop to make some headway. What I need is a Hackation.

Some projects make great after-work distractions, but this one is hard and requires my full brainpower. It’s just not a beer-and-a-project project. So during the week is out. That leaves weekends, but that’s prime time for hanging out with the family. Sure, I can get work in a few hours of good mid-day think/work time in on a Saturday or Sunday when my son is out playing with friends, but there’s something about devoting a whole day or more to cracking a tough nut.

Of course, I’m fully aware that I’ll probably not get it finished in just a day, and that I’ll want another day, or yet another. So be it. Isn’t that the way it is when you’re at the beach in the summer as well? Shouldn’t hacking be at least as high on the priority list as a trip to Disneyland?

Have you ever taken a Hackation? Because that’s what I need. And please tell me there’s a better name for it.

A Practical Discrete 386

There are some chips that no matter how much the industry moves away from them still remain, exerting a hold decades after the ranges they once sat alongside have left the building. Such a chip is the 386, not the 80386 microprocessor you were expecting but the LM386, a small 8-pin DIP audio amplifier that’s as old as the Ark. the ‘386 can still be found in places where a small loudspeaker needs to be powered from a battery. SolderSmoke listener [Dave] undertook an interesting exercise with the LM386, reproducing it from discrete components. It’s a handy small discrete audio amplifier if you want one, but it’s also an interesting exercise in understanding analogue circuits even if you don’t work with them every day.

A basic circuit can be found in the LM386 data sheet (PDF), but as is always the case with such things it contains some simplifications. The discrete circuit has a few differences in the biasing arrangements particularly when it comes to replacing a pair of diodes with a transistor, and to make up for not being on the same chip it requires that the biasing transistors must be thermally coupled. Circuit configurations such as this one were once commonplace but have been replaced first by linear ICs such as the LM386 and more recently by IC-based switching amplifiers. It’s thus instructive to take a look at it and gain some understanding. If you’d like to know more, it’s a chip we’ve covered in detail.

A display with the magic mirror webpage shown running on it

Magic Mirror – On A Low CPU Budget

For quite a few hackers out there, it’s still hard to find a decently powerful Raspberry Pi for a non-eye-watering price. [Rupin Chheda] wanted to build a magic mirror with a web-based frontend, and a modern enough Raspberry Pi would’ve worked just fine. Sadly, all he could get was single-1 GHz-core 512MB-RAM Zero W boards, which he found unable to run Chromium well enough given the stock Raspbian Desktop install, let alone a webserver alongside it. Not to give up, [Rupin] gives us a step-by-step breakdown on creating a low-footprint Raspbian install showing a single webpage.

Starting with Raspbian Lite, a distribution that doesn’t ship with any desktop features by default, he shows how to equip it with a minimal GUI – no desktop environment needed, just an X server with the OpenBox window manager, as you don’t need more for a kiosk mode application. In place of Chromium, you can install Midori, which is a lean browser that works quite well in single-website mode, and [Rupin] shows you how to make it autostart, as well as the little quirks that make sure your display doesn’t go to sleep. The webserver runs in Heroku cloud, but we wager that, with such a minimal install, it could as well run on the device itself.

With these instructions, you can easily build a low-power single-page browser when all you have is a fairly basic Raspberry Pi board. Of course, magic mirrors are a well-researched topic by now, but you can always put a new spin on an old topic, like in this this retro-tv-based build. You don’t have to build a magic mirror to make use of this hack, either – build a recipe kiosk!

A two picture montage of a boy wearing a sonic the hedgehog costume with LEDs in them. The left picture is at night with the boy wearing sunglasses and a face mask with the sonic costume head piece lit up. The right picture is during the day with the boy wearing a face mask, holding a plastic pu mpkin bucket for candy and wearing a lit up sonic the hedgehog costume in the front yard of a house.

LEDs Put New Spin On A Sonic The Hedgehog Costume

[Wentworthm] couldn’t say no to his son’s plea for a Sonic the Hedgehog costume for Halloween but also couldn’t resist sprucing it up with LEDs either. The end result is a surprisingly cool light up Sonic the Hedgehog costume.

a picture of a breadboard with an Arduino Nano on it, with wires going out to 3d printed tear dropped shapes that have LED strips in them, with some LED strips on.

After some experimentation, [Wentworthm] ordered two costumes and ended up mixing and matching the head piece of one with the body suit of the other. For the head, [Wentworthm] created six 3D printed “quills” that had slots for the WS2812B LED strips to slide into and diffuse out the sides, with each quill sliding into the folds of the Sonic head “spikes”. Sewn strips of cloth were used to house the LED strips that were placed down the sides of the costume. An additional 3D printed switch housing was created to allow for a more robust interface to the two push buttons to activate the LEDs. An Arduino Nano, soldered to a protoboard, was used to drive the LED strips with a USB battery pack powering the whole project.

[Wentworthm] goes into more detail about the trials and errors, so the post is definitely worth checking out for more detail on the build. Halloween is always a great source of cool costumes and we’ve featured some great ones before, like a light up crosswalk costume to making a giant Gameboy colour costume.

Video after the break!

Continue reading “LEDs Put New Spin On A Sonic The Hedgehog Costume”

A slide from the presentation, showing the power trace of the chip, while it's being pulsed with the laser at various stages of execution

Defeating A Cryptoprocessor With Laser Beams

Cryptographic coprocessors are nice, for the most part. These are small chips you connect over I2C or One-Wire, with a whole bunch of cryptographic features implemented. They can hash data, securely store an encryption key and do internal encryption/decryption with it, sign data or validate signatures, and generate decent random numbers – all things that you might not want to do in firmware on your MCU, with the range of attacks you’d have to defend it against. Theoretically, this is great, but that moves the attack to the cryptographic coprocessor.

In this BlackHat presentation (slides), [Olivier Heriveaux] talks about how his team was tasked with investigating the security of the Coldcard cryptocurrency wallet. This wallet stores your private keys inside of an ATECC608A chip, in a secure area only unlocked once you enter your PIN. The team had already encountered the ATECC608A’s predecessor, the ATECC508A, in a different scenario, and that one gave up its secrets eventually. This time, could they break into the vault and leave with a bag full of Bitcoins?

Lacking a vault door to drill, they used a powerful laser, delidding the IC and pulsing different areas of it with the beam. How do you know when exactly to pulse? For that, they took power consumption traces of the chip, which, given enough tries and some signal averaging, let them make educated guesses on how the chip’s firmware went through the unlock command processing stages. We won’t spoil the video for you, but if you’re interested in power analysis and laser glitching, it’s well worth 30 minutes of your time.

You might think it’s good that we have these chips to work with – however, they’re not that hobbyist-friendly, as proper documentation is scarce for security-through-obscurity reasons. Another downside is that, inevitably, we’ll encounter them being used to thwart repair and reverse-engineering. However, if you wanted to explore what a cryptographic coprocessor brings you, you can get an ESP32 module with the ATECC608A inside, we’ve seen this chip put into an IoT-enabled wearable ECG project, and even a Nokia-shell LoRa mesh phone!

Continue reading “Defeating A Cryptoprocessor With Laser Beams”