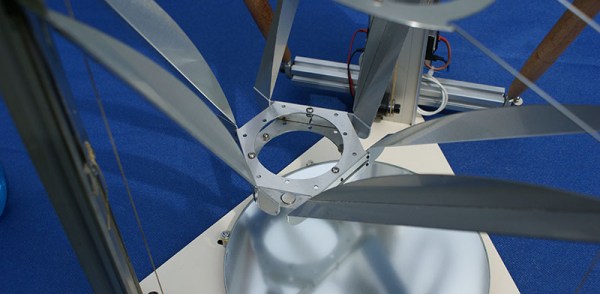
Squishy Robot Hardware Does Well Under Pressure

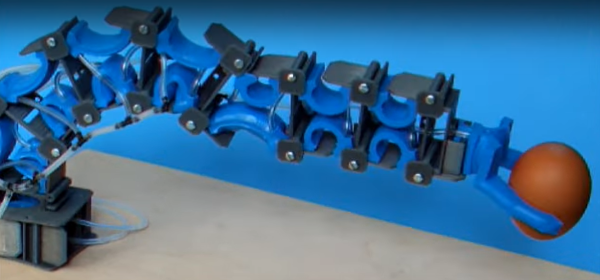
If your jealousy for Festo robots is festering, fret not! [mikey77] has shown us that, even without giant piggy banks, we can still construct some fantastic soft robotics projects with a 3D printer and a visit to the hardware store. To get started, simply step through the process with this 3D Printed Artificial Muscles: Erector Set project on Instructables.

In a nutshell, [mikey77] generously offers us a system for designing soft robots built around a base joint mechanism: the Omega Muscle. Fashioned after its namesake, this base unit contains an inflatable membrane that expands with pressure and works in tandem with another Omega Muscle to produce upward and downward angular movement. Each muscle also contains two endpoints to connect to a base, a gripper, or more Omega Muscles. Simply scale them as needed and stack them to produce a custom soft robot limb, or use the existing STLs to make an articulated soft gripper.

This project actually comes in two parts for robot brawns and brains. Not only does [mikey77] take us through the process for making Omega muscles, we also get a guide for building the pressure system designed to control them. Taken together, it’s a feature-complete setup for exploring your own soft robotics projects with a great starting project. Stay tuned after the break for a demo video in action. There’s no audio, but we’re sure you’ll be letting off an audible pssssh in satisfaction to follow along.

It’s not every day that we see FFF-based 3D printers making parts that need to be airtight. And [mikey77’s] success has us optimistic for seeing more air muscles in future projects down the road. In the meantime, have a look at the silicone-silicon half-breeds that we’ve previously caught pumping iron.

Continue reading “Squishy Robot Hardware Does Well Under Pressure”

A home-made colorimeter

Classic Colorimeter Clone Calibrates Cuvettes’ Contents

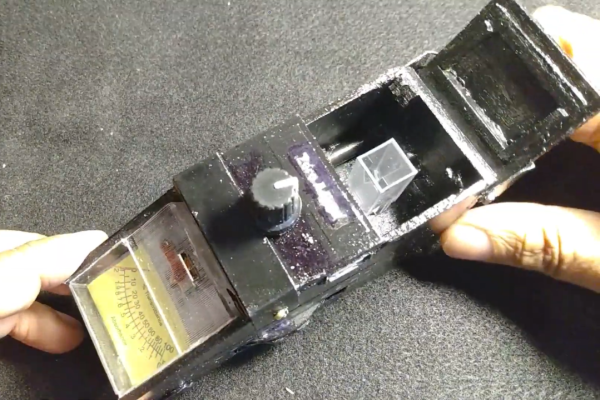
For anyone dabbling in home chemistry, having access to accurate measurement equipment can mean the difference between success and failure. But with many instruments expensive and hard to find, what’s a home chemist to do? Build their own equipment, naturally. [Abizar] went ahead and built himself a colorimeter out of wood and spare electronic components.

A colorimeter (in a chemistry context) is an instrument that determines the concentration of a solution by measuring how much light of a certain wavelength is absorbed. [Abizar]’s design was inspired by the classic Klett-Summerson colorimeter from the 1950s, which uses a light bulb and color filters to select a wavelength, plus a photoresistor to measure the amount of light absorbed by the sample. Of course, a more modern solution would be to use LEDs of various colors, which is exactly what [Abizar] did, although he did give it a retro touch by using an analog meter as the readout device.

The body of the colorimeter is made from laser-cut pieces of wood, which form a rigid enclosure when stacked together. The color wheel holds eleven different LEDs and is made with a clever ratchet mechanism to keep it aligned to the cuvette, as well as a sliding contact to drive current into the selected LED. All parts are painted black to prevent stray reflections inside the instrument, but also make it look cool enough to fit in any evil genius’s lab. In the video embedded below, [Abizar] demonstrates the instrument and shows how it was put together.

While we haven’t seen anyone make their own colorimeter before, we have seen DIY spectrophotometers (which measure the entire absorption spectrum of a solution) and even building blocks to make a complete biochemistry lab.

Continue reading “Classic Colorimeter Clone Calibrates Cuvettes’ Contents”

The Other First Computer: Konrad Zuse And The Z3

Bavarian Alps, Dec. 1945:

Since 1935, Berlin engineer Konrad Zuse has spent his entire career developing a series of automatic calculators, the first of their kind in the world: the Z1, Z2, Z3, S1, S2, and Z4. He accomplished this with a motley group of engineers, technicians, and mathematicians who were operating against all odds. With all the hardships and shortages of war and the indifference of their peers, the fact that they succeeded at all is a testament to their dedication and resourcefulness. And with the end of the war, more hardships have been piling on.

Two years ago, during the Battle of Berlin, bombers completely destroyed the Zuse family home and adjacent workshops on the Methfesselstraße, where they performed research and fabrication. All of the calculators, engineering drawings, and notes were lost in the rubble, save for the new Z4 nearing completion across the canal in another workshop on Oranienstraße. In the midst of all this, Zuse married in January of this year, but was immediately plunged into another crisis when the largest Allied air raid of the war destroyed the Oranienstraße workshop in February. They managed to rescue the Z4 from the basement, and miraculously arranged for it to be shipped out of the Berlin. Zuse, his family, and colleagues followed soon thereafter. Here and there along the escape route, they managed to complete the final assembly and testing of the Z4 — even giving a demonstration to the Aerodynamics Research Institute in Göttingen.

On arrival here in the Bavarian Alps, Zuse found a ragtag collection of refugees, including Dr Werner Von Braun and a team of 100 rocket scientists from Peenemünde. While everyone here is struggling just to stay alive and find food and shelter, Zuse is further worried with keeping his invention safe from prying eyes. Tensions have risen further upon circulation of a rumor that an SS leader, after three bottles of Cognac, let slip that his troops aren’t here to protect the scientists but to kill them all if the Americans or French approach.

In the midst of all this madness, Zuse and his wife Gisela welcomed a baby boy, and have taken up residence in a Hinterstein farmhouse. Zuse spends his time working on something called a Plankalkül, explaining that it is a mathematical language to allow people to communicate with these new machines. His other hobby is making woodblocks of the local scenery, and he plans to start a company to sell his devices once the economy recovers. There is no doubt that Konrad Zuse will soon be famous and known around the world as the father of automatic computers. Continue reading “The Other First Computer: Konrad Zuse And The Z3”

Getting Started With Aluminum Extrusions

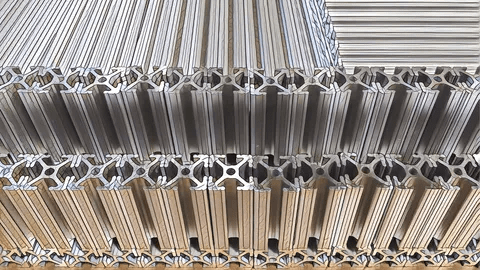
T-slot extrusions used to be somewhat mysterious, but today they are quite common thanks to their use in many 3D printers. However, it is one thing to assemble a kit with some extrusions and another thing to design your own creations with the material. If you ever had a Play-Doh Fun Factory as a kid, then you know about extrusions. You push some material out through a die to make a shape. Of course, aluminum extrusions aren’t made from modeling clay, but usually 6105-T5 aluminum. Oddly, there doesn’t seem to be an official standard, but it is so common that there’s usually not much variation between different vendors.

We use extrusions to create frames for 3D printers, laser cutters, and CNC machines. But you can use it anywhere you need a sturdy and versatile frame. There seems to be a lot of people using them, for example, to build custom fixtures inside vans. If you need a custom workbench, a light fixture, or even a picture frame, you can build anything you like using extrusions. Continue reading “Getting Started With Aluminum Extrusions”

Under Pressure: How Aluminum Extrusions Are Made

At any given time I’m likely to have multiple projects in-flight, by which of course I mean in various stages of neglect. My current big project is one where I finally feel like I have a chance to use some materials with real hacker street cred, like T-slot extruded aluminum profiles. We’ve all seen the stuff, the “Industrial Erector Set” as 80/20 likes to call their version of it. And we’ve all seen the cool projects made with it, from CNC machines to trade show displays, and in these pandemic times, even occasionally as sneeze guards in retail shops.

Aluminum T-slot profiles are wonderful to work with — strong, lightweight, easily connected with a wide range of fasteners, and infinitely configurable and reconfigurable as needs change. It’s not cheap by any means, but when you factor in the fabrication time saved, it may well be a net benefit to spec the stuff for a project. Still, with the projected hit to my wallet, I’ve been looking for more affordable alternatives.

My exploration led me into the bewilderingly rich world of aluminum extrusions. Even excluding mundane items like beer and soda cans, you’re probably surrounded by extruded aluminum products right now. Everything from computer heatsinks to window frames to the parts that make up screen doors are made from extruded aluminum. So how exactly is this ubiquitous stuff made?

Continue reading “Under Pressure: How Aluminum Extrusions Are Made”

3D Printed Parts Let You Hold Work The Way You Want

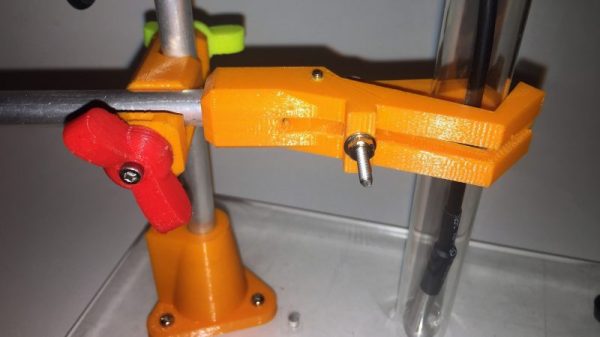
Fixturing and work holding can be huge problems for hackers. Let’s face it – that $5, alligator clip-festooned “Helping Hand” is good for only the smallest of workpieces, and the problem only gets worse as the size scales up. One can jury rig fixtures for things like microscopes and lights, but a systematic approach like this 3D-Printed work fixturing Erector Set really appeals to our need for organization.

As [Tinkers Projects] explains it, the genesis of this project came from a need to mount a microscope firmly over a PCB. Rather than build a one-off fixture, the idea of a complete system of clamps and connectors seemed to make more sense. Based on 10-mm aluminum rods and a bewildering number of 3D-printed pieces, the set has just about everything needed to fixture pretty much anything. There’s a vertical element that acts as the central support, connectors for putting another rod perpendicular to that, plus neat attachments like a three-fingered clamp for small cylindrical objects and a couple of blocks that act like a stick-vise for PCBs and similar workpieces. And yes, there’s even a fixture with alligator clips. The whole thing seems very well thought out and has a little mad scientist vibe to it, but while some fixtures look as if they came right from the chemistry lab, we’d be cautious about chemical compatibility and use near heat sources.

[Elliot Williams] did a rundown of what people are using for helping hands a couple of years ago which made us covet articulating dial indicator arms for our bench. Still, [Tinkers Projects]’ approach has a lot of appeal and is probably cheaper and more versatile to boot.

Folding Robots With Special Materials

When it comes to robots, we usually see some aluminum extrusion, laser-cut parts, maybe some 3D printed parts, and possibly a few Erector sets confabulated into a robot arm. This entry for the Hackaday Prize is anything but. It’s a robot chassis, a 3D printer, and the structural frame for any sort of moving project that’s made out of a special composite material.

[Marc]’s project for the Hackaday Prize is all about articulated mechanisms. Instead of the usual structural components, he’s using Hylite, a special material that’s basically a polypropylene core clad in a sheet of aluminum on both sides. By carefully milling away the aluminum on both sides, [Marc] is creating a living hinge that can be used to build a 3D printer, robot, or really anything else.

This really isn’t a finished project; it’s more of a technology demonstrator. That said, [Marc] has a lot of examples where he can bend these Hylite aluminum plates over on themselves, can create boxes and space frames, and has the ability to create just about any shape he wants. It’s really a highly precise means of bending aluminum with a mill, and has the added benefit of looking really, really good.

Already, [Marc] has a few interesting robots that are built around this construction technology. The first is a remote control focus for a telescope that simply connects an eyepiece to the scope. Actuation is provided pneumatically, and all reports say this example works well. The other example is a flat-pack phone stand. It’s a bit simpler than a focus mechanism, but it is a small and inexpensive way to show off the technology. Great work, and an excellent project in The Hackaday Prize.