Wii-Inspired Controller Built Using Raspberry Pi Pico

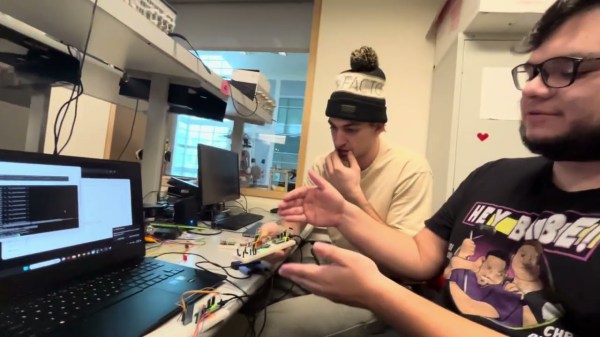
We all thought Nintendo was going to change the world of gaming when it released the Wii all those years ago. In the end, it was interesting but not really fundamentally life-changing for most of us. In any case, [Sebastian] and [Gabriel] decided to build a Wii-like controller for their microcontroller class at Cornell.

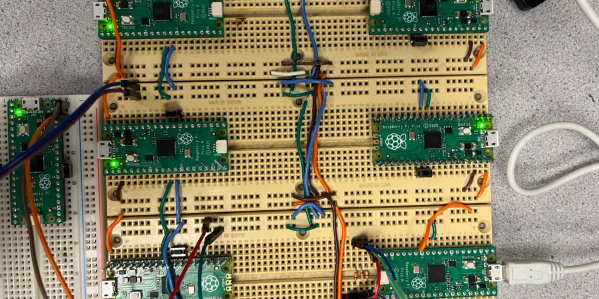
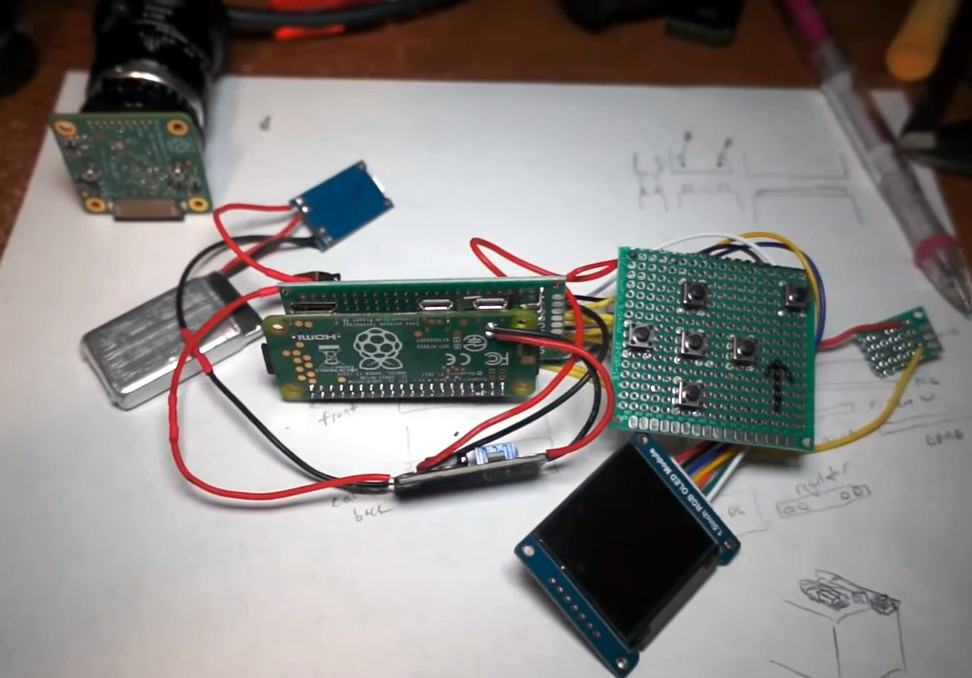
The build uses a pair of Raspberry Pi Pico microcontrollers, communicating over HC-05 Bluetooth modules. One Pico acts as a controller akin to a Wiimote, while the other runs a basic game and displays it on a screen via VGA output. The controller senses motion thanks to a MPU6050 inertial measurement unit, combining both gyros and accelerometers in all three axes.

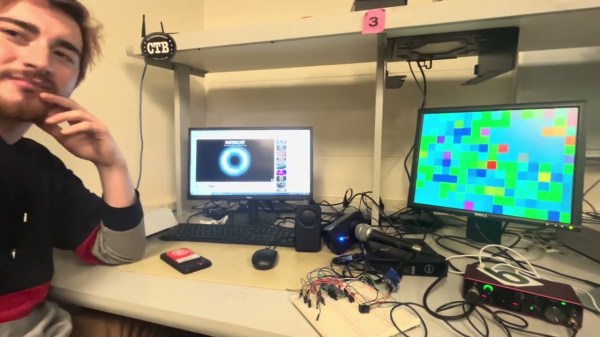
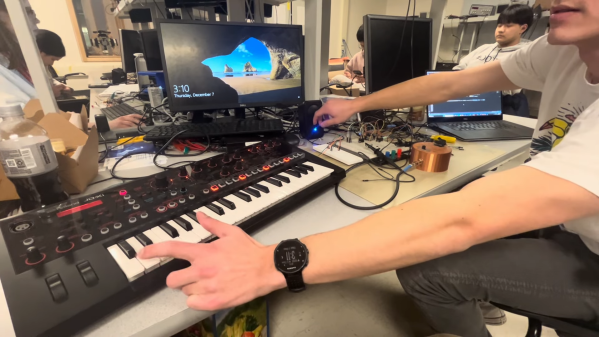
The duo demonstrate the hardware by using it as a pointer to play a simple Tic-Tac-Toe game. It’s in no way going to light up the Steam charts, but the project page does go into plenty of useful detail on how everything was implemented. If you want to create your own motion gaming controller, you could do worse than reading up on their work.

We’ve seen some other great examples of motion controls put to good use, like this VR bowling game. Video after the break.

Continue reading “Wii-Inspired Controller Built Using Raspberry Pi Pico”

Raspberry Pi Pico Becomes Emotionally-Aware Music Visualizer

Back in the late 1990s and early 2000s, the nascent world of digital music was incredibly exciting. We all cultivated huge MP3 collections and spent hours staring at the best visualizers Winamp and Windows Media Player had to offer. [Rafael] and [Eric] decided to bring back those glory days with their music visualizer that runs on the Raspberry Pi Pico.

The design is quite interesting, going beyond the usual simplistic display of waveforms and spectrograms. Instead, the Pi Pico uses a Fast Fourier Transform analysis to determine the frequencies of the music, ideally then to determine the key, and thus the mood, of the tune.  Then, the visualizer uses different colors to represent those moods, such as green for happy music in a major key, or deeper blues for a sad piece in a minor key. The output of the visualizer is via Bruce Land’s 8-bit color VGA library, which allows the Pi Pico to drive a monitor directly.

Whether the visualizer really gets the music is up for debate.  The visuals simply don’t look sad and depressing enough when listening to Hallelujah, but maybe that’s just the lack of Jeff Buckley’s vocals in the instrumental. Furthermore, getting an FFT analysis to pull out reliable musical information from an audio recording is finicky to say the least. In any case, the blocky and colorful animations are nice to watch nonetheless. They’d make an excellent basis for visuals at your next underground chiptune show, that much is for certain. Video after the break.

Continue reading “Raspberry Pi Pico Becomes Emotionally-Aware Music Visualizer”

Localizing Fireworks Launches With A Raspberry Pi

If you have multiple microphones in known locations, and can determine the time a sound arrives at each one, you can actually determine the location that sound is coming from. This technique is referred to as sound localization via time difference of arrival. [Kim Hendrikse] decided to put the technique to good use to track down the location of illicit fireworks launches.

The build is based on the Raspberry Pi, with [Kim] developing an “autonomous recording unit” complete with GPS module for determining their location and keeping everything time synchronized. By deploying a number of these units, spread out over some distance, it’s possible to localize loud sounds based on the time stamps they show up in the recording on each unit.

Early testing took place with an air horn and four recording units. [Kim] found that the technique works best for sounds made within the polygon.  Determining the location was achieved with a sound investigation tool called Raven Lite, developed by Cornell University. The process is very manual, involving hunting for peaks in sound files, but we’d love to see a version that automated comparing sound peaks across many disparate recording units. In any case, it worked incredibly well for [Kim] in practice. Later testing with friends and a network of six recorders spread over Limburg, Netherlands, [Kim] was later able to localize fireworks launches with an accuracy down to a few meters.

Similar techniques are used to locate gunshots, and can work well with pretty much any loud noise that’s heard over a great distance. If you’ve been using your hacker skills to do similar investigative work, don’t hesitate to let us know on the tipsline!

Raspberry Pi Does Its Best Retro PC Impression

The Raspberry Pi is a popular choice if you’re looking to put together a simple emulation box — it’s relatively cheap, small enough to tuck into pretty much any entertainment center, and benefits from a large and vibrant development community. You can even get enclosures that will dress the Linux single-board computer up like a miniature version of your favorite retro console. But what about the old school PC gamers who want to relive their glory days in a palm-sized package?

Well, if you’ve got a 3D printer, [fantasticmrdavid] might have just the solution for you. This second iteration of his printable Raspberry Pi enclosure is designed to look like the 286 desktop that he had in his youth, complete with a functional “floppy drive” in the front that takes an SD card. With a 3.5 inch MPI3508 LCD up in the “monitor” and a copy of DOSBox on the SD card, you’re well on your way to booting up a copy of Windows 3.11 or building some contraptions in The Incredible Machine.

While the external aesthetics of the design are impeccable, we appreciate that [fantasticmrdavid] didn’t skimp on the internals. There’s mount points for dual 25 mm fans to keep the more powerful variants of the Raspberry Pi cool, and a speaker expansion board that plugs into the GPIO header to provide era-appropriate bloops and bleeps. The tiny details here really shine, like the fact that the face plates for the dual drives are designed as separate pieces so they can be printed in a different color than the main case.

If you’re not interested in the classics, don’t worry. We’ve seen the Raspberry Pi stand in foraa modern gaming PC, complete with the RGB LEDs you’d expect in a contemporary rig.

Several Raspberry Pi Picos connected to each other

Raspberry Pi Pico Parallel Mandelbrot Computation

The Mandelbrot set is — when visualized with some colors — an interesting shape with infinite detail. While the patterns are immediately obvious to the human eye, anyone who’s run one can tell you that they’re pretty computationally expensive to produce. Fortunately, as with many things in graphics, rendering the Mandelbrot set can be easily parallelized.

That’s what [rak277] and [ir93] demonstrate in their RP2040-based finals project. Computron, as they call it, is a network of Raspberry Pi Picos that work together to compute a visualization of the Mandelbrot set and show it on a VGA display. The Computron is made of two or more “math units” and one “projection unit”. The math units communicate over a shared I²C bus with the projection unit to first divide the workload and then compute their share of the work.

This project shows both the strengths and limitations of parallel computation. It makes use of multiple math units on a highly parallelizable workload, but as more math units are added there are diminishing performance gains due to the increased communications load on the network, which [rak277] and [ir93] suspect to be the current bottleneck in the Computron.

If you’re fresh out of Pi Picos, and don’t mind waiting awhile, you could always crank out a Mandelbrot set on your trusty Atari 800 in BASIC.

Raspberry Pi Pico Becomes MIDI-Compatible Synth

ECE 4760 is a microcontroller course that runs at Cornell every year, and it gives students a wide remit to pursue various kinds of microcontroller projects. [Pelham Bergesen] took the class and built himself a MIDI-controllable synthesizer out of a Raspberry Pi Pico.

[Pelham] coded a library to parse MIDI messages on the Pico, with the microcontroller’s UART charged with receiving the input data. MIDI is basically just serial at a baud rate of 31.25k, with a set message structure, after all. From there, the Pico takes the note data and plays the relevant frequencies by synthesizing square waves using a PWM output. A second PWM channel can also be blended with the first to generate more complex tones.  The synthesizer is designed to be used with a source of MIDI note data such as a keyboard controller; [Pelham] demonstrates the project in use with a Roland JD-XI. It’s a fairly basic synthesizer, but [Pelham] does a good job of explaining all the steps required to get this far. If you’ve never done an audio or MIDI project before, you might find his guide very helpful for the way it steps through the basics.

[Pelham] didn’t get to implement fancier features like direct digital synthesis (DDS) or analog audio effects before the class closed out. However, that would be an excellent project for anyone else developing their own Pico synthesizer. If you whip up something that sounds good, or even just interesting, be sure to notify us on the tipsline. Video after the break.

Continue reading “Raspberry Pi Pico Becomes MIDI-Compatible Synth”

Raspberry Pi Zero Powers Custom Camera Platform

These days, most of us are carrying a fairly impressive digital camera with us at all times. But as capable as the hardware and software of a modern smartphone may be, there’s still plenty of reasons you may want a “real” camera to go along with it. The larger sensor, advanced controls, and selection of lenses that you’ll get with even a relatively cheap camera opens up a world of artistic possibilities.

If you’re really into chasing that perfect shot, you can even build your own digital camera these days. This design from [Jacob Cunningham] may not be able to go shot-for-shot against a Canon or Nikon in its current state, but we think you’ll agree there’s a lot of potential here — especially for something pieced together with modular components and perfboard.

Inside the 3D printed enclosure is a Raspberry Pi Zero, a Pi HQ Camera module, an 1.5″ OLED display, a lithium-ion battery pouch cell, and the charging and voltage regulation boards necessary to keep everything powered up. There’s also a handful of tactile buttons to work through the settings and menus, and a 10-axis IMU to help you keep your horizon level.

[Jacob] figures the whole thing comes in at around at $185.00, though naturally that number could go up or down considerably depending on what you’ve already got in the parts bin and what kind of lenses you add to the mix.

The hardware side of things looks more or less complete, at least for a first version, and [Jacob] has provided everything you’ll need to build one of your own. But the software is still a work in progress, with the latest push to the Python code in the project’s GitHub repository just eight hours old at the time of this writing. If you’ve been looking for a DIY camera project to really sink your teeth into, this could provide a great starting point.

If you’re more interested in moving pictures, we recently covered the CinePi project, which aims to develop an open source cinema-quality camera that you won’t need studio backing to afford.

Continue reading “Raspberry Pi Zero Powers Custom Camera Platform”