Laser Cutting Your Way To An RGB LED Table

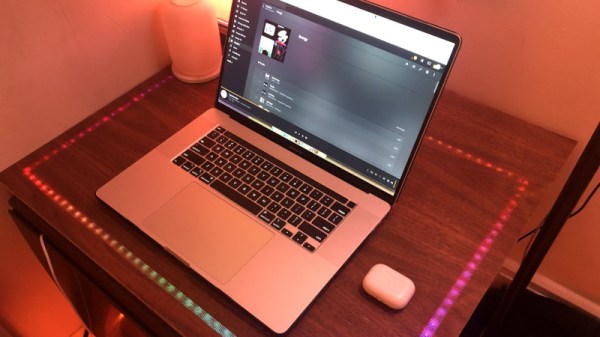
You’ve got the RGB keyboard, maybe even the RGB mouse. But can you really call yourself master of the technicolor LED if you don’t have an RGB table to game on? We think you already know the answer. Luckily, as [ItKindaWorks] shows in his latest project, it’s easy to build your own. Assuming you’ve got a big enough laser cutter anyway…

The construction of the table is quite straightforward. Using an 80 watt laser cutter, he puts a channel into a sheet of MDF to accept RGB LED strips, a pocket to hold a Qi wireless charger, and a hole to run all the wires out through. This is then backed with a second, solid, sheet of MDF.

Next, a piece of thin wood veneer goes into the laser cutter. In the video after the break you can see its natural tendency to roll up gave [ItKindaWorks] a little bit of trouble, but when strategically weighted down, it eventually lays out flat. He then uses the laser to blast an array of tiny holes in the veneer, through which the light from the LEDs will shine when it’s been glued over the MDF. A few strips of plastic laid over the strips serve both to diffuse the light and support the top surface.

The end result is truly gorgeous and has a very futuristic feel. Assuming you’ve got the equipment, it’s also a relatively simple concept to experiment with. It’s yet another example of the unique construction techniques possible when you add a high-powered laser to your arsenal.

Continue reading “Laser Cutting Your Way To An RGB LED Table”

Counter-Strike Gets The RGB LED Treatment

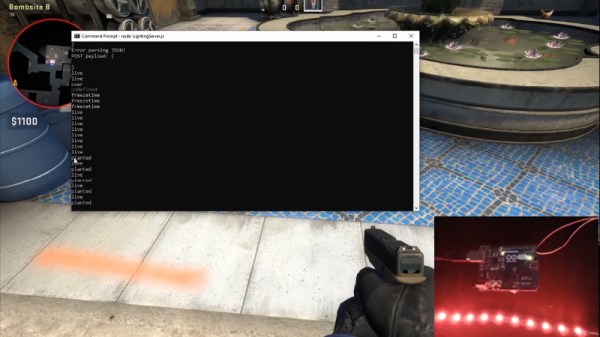
Inspired by the over-the-top stage lighting and pyrotechnics used during e-sport events, [Hans Peter] set out to develop a scaled-down version (minus the flames) for his personal Counter-Strike: Global Offensive sessions. It might seem like pulling something like this off would involve hacking the game engine, but as it turns out, Valve was kind enough to implement a game state API that made it relatively easy.

According to the documentation, the CS:GO client can be configured to send out state information to a HTTP server at regular intervals. It even provided example code for implementing a simple state server in Node.js, which [Hans] adapted for this project by adding some conditional statements that analyze the status of the current game.

These functions fire off serial commands to the attached Arduino, which in turn controls the WS2812B LEDs. The Arduino code takes the information provided by the HTTP server and breaks that down into various lighting routines for different conditions such as wins and losses. But things really kick into gear when a bomb is active.

[Hans] wanted to synchronize the flashing LEDs with the beeping sound the bomb makes in the game, but the API doesn’t provide granular enough data. So he recorded the audio of the bomb arming sequence, used Audacity to precisely time the beeps, and implemented the sequence in his Arduino code. In the video after the break you can see that the synchronization isn’t perfect, but it’s certainly close enough to get the point across in the heat of battle.

With the special place that Counter-Strike occupies in the hearts of hackers and gamers alike, it’s little surprise people are still finding unique ways to experience the game.

Continue reading “Counter-Strike Gets The RGB LED Treatment”

A Chrome Extension For Configuring RGB LEDs

Like pretty much all of us, [Andy Schwarz] loves RGB LEDs. Specifically he likes to put them on RC vehicles, such as navigation lights on airplanes or flashers and headlights on cars. He found himself often rewriting very similar Arduino code for each one of these installations, and eventually decided he could save himself (and all the other hackers in the world) some time by creating a customizable Arduino firmware specifically for driving RGB LEDs.

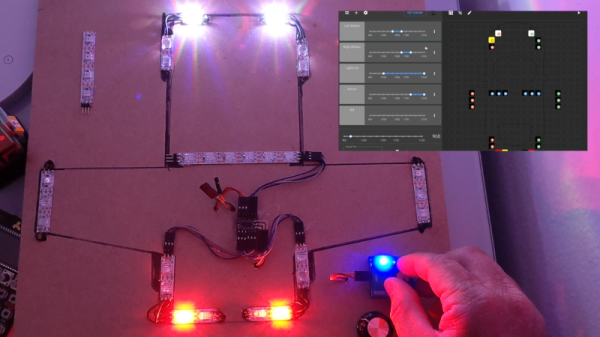
The software side of this project, which he’s calling BitsyLED, actually comes in two parts. The first is the firmware itself, which is designed to control common RGB LEDs such as the WS2812 or members of the NeoPixel family. It can run on an Arduino Pro Mini with no problems, but [Andy] has also designed his own open hardware control board based on the ATtiny84 that you can build yourself. Currently you need a USBASP to program it, but he’s working on a second version which will add USB support.

With your controller of choice running the BitsyLED firmware, you need something to configure it. For that, [Andy] has developed a Chrome extension which offers a very slick user interface for setting up colors and patterns. The tool even allows you to create a visual representation of your LEDs so you can get an idea of what it’s going to look like when all the hardware is powered up.

RGB LEDs such as the WS2812 are some of the most common components we see in projects today, mainly because they’re so easy to physically interface with a microcontroller. But even though it only takes a couple of wires to control a large number of LEDs, you still need to write the code for it all. BitsyLED takes a lot of the hassle out of that last part, and we’re very interested to see what the hacker community makes of it.

Continue reading “A Chrome Extension For Configuring RGB LEDs”

Trashed TV Gets RGB LED Backlight

It might not be obvious unless you’ve taken one apart, but most of the TVs and monitors listed as “LED” are simply LCD panels that use a bank of LEDs to illuminate them from behind. Similarly, what are generally referred to as “LCDs” are LCD panels that use fluorescent tubes for illumination. To get a true LED display with no separate backlight, you need OLED. Confused? Welcome to the world of consumer technology.

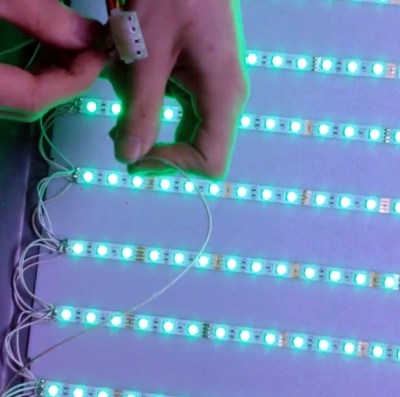
With those distinctions in mind, the hack that [Zenodilodon] recently performed on a broken “LED TV” is really rather brilliant. By removing the dead white LED backlights and replacing them with RGB LED strips, he not only got the TV working again, but also imbued it with color changing abilities. Perfect for displaying music visualizations, or kicking your next film night into high gear with a really trippy showing of Seven Samurai.

In the video after the break, [Zenodilodon] starts his RGB transplant by stripping the TV down to its principal parts. The original LEDs were toasted, so they might as well go straight in the bin alongside their driver electronics. But the LCD panel itself was working fine (tested by shining a laser pointer through it to see if there was an image), and the plastic sheets which diffuse the LED backlight were easily salvaged.

With the old LEDs removed, [Zenodilodon] laid out his new strips and soldered them up to the external controller. He was careful to use all white wires, as he was worried colored wires might reflect the white light and be noticeable on the display. After buttoning the TV back up, he went through a few demonstrations to show how the image looked with the white LEDs on, as well as some interesting effects that could be seen when the LEDs are cycling through colors.

The RGB strips don’t light up the display as well as the original backlight did, as there are some obvious dark spots and you can see some horizontal lines where the strips are. But [Zenodilodon] says the effect isn’t too bad in real-life, and considering it was a cheap TV the image quality was probably never that great to begin with.

On the flip side, if you find an LED TV or monitor in the trash with a cracked screen, it might be worth taking it home to salvage its super-bright white LEDs for your lighting projects.

Continue reading “Trashed TV Gets RGB LED Backlight”

Color Sensor From An RGB LED And A Photocell

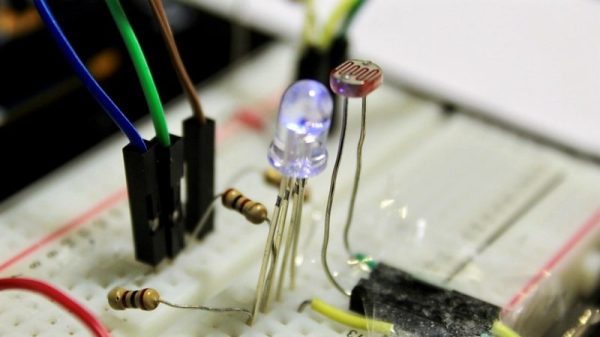
When you need to quantify the color of an object, you’ve got quite a few options. You can throw a Raspberry Pi camera and OpenCV at the problem and approach it through software, or you can buy an off-the-shelf RGB sensor and wire it up to an Arduino. Or you can go back to basics and build this reflective RGB sensor from an LED and a photocell.

The principle behind [TechMartian]’s approach is simplicity itself: shine different colored lights on an object and measure how much light it reflects. If you know the red, green, and blue components of the light that correspond to maximum reflectance, then you know the color of the object. Their sensor uses a four-lead RGB LED, but we suppose a Neopixel could be used as well. The photosensor is a simple cadmium sulfide cell, which measures the intensity of light bouncing back from an object as an Arduino drives the LED through all possible colors with PWM signals. The sensor needs to be white balanced before use but seems to give sensible results in the video below. One imagines that a microcontroller-free design would be possible too, with 555s sweeping the PWN signals and op-amps taking care of detection.

And what’s the natural endpoint for a good RGB sensor? A candy sorter, or course, of which we have many examples, from the sleek and polished to the slightly more hackish.

Continue reading “Color Sensor From An RGB LED And A Photocell”

RGB LEDs: How To Master Gamma And Hue For Perfect Brightness

You would think that there’s nothing to know about RGB LEDs: just buy a (strip of) WS2812s with integrated 24-bit RGB drivers and start shuffling in your data. If you just want to make some shinies, and you don’t care about any sort of accurate color reproduction or consistent brightness, you’re all set.

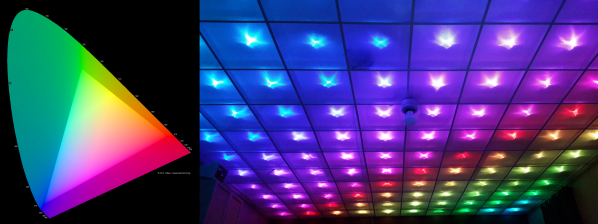
But if you want to display video, encode data in colors, or just make some pretty art, you might want to think a little bit harder about those RGB values that you’re pushing down the wires. Any LED responds (almost) linearly to pulse-width modulation (PWM), putting out twice as much light when it’s on for twice as long, but the human eye is dramatically nonlinear. You might already know this from the one-LED case, but are you doing it right when you combine red, green, and blue?

It turns out that even getting a color-fade “right” is very tricky. Surprisingly, there’s been new science done on color perception in the last twenty years, even though both eyes and colors have been around approximately forever. In this shorty, I’ll work through just enough to get things 95% right: making yellows, magentas, and cyans about as bright as reds, greens, and blues. In the end, I’ll provide pointers to getting the last 5% right if you really want to geek out. If you’re ready to take your RGB blinkies to the next level, read on!

Continue reading “RGB LEDs: How To Master Gamma And Hue For Perfect Brightness”

Tiny Tiny RGB LED Displays

Hackaday.io contributor extraordinaire [al1] has been playing around with small LEDs a lot lately, which inevitably leads to playing around with large groups of small LEDs. Matrixes of tiny RGB LEDs, to be precise.

Where's the LED?
Where’s the LED?

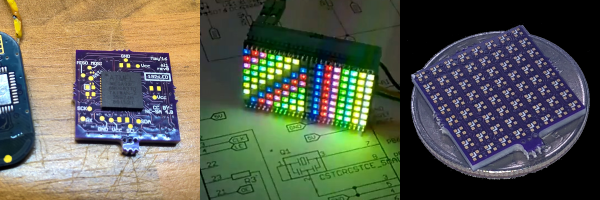
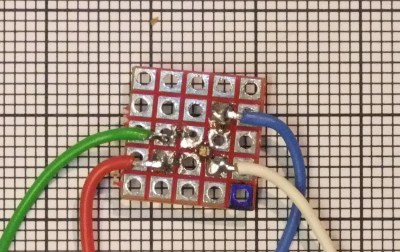
First, he took 128 0404 SMD RGB LEDs (yes, 40 thousandths of an inch on each side) and crammed them onto a board that’s just under 37 mm x 24 mm. He calls the project 384:LED (after all, each of those 128 packages has three diodes inside). A microcontroller and the driver chips are located on a separate driver board, which piggy-backs via pin headers to the LED board. Of course, he had to use 0.05 inch headers, because this thing is really small.

Of course, no project is without its hitches. [al1] bought LEDs with the wrong footprint by mistake, so he had a bunch of (subtly different) 0404 LEDs left over. Time for an 8×8 matrix! 192:LED isn’t just the first project cut in half, though. It’s a complete re-design with a four-layer board and the microcontroller on the back-side. And as befits a scrounge project with lots of extreme soldering, he even pulled the microcontroller off of a cheap digital FM radio. Kudos!

We’re in awe of [al1]’s tiny, tiny hacking skills. Now it’s time to get some equally cool graphics up on those little displays.