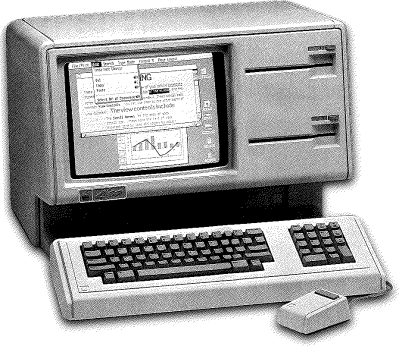
Recreating The Analog Beauty Of A Vintage Tektronix Oscillator

Tektronix must have been quite a place to work back in the 1980s. The company offered a bewildering selection of test equipment, and while the digital age was creeping in, much of their gear was still firmly rooted in the analog world. And some of the engineering tricks the Tek wizards pulled off are still the stuff of legend.

One such gem of analog design was the SG505, an ultra-low-distortion oscillator module that [Paul] is trying to replicate with modern parts. That’s a tall order since not only did the original specs on this oscillator call for less than 0.0008% total harmonic distortion over a frequency range of 20 Hz to 20 kHz, but a lot of the components it used are no longer manufactured. Tek also tended to use a lot of custom parts, especially mechanical ones like the barrel switch used to select attenuation levels in the SG505, leaving [Paul] no choice but to engineer his way around them.

So far, [Paul] has managed to track down most of the critical components or source suitable substitutes. One major win was locating the original J-FET Tek used in the oscillator’s AGC circuit. One part that’s proven more elusive is the potentiometer that Tek used to adjust the frequency; who knew that finding a dual-gang precision wirewound 10k single-turn pot with no physical stop would be such a chore?

[Paul] still seems to be very much in the planning stages of this project yet, and that’s probably for the best since projects such as these live and die on proper planning. We’re keen to see how this develops, and we’re very much looking forward to seeing the FFT results. We also imagine he’ll be busting out his custom curve tracer at some point in the build, too.

How To Make A 13 Mm Hole With A 1/2″ Drill Bit

As everyone knows, no matter how many drill bits one owns, one inevitably needs a size that isn’t on hand. Well, if you ever find yourself needing to drill a hole that’s precisely 13 mm, here’s a trick from [AvE] to keep in mind for doing it with a 1/2″ bit. It’s a hack that only works in certain circumstances, but hey, it just may come in handy some day.

So the first step in making a 13 mm hole is to drill a hole with a 1/2″ bit. That’s easy enough. Once that’s done, fold a few layers of tinfoil over into a small square and lay it over the hole. Then put the drill bit onto the foil, denting it into the hole (but not puncturing it) with the tip, and drill at a slow speed until the foil wraps itself around the bit like a sheath and works itself into the hole. The foil enlarges the drill bit slightly and — as long as the material being drilled cooperates — resizes the hole a tiny bit bigger in the process. The basic idea can work with just about any drill bit.

It’s much easier demonstrated than described, so watch it in action in the video around the 2:40 mark which will make it all very clear.

It’s not the most elegant nor the most accurate method (the hole in the video actually ends up closer to 13.4 mm) but it’s still something worth keeping in the mental toolbox. Just file it away along with laying your 3D printer on its side to deal with tricky overhangs.

Continue reading “How To Make A 13 Mm Hole With A 1/2″ Drill Bit”

Pictures From A High Altitude Balloon

How do you get images downlinked from 30 km up? Hams might guess SSTV — slow scan TV — and that’s the approach [desafloinventor] took. If you haven’t seen it before (no pun intended), SSTV is a way to send images over radio at a low frame rate. Usually, you get about 30 seconds to 2 minutes per frame.

The setup uses regular, cheap walkie-talkies for the radio portion on a band that doesn’t require a license. The ESP32-CAM provides the processing and image acquisition. Normally, you don’t think of these radios as having a lot of range, but if the transmitter is high, the range will be very good. The project steals the board out of the radio to save weight. You only fly the PC board, not the entire radio.

If you are familiar with SSTV, the ESP-32 code encodes the image using Martin 1. This color format was developed by a ham named [Martin] (G3OQD). A 320×256 image takes nearly two minutes to send. The balloon system sends every 10 minutes, so that’s not a problem.

Of course, this technique will work anywhere you want to send images over a communication medium. Hams use these SSTV formats even on noisy shortwave frequencies, so the protocols are robust.

Hams used SSTV to trade memes way before the Internet. Need to receive SSTV? No problem.

Make DIY Conductive, Biodegradable String Right In Your Kitchen

[ombates] shares a step-by-step method for making a conductive bio-string from scratch, no fancy equipment required. She demonstrates using it to create a decorative top with touch-sensitive parts, controlling animations on an RGB LED pendant. To top it off, it’s even biodegradable!

The string is an alginate-based bioplastic that can be made at home and is shaped in a way that it can be woven or knitted. Alginate comes primarily from seaweed, and it gels in the presence of calcium ions. [ombates] relies on this to make a goopy mixture that, once extruded into a calcium chloride bath, forms a thin rubbery length that can be dried into the strings you see here. By adding carbon to the mixture, the resulting string is darkened in color and also conductive.

There’s no details on what the actual resistance of a segment of this string can be expected to measure, but while it might not be suitable to use as wiring it is certainly conductive enough to act as a touch sensor in a manner similar to the banana synthesizer. It would similarly be compatible with a Makey Makey (the original and incredibly popular hardware board for turning household objects into touch sensors.)

What you see here is [ombates]’ wearable demonstration, using the white (non-conductive) string interwoven with dark (conductive) portions connected to an Adafruit Circuit Playground board mounted as an LED pendant, with the conductive parts used as touch sensors.

Alginate is sometimes used to make dental molds and while alginate molds lose their dimensional accuracy as they dry out, for this string that’s not really a concern. If you give it a try, visit our tip line to let us know how it turned out!

Multi-Divi book with hand thumbing through it

Math, Optimized: Sweden’s Maximal Multi-Divi

Back in the early 1900s, before calculators lived in our pockets, crunching numbers was painstaking work. Adding machines existed, but they weren’t exactly convenient nor cheap. Enter Vilin Vinson and his Maximal Multi-Divi, a massive multiplication and division table that turned math into an industrialized process. Originally published in Sweden in the 1910’s, and refined over decades, his book was more than a reference. It was a modular calculating instrument, optimized for speed and efficiency. In this video, [Chris Staeker] tells all about this fascinating relic.

What makes the Multi-Divi special isn’t just its sheer size – handling up to 9995 × 995 multiplications – but its clever design. Vinson formatted the book like a machine, with modular sections that could be swapped out for different models. If you needed an expanded range, you could just swap in an extra 200 pages. To sell it internationally, just replace the insert – no translation needed. The book itself contains zero words, only numbers. Even the marketing pushed this as a serious calculating device, rather than just another dusty math bible.

While pinwheel machines and comptometers were available at the time, they required training and upkeep. The Multi-Divi, in contrast, required zero learning curve – just look up the numbers for instant result. And it wasn’t just multiplication: the book also handled division in reverse, plus compound interest, square roots, and even amortizations. Vinson effectively created a pre-digital computing tool, a kind of pocket calculator on steroids (if pockets were the size of briefcases).

Of course, no self-respecting hacker would take claims of ‘the greatest invention ever’ at face value. Vinson’s marketing, while grandiose, wasn’t entirely wrong – the Multi-Divi outpaced mechanical calculators in speed tests. And if you’re feeling adventurous, [Chris Staeker] has scanned the entire book, so you can try it yourself. Take a look at the full video here and see how it stacks up against your favorite retro calculators!

Continue reading “Math, Optimized: Sweden’s Maximal Multi-Divi”

An Artificial Sun In A Manageable Size

The sun is our planet’s source of natural illumination, and though we’ve mastered making artificial light sources, it remains extremely difficult to copy our nearby star. As if matching the intensity wasn’t enough, its spectral quality, collimation, and atmospheric scattering make it an special challenge. [Victor Poughon] has given it a go though, using a bank of LEDs and an interesting lens system.

We’re used to lenses being something that can be bought off-the-shelf, but this design eschews that convenience by having the lenses manufactured and polished as an array, by JLC. The scattering is taken care of by a sheet of inkjet printer film, and the LEDs are mounted on a set of custom PCBs.

The result is certainly a very bright light, and one whose collimation delivers a sun-like effect of coming from a great distance. It may not be as bright as the real thing, but it’s certainly something close. If you’d like something to compare it to, it’s not the first such light we’ve featured.

Take A Little Bit Of Acorn To Work

When we think of 8-bit computers, it’s natural to start with home computers. That’s where they live on in the collective memory. But a Z80, a 6502, or similar was more likely to be found unseen in a piece of industrial machinery, doing the job for which we’d today reach for a microcontroller. Sometimes these two worlds intersected, and thus we come to the EuroBEEB, a derivative of Acorn’s BBC Micro on a Eurocard. [Steve Crozier] has performed extensive research into this system and even produced a recreated PCB, providing a fascinating window into embedded computing in the early 1980s.

The EuroBEEB was the work of Control Universal, a Cambridge-based company specialising in embedded computers. They produced systems based upon 6502 and 6809 processors, and joining their product line to the then-burgeoning BBC Micro ecosystem would have been an obvious step. The machine itself is a Eurocard with a simple 6502 system shipped with ACORN BBC Basic on ROM, and could be seen as a cut-down BBC Micro with plenty of digital I/O, accesible through a serial port. It didn’t stop there though, as not only could it export its graphics to a “real” BBC Micro, it had a range of expansion Eurocards that could carry the missing hardware such as analogue input, Teletext, or high-res graphics.

The reverse-engineered PCB comes from analysis of surviving schematics, and included a couple of gate array logic chips to replace address decoding ROMs in the original. If it seems overkill for anyone used to a modern microcontroller, it’s worth remembering that by the standards of the time this was a pretty simple system. Meanwhile if you only fancy trying BBC BASIC, there’s no need to find original hardware.