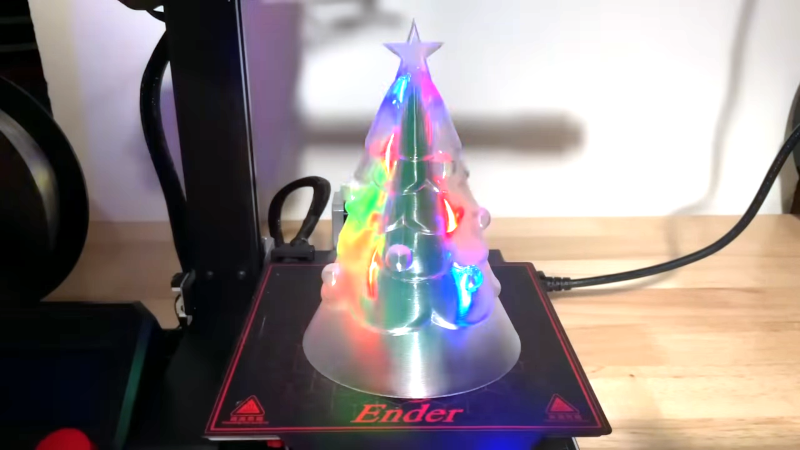
[Chuck] often prints up interesting 3D prints. But we enjoyed his enhancement to a cheap LED Christmas tree kit. The original kit was simply a few green PCBs in the shape of a tree. Cute, but not really something a non-nerd would appreciate. What [Chuck] did, though, is printed a clear PLA overcoat for it and it came out great. You can see how great in the video below.
You might think transparent PLA would be really clear, but because of the layers, it is more translucent than transparent. For an LED diffuser, though, it works great. There are a few things to consider when printing for this purpose. First, you’d think vase mode would be perfect for this, but he found out it didn’t work well — possibly due to something in the model, which was a download from Thingiverse.
This probably wouldn’t do well for, say, an LED numeric display where you actually want to see the digits. But for something artistic like the tree project, it did a great job of making the PCB and raw LEDs look much more polished. Of course, like us, you may like the PCB and raw LED look, but you probably have friends and possibly a significant other who don’t have the same sense of aesthetics we do. No problem! The cover will pop right off when your hacker friends come over. In fact, we considered you could print a half Christmas tree shell and put the whole thing on a rotating base to get the best of both worlds.
This is one of those obvious things once you see it. We wondered how a small square of this material would work for diffusing individual (and dimmer) panel LEDs. If you want to maximize transparency, there are settings that work for that. Some settings and materials work better than others.


I really liked his tip about trimming transistor leads at an angle.
+1
It works quite well for printing LED lit keycaps. Paint over the parts that aren’t supposed to glow.
Or make the last layer out of another material. wouldn’t need a dual extruder or mux printer since it’s going to be the last layer, and you’re probably going to print many keycaps at once, so it’s just one pause and filament swap. maybe another pause to go back to clear if you want the visible parts to be at the same height than the blocking parts.
The only way the typeface might look okay is using a 0.2mm nozzle or around that size though…
Or if you want to go full psycho, I guess you can print lots of keycaps with a full opaque last layer, and CNC the letters on it (or the entire top surface). I’m not sure if it’s worthwhile tho.
Ooo I actually like the idea of raised letters. Could be nice for tactile feeling. Good to teach a kid touch typing perhaps
How about printed letters with Braille bumps?
2 birds 🐦, 1 stone.
B^)
That’s the purpose of the nubs on the F and J keys… If your index fingers feel those, you’ll learn where the rest are located. Also, for the average sight-having human, we’d be typing at full speed before our fingers learned to recognize a letter by touch… which must not work very well since we have Braille instead of raised lettering.
The only key I’ve needed a nub on is W for gaming. I used a little Sugru to mold a ridge along the top of the key.
Natural ABS works pretty well also. For an even more diffused and smoothed look.
https://youtu.be/5V_WBZOvGaM
Sorry for my ancient video :)
I made something in the same vein before Christmas: https://www.printables.com/model/345536-shiny-tetrahedra
It’s a pain to assemble, and I really need to do some instructions for it, but the translucency works really well on this model.
Again, the electronics are a pre-bought pack, only in this case it was a £2 string of Christmas fairy lights from Asda.
Yo so 3d printed LED flow toys are hugely prevalent, mostly due to how well the clear diffuses LEDs. LED Poi, LED staffs, LED orbits are all starting to see more and more clear 3d printed components.