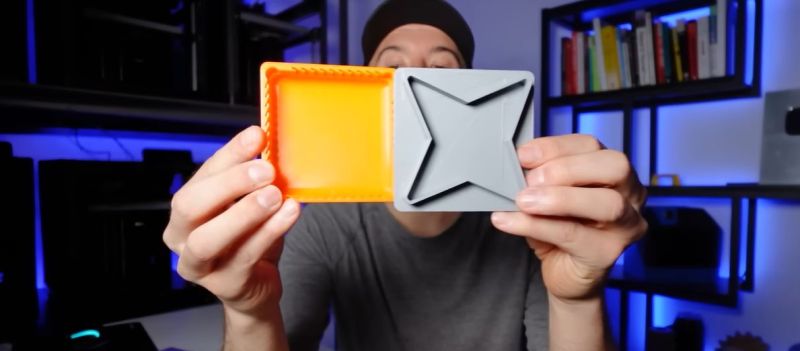
One of the continuing struggles with FDM printing is making sure that parts that should fit together actually do. While adding significant tolerance between parts is an option, often you want to have a friction fit or at least a gap that you cannot drive a truck through. In a video by [Slant 3D] a number of tips and tricks to improve parts design with tolerance in mind are provided.
Starting with the fairly obvious, such as avoiding sharp corners, rounding off edges and using chamfered edges and filets for e.g. lids to make getting started easy, the video then moves into more advanced topics. Material shrinkage is a concern, which is where using thin walls instead of solid blocks of material helps, as does using an appropriate infill type. Another interesting idea is to use a compliant mechanism in the lid to get a friction fit without getting all print parameters just right.
On the opposing side to the lid – or equivalent part – you’d follow many of the same tips, with the addition of e.g. slots that allow for the part to flex somewhat. All of this helps to deal with any variability between prints, with the suggested grip fins at the end of the video being probably the most extreme.


I think this should be a feature of the slicer and 3d Printer combination that determines the tolerences. People should design for actual dimensions, plus have metadata embedded inside the model, which the slicer can pickup. I do know that the stl file format in a way stores triangles that determine the curvature of parts, but combining triangles for the slicer to understand that this is a hole or a feature could be somewhat tricky.
The plus side to this is it takes the calculation out of the design process, and makes the design process agnostic to printing parameters.
I think the issue is that you’d have zero idea on the tolerances used by the designer, unless they explicitly state it in the model details on the download pages atm. It would be nice to see tolerances used as standard on the model download sites.
It would be great to be able to pull it from the stl model but I think the metadata in an STL file is very limited, it doesn’t even supply the units used by the designer, just seems to be accepted that everything is processed in mm.
it looks like 3mf project files do better for metadata, ironically, the sliced gcode files have a huge amount of metadata in them, to the point that you could recreate the printer/filament/process profiles used for any slicer to a greater or lesser degree.
This stuff is hard to calibrate for without test prints, or heaven forbid printing something and checking the fit.
The video mentions shrinkage. It’s important to think about all the degrees of freedom there as well as variations on the theme. Environmental warping, hot and cold spots on the build plate, filament composition, etc.
The last thing I want is a tool that insightfully guesses at something without knowing all the factors of my set up, and locks me into its decisions. In a perfect world I’d love to have my printer, slicer, and cad tool to just make things work. But I’m pretty sure the less magic there is behind it all, the easier it would be to get things to work.
Tolerances also specify interference and fit (tight/loose) so it’s not that easy to separate design tolerances from manufacturing tolerances. You always specify an allowable range in the design, which is used to select the process and QA (rejects). If your allowable range is too tight (e.g. this has to be 0.1mm exact) then the manufacturing process becomes prohibitively difficult/expensive or you get 99% reject rate.
That’s why there’s the annotated mechanical drawing – for humans. The way it works, you specify a general tolerance and surface quality (or it is assumed) and you mark specific features with tolerances and allowances as needed. Something like that would be needed for the 3D printer file to capture the design intent automatically, or you should be able to read the drawing yourself and point to the slicer “This is a tolerance hole”.
This point is part of the discussion of what counts as the “source code” for open source 3D printed part designs. The 3D model alone is not sufficient.
This might be possible if more slicers start accepting STP files since the newest standards can now contain machine readable dimensions and tolerances as well as geometric tolerances embedded in them.
“under the hood” STP is converted to STL anyway…
Goog idea at 10 minute
Lots of good design tips from Slant 3D.
It’s interesting how their channel started to attract clients by pointing out specific use-case advantages to the corporate types (and tell proffesionals to stop doing stupid things when designing for FDM), and now it seems focused more on giving enough design tips to hobbyists to create a lot of new potential clients.
Yeah, I always check Slant 3D videos when they pop up. It’s often focused on good design practices to support mass/on-demand production, but easily generalizes to best practices for home use, too.
Dude’s concise and gives great advice; he makes no secret his company provides printing services, yet the videos don’t come across as advertising.
Definitely recommended for new/intermediate/advanced hobbyists. Might be less helpful if you’re a modeling engineer by trade; I’m not :)
i have a variable “ee=0.3;” at the top of most of my openscad files. it stands for “edge extra” and is supposed to represent how much my printer exceeds the requested size at each edge. whenever i make something that has to fit inside of something, i subtract ee, like cylinder(r=object_dia/2-ee). and when i make something that has to fit around something else, i add ee instead. like difference() { cube(big); cylinder(r=object_dia/2+ee); }
and the surprising thing is it’s pretty reliable. it’s roughly the same on my old printer and my new one. it’s even mostly the same whether the hole is vertical or horizontal (so long as the overhangs are plausible). i use ee=0.2 and i get a friction fit but i might have to trim it a little with the x-acto. i use ee=0.3 and i get a loose fit that i rarely have to trim at all…maybe i have to trim a little extra if there’s an overhang involved. not sure if that’s what it’s like for everyone else but it gives me the feeling that the calibration is actually not that difficult…imo you do want to separate out this factor, but i find i don’t actually need to re-print something to fine tune it.
it does seem like it could be a calibration parameter in the slicer…but it’s not so much that every edge is over-extruded or something like that, it’s more like the edges just aren’t perfectly straight / even and have a certain amount of +/- that means you face a harsh trade off between tolerance and time spent trimming / sanding. i’m pretty happy with how it is today actually.