As the art of 3D printing has refined itself over the years, a few accessories have emerged to take prints to the next level. One of them is the threaded insert, a a piece of machined brass designed to be heat-set into a printed hole in the part. They can be placed by hand with a soldering iron, or for the really cool kids, with a purpose-built press. They look great and they can certainly make assembly of a 3D printed structure very easy, but I’m here to tell you they are not as necessary as they might seem. There’s an alternative I have been using for years which does essentially the same job without the drama.
Enter The Self-Tapper

When we think of screws or other fastenings, if we’re not a woodworker, the chances are that it’s a machine screw which comes to mind. A high-precision machined parallel thread, intended to screw into a similarly machined receptacle. Where this is being written they’re mostly metric, in fact I have a small pile of M3 bolts on my desk as I write this, for mounting a Raspberry Pi LCD screen. These are what you would use with those heat-set inserts, and they are generally a very good way to attach parts to each other.
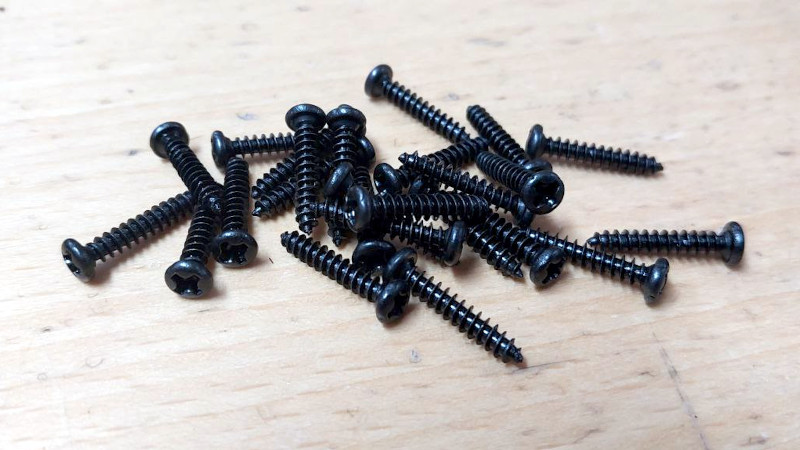
However good an M3 bolt is though, I don’t use them for most of my 3D printing work. Instead, I use self-tapping screws. A self-tapper is a screw with a wide tapering pitch, designed to cut its own thread into a soft material. Most wood screws are self-tappers, as are many screws used for example with aluminium sheet. The material is soft enough for a reliable enough coupling to be made, even if repeated use or over-tightening can destroy it. It’s easy to make 3D prints that can take self-tapping screws in this way, I find it reliable enough for my purposes, and I think it can save you a bunch of time with heat inserts.
How To Make It All Happen
Designing for a self-tapping connection in a 3D print is simplicity itself: a suitable hole for the screw thread to pass through is placed in the upper side, while the lower side has a smaller hole for the thread to bite into. The size of the smaller hole can vary significantly without penalty, but I normally make it the diameter of the shaft of the screw without the thread. A simple example for a 3mm self-tapper in OpenSCAD is shown below, along with a render of the result.
//Screw head end
translate([0,0,20]){  //Move upwards to see both parts
    difference(){
        cube([20,20,4]);
        //screw thread
        translate([10,10,0]) cylinder(10,1.5,1.5);
        //screw head
        translate([10,10,2]) cylinder(10,3,3);
    }
}

//Screw thread end
difference(){
    cube([20,20,10]);
    translate([10,10,0]) cylinder(10,1,1); // For the screw to bite into
}
Assembly follows construction in its simplicity; simply line up both holes and screw the self-tapping screw into them. It should be obvious when the screw is tight enough. Mashing upon it, just like with any other self tapper, risks stripping the thread.
Everyone makes things in their own manner, and it’s likely that among you will be people who might decry the use of self-tappers in a 3D print. But I have found this technique to be a simple and cheap time saver for as many years as I’ve been 3D printing. I hope by sharing it with you, I’ve given you a useful tool in your work.


In my experience, not all self-tapping screws are created equal. There are generic “self-tapping” screws, those intended for metals, some made for plastics, and so on. Sheet metal screws tend to wedge plastics apart and don’t actually cut threads – they just mush plastic around, and that’s less effective in 3d prints. And screws that are self-tapping that are designed for metal tend to be too aggressive for use with plastics.
I’ve had really good experience with screws like these from McMaster – https://www.mcmaster.com/products/screws/tapping-screws-2~/system-of-measurement~metric/stainless-steel-torx-rounded-head-thread-forming-screws-for-plastic/?s=screws+for+plastics – they’re intended for plastics, and if you figure out the correct hole size for your material, they work consistently in 3d prints. Usually well enough to get at least a handful of assembly/disassembly repetitions before the holes strip out.
This is a great comment. Usually, the onus goes to the designer of the part, or potentially to proper slicing, but knowing that the proper fixtures DO make a difference is very good for production.
Thanks for the tip
Another plus is the McMaster has 3d models of the screws to download for free.
Yes, actually this is the code I usually use with selftappers from McMaster’s.
$fn = 100; handle_length = 150; handle_diameter = 30; reservoir_height = 100; reservoir_diameter = 80; nozzle_length = 50; nozzle_diameter = 10; tessellation_size = 10; module tessellated_surface() { for (x = [-reservoir_diameter/2 : tessellation_size : reservoir_diameter/2]) { for (y = [-reservoir_diameter/2 : tessellation_size : reservoir_diameter/2]) { if (sqrt(x*x + y*y) < (reservoir_diameter/2)) { translate([x, y, 0]) rotate([0, 0, 45]) cube([tessellation_size, tessellation_size, 2], center = true); } } } } module threat_insert() { translate([0, 0, handle_length]) difference() { cylinder(h = reservoir_height, d = reservoir_diameter, center = true); translate([0, 0, -1]) cylinder(h = reservoir_height + 2, d = reservoir_diameter - 5, center = true); } translate([0, 0, handle_length + reservoir_height]) tessellated_surface(); translate([0, 0, handle_length / 2]) rotate([90, 0, 0]) cylinder(h = handle_length, d = handle_diameter, center = true); translate([0, reservoir_diameter / 2, reservoir_height]) rotate([90, 0, 0]) cylinder(h = nozzle_length, d = nozzle_diameter, center = true); } threat_insert();How did you mark that up? I don’t think I’ve seen a code box in the hackaday comments before.
10 FOR A = 1 TO 102420 SOUND A, 1
30 NEXT A
Well, I just tried it Github markup style, enclosed in three backticks.
Got to wait to be approved to find out if it worked.
You need BOSL2! It’ll make your models in OpenSCAD so much faster to write and update.
Indeed, there are screws with sparse, steep pitch, thin threads that don’t tend to jack the layers apart.
https://www.stanleyengineeredfastening.com/-/media/web/sef/resources/docs/other/threaded_fasteners_for_plastics.ashx
Heaps of different plastic fasteners. Also note the difference between hard plastics and soft plastics. Different screws might be best for different 3dp plastics.
The way to ensure the parts are nipped together properly is to have a clearance hole in the material sitting directly under the head. As the piece says, it should be 4mm for an M4, 2.5mm for and M2.5 etc.
A point for everyone to note is reassembly. The screw will happily remake a thread each time it’s reinstalled. Unf that eventually destroys the thread and makes it useless. A more sustainable option is to take a little time each time you reinsert to turn the screw in by HAND. It will happily turn into the existing thread by hand when you find it, then you gently nip it up. It does take a little patience, but doing it gives you a thread that’ll last as long as the product.
Wurth plastofast is the model designed for plastics.
WTF, now we get group ads like in youtube comments on HaD?
Next we’ll get those: I made 30000 in blahblah coin. I’m another person and I too made 20000 in blahblah coin. Indeed, I’m yet another person and made 32000 in blahblah coin.
(N.B. when I say blahblah coin I of course mean the new mcmaster coin)
These are ‘tri-lobe’ screws, a great choice in this application. Another is the ‘high-low’, which is a double pitch self tapper where the major diameter differs between the two threads. Just have to be sure to get plastic high-lows, as there are a few different threadforms for different materials.
i lately just use regular m4 screws without insert with a hole of 3.7mm but then again, the part i was screwing into is quite thick. i dont prethread them at all. this in regular pla
Helps to file a thread cutter notch into the end of the bolt. Like a common ‘self tapping bolt’.
Remove every few turns to clear the notch of cuttings, especially w small bolts.
Also helps to heat the screw/bolt up.
Friction will do the job, just turn it in and out as rapidly as you can for 10-20 seconds or so.
This a second step, with a unnotched bolt in my process.
Heated screws and bolts are generally a good trick.
I print threads to make the job easier. They suck as printed, but the ‘tapping bolt’ fixes that right up.
this approach works for 99% of use cases. threaded brass inserts offer little advantage other than in uses cases where assembly/disassembly is exceedingly common.
I would love to see a comparative strength test between a couple of these methods, threading machine screws directly into an undersized hole, thermally pressed brass inserts, and externally threaded brass inserts.
I would expect that in any use case where you can thread a machine screw to significant depth, it’s strength would exceed any brass insert.
Somehow it never occurred to me to thread directly into a print: I’ve always used a standard tap on the PLA and then put a machine screw in, and it’s worked really well.
captive nuts are also fairly easy to do, model a hex, place nut in hex, then friction stir weld plastic in the corners to holt it in place. needs a hex hole a couple mm deeper than the nut being used. you can also use square nuts in slots that line up with holes in the pla when pressed. ive spent most of the 3d printer era stuck on a printrbot play with bed extensions (8x4x5), so joining sections together is necessary on anything larger than a project box.
Square nuts work better in my opinion, it is harder for them to round out the slot or hole.
I agree, generally I just undersize the hex relief so that it holds via friction, you can even use a longer fastener to draw the hex nut into it’s relief.
Something relating to fasteners that is infrequently discussed but equally important is fastener preload. Preload is even trickier with 3D prints, as you can not conventionally preload most fasteners without instead compressing your print.
The “OEM” solution to this is line fastened holes with metal dowels, as the dowel will take the preload force without crushing. For low-volume 3D prints, dowels are often not worth the time investment. In this case, I think that preloading via friction (i.e. forming threads in an undersize hole) or using threadlocker (with a captive hex nut) are great alternatives.
People who have designed and built 3D printed assemblies that experience large mechanical loads, like CNC machines and high speed 3D printers, have tested this: threaded inserts tend to be the strongest, closely followed by captive nuts, followed by cutting threads directly into plastic with screws. And this makes sense because the surface area that experiences the force is larger with both captive nuts and threaded inserts than screws. Most projects don’t need this strength though.
There’s are a few videos comparing various fastening methods. Look for MyTechFun and CNC Kitchen.
I use triangle shaped holes with regular m2 to m4 screws. The m3 hole is a regular sided triangle with the sides 1.3 mm from the middle.
Perhaps this approach is also better from a standpoint of recycleability. Plastic with embedded metal inserts doesn’t lend itself to being easily ground up. We’re not at a point yet where recycling of printed parts is commonplace, but why create additional obstacles?
make a screw attachment for your soldering iron and salvage all your brass. why throw away a perfectly good part because its stuck in plastic?
the nut technique i mentioned further up usually just requires a screw and a hammer to remove. slotted square nuts can be made reversible and are easy to remove non destructively (unless your tolerances are too tight in which case break it out with a straight edge screwdriver).
hardware is the first thing i salvage.
I quite like self tapping screws for 3D prints. The main problem I have with them is that they are hard to specify. Any M3 screw will fit in an M3 thread, but it seems like no two self-tappers are alike. In 25 years of taking things apart, I’ve almost never found identical screws in two different things.
If you go for the absurdly cheap screws from the usual places, buy them in bulk enough to last a few years, because there’s a good chance the listing will disappear and you’ll never find them again. Just make sure not to go too cheap. I currently have a large number of ones that look ok, but the heads snap off unlike anything I’ve ever seen.
Good point, specification is important not only for restocking later on but also for sharing a project so that someone else (possibly in another country) can print and assemble your project.
But luckily there is a standard for that: DIN 7981
Obviously not all self-tapping screws conform to that standard but you can choose to use that standard only for your projects. The screws are available in various different diameters and if you specify that one screw should be let’s say 2.9x13mm DIN 7981, it will be easy to order a compatible screw 10 years later or in another country.
finally something about fasteners for 3d printing that i can agree with :)
i figure people mostly use inserts for clickbait? in practice, i always use nuts with machine screws, sometimes i trap the nut, and sometimes i don’t. or sometimes i use wood screws if the piece behind it is made out of wood. while doing those, i noticed that wood screws and machine screws both will hold good enough on their own with no nut / wood, if i forget to include any extra tolerance in the hole. to echo macsimki: an M3 in a 3.0 hole holds great, so long as there’s enough depth to engage more than a couple threads. PLA and PETG.
i just figure, if you actually care about strength then you should be putting the force through a proper nut. if you don’t care about strength, self-threading with any old screw will work great.
just in my last few projects, i have been using zip ties instead of screws whenever it’s clever. and that has worked pretty well too. i’d do just about anything before messing with an insert, which seems to me to have the worst of all possible worlds…not very strong, not very cheap, not particularly easy, not already in my parts bin / multi-purpose, and not particularly tolerant of variation in hole diameter.
Or perhaps the best of all worlds as its exceptionally durable for repeat threadings, needs little Z height, across the x-y plane direction you can apply huge forces and it won’t pull out or tear through the part as the bare screw probably would having less load spreading, and when you’re talking 3d print the act of melting it in can cross bond a heap of layers and improve the layer to layer adhesion etc.
All down to what you are planning to with the part as which one is best, not to mention there is a huge variety of insert options.
I tend to just drive machine screws into a well toleranced hole with the powered screwdriver – part melt, part cut to form real threads and part just grabbing the printing artifacts I expect but it works well enough for only the cost of the bolt. I don’t like self tapping screws in 3d prints as a rule, the larger thinner blade like screw part has a tendency peel open layer lines a bit, needs many more perimeter or high infill density to not really weaken the part where it is cutting all those print lines, but done well its good.
But for anything I expect to take apart often or short thread lengths screwing into a thinner part the captive metal nut or heat set insert has to the winner.
The “Pushtite” might work well for things you don’t normally disassemble. Doesn’t cut threads at all.
(pg29 https://www.stanleyengineeredfastening.com/-/media/web/sef/resources/docs/other/threaded_fasteners_for_plastics.ashx)
I also like trilobe machine screws that don’t cut material away, but enter holes reliably and square.
What gives you the impression that threaded inserts are not very strong?
the fact that they are a superficial mating to the underlying plastic. they pull on the top layer instead of pinching the top and bottom layer together. if strength matters, i’d rather capture the full thickness of my plastic part between nut and screw head. if strength doesn’t matter, i’d rather somethig more convenient.
Some odder heat set and other insert options usually meant for wood folks have used on 3d prints as heat set are designed for through holes where you can insert them from the bottom – but unlike a nut they can end up flush to the surface without needing a huge thickness to hide in.
And while you are generally correct the pull back out resistance is generally low with the default heat-set that only matters if the load direction is going to be trying to pull the insert out the hole the way it was inserted – really depends on how the forces are going to be applied as to if its strong enough or not.
Then you’re either using them wrong, or we don’t mean the same thing by threaded inserts, because they definitely grip more than just the top layer.
First, you’re supposed to put the insert on the opposite side of what you’re screwing into if st all possible because that’s obviously the strongest way to do it. But even if you can’t, inserts typically have larger surface areas than the screws you would use, and so if the insert is properly melted in, all of the insert’s protrusions grip the plastic quote well.
I reliably found the extra length of the point to be annoying in my designs. You can find “self-tapping” screws from the usual sites that are blunt. Still have the coarse thread for soft plastics but can skip the wasted length.
Blind-rivet nut (Blindnietmutter, Einnietmutter) are the solution to everything.
What I’ve been working on and with is a 3d printed “twist-lock” system.
I’ve had success with it being surprisingly strong on pla, at very very small sizes, a few mm wide and a few more long. The core issue I’m experiencing is that actuating it multiple times can “wear” away material thus losing grip and causing a cascading failure. But I’m hoping that if I can get it right it would mean a print only, no fixture required solution for bonding.
How about reverse taper holes (i.e. bigger at the toe), and use an expanding rawlplug and screw?
5mm x 25mm seems common. 4x20mm exists
https://www.amazon.co.uk/fischer-568004-Plus-Expansion-Wall/dp/B0C43Y49JC/
i like to minimize fasteners by having my parts mate together in one way or another. like, i always cringe when i see a design where 4 screws are used at the corners just to hold a lid onto a box (little-to-no mechanical stress). i’d rather have the lid go into a groove / slot / recess / overhang, so that it has a defined mating just by its geometry, and it only takes one or two fasteners to hold it there.
but i’m having a hard time understanding a ‘twist lock’ that doesn’t keep the plastic under tension? even if the components don’t actually have any mechanical force pulling them apart, don’t you introduce a little tension just to have the friction preventing it from unlocking on its own from mild vibration?
PLA under tension is a disaster over time. at first it holds, but it’s super prone to creeping (loosening) and cracking. though that’s not just for tension…generally PLA parts lose most of their desirable properties after a couple years and within a decade they fall apart even if they’re thick and unloaded.
this is why i save plastic screws from salvage. my method is simple. figure out how many screws you need, find a screw type in that quantity. then take a caliper and measure inside and outside the threads, split the difference, and cad holes that big. im using pla, and like a less aggressive bite to resist cracking, and so far its worked. softer materials can probibly handle a slightly larger bite.
Basic wood/construction/drywall screws (for building houses) work really well on 3d prints.
They have the thin/steep threads that others have described as beneficial.
They’re the easiest fastener to get (menards/homedepot), they’re cheap, they come in ~0.5″ to 4″ sizes (size graduations might be too course for small prints, but you can cut them off too).
The heads usually have a countersink that requires a chamfer on the hole (or not caring if they’re slightly proud of the surface). I find that leaving the hole bore a little loose is better than trying to minimize it.
You really need screws designed for plastic. They are called PT screws and have a thread form designed to work in plastic. Also only use self tappers in plastic if it is not going to be disassembled much, you only get a few uses before the thread breaks away and they don’t hold very well.
Agreed, thread formers are much better than tappers.
Inserts are needed for anything you intend to take apart more than a few times. Embedding square nuts in the part also works pretty well if you don’t want to use heat set inserts.
With self tapping screws, you have to be very careful not to cut a new thread when reassembling the part.
Came here to say this. :)
One-time assembly? Deck screw, wood screw, self-tapping-whatever-is-in-the-basement. Hole dimensioned to the shaft or just a bit larger, but smaller than the threads, natch.
Few-times? Tap the hole and use a machine screw. I usually make the holes the nominal shaft size (2.5 mm for M3) but they come out a little small b/c 3D printers. Tapping solves that nicely. I’ve rebuilt parts with this method in the tens of times, and this is my go-to solution, but I still feel like I’m getting away with something.
Many-many times? Embedded hex/square nut and machine screw is the strongest, but heat-set nuts work too if space requires them. I prefer hex nuts in general b/c they’re cheaper and stronger. I’ve fooled around with embedded washers in addition, but it was overkill. YMMV.
On the tapped hole in plastic.
Now that I think about it, we have a dog-poop-bag holder that goes together with an M4 threaded rod and a tapped pillar. It is not subject to high load, but we’ve screwed it apart and together at least once a week for three-plus years now. So 100 cycles in straight PETG? Not too shabby!
Still feel like I’m doing it wrong, though.
really perplexed by this attitude :)
i mean i basically agree about the downsides of using tapped plastic to receive a many-use screw. you will definitely tear up the threads. though in a lot of cases i find it takes more to do that than i might expect. like an M3 going into a 2cm deep 3.0mm nominal diameter hole will be so tight that it is a nuissance to screw in the first time, and then after ten uses, it is still a nuissance to screw in.
but i don’t understand doing many cycles for a screw. i use screws when i want to be able to open it up to repair it. i might open up something with screws a dozen times over a decade, absolute maximum. but if i need to open it up as a part of regular usage, i come up with something easier than a screw!
it really depends on the setting but i have used a pin that can be pulled out (like a cotter pin), or, you know, a latch. or even, if i’m using screws, a wing nut. last thing i want to do is use a screw driver as part of my user interface for my doodad
Already have a complete collection of M3 and 4-40 screws and don’t want to add yet another screw type to the BOM. Thomas showed a 3D printing technique for self-forming threads (5:15 @ https://www.youtube.com/watch?v=HgEEtk85rAY&ab_channel=MadewithLayers%28ThomasSanladerer%29)
It takes care of the ‘where does the plastic go’ problem. I have been using this on parts that may expect < 10 times insert of the screw, especially useful on protos where I would normally use brass inserts.
Anything’s a self-tapper in plastic. Just make the hole a little smaller than the screw, and any screw will do.
I worked at a well known laser printer manufacturer on the engineering side. We used self tapping screws on assemblies that were designed for disassembly and reassembly.
The rotational speed on initial insertion was carefully controlled so that the friction generated melted the material forming a good thread. Too slow and the screw “jittered” causing fractures. Too fast and the material stuck to the screw effectively welding it in.
When I needed to fix a PCB to an ABS enclosure I just used regular M3 and a premade hole. I did print a list of candidates with different inner sizes, at steps of 0.2 mm to see what would hold best.
Still kicking around in production.
By the way, I was somehow reading the article in your voice even before scrolling up and checking who had written it.
Self tapping screws are easily reused and there’s no reason that the threads in the plastic won’t hold up unless you force the screw to create new threads until the hole is stripped.
To reuse the threads, simply insert the screw and while applying very gentle force with the driver, reverse the screw until you hear (or feel) a click or bump. Turn the screw in normally and it will follow the existing threads.
If it takes any force to screw in, reverse again and feel for the next bump, then screw in normally.
While I can’t speak specifically about 3D prints since I don’t have one, but have made a few things with plastic stock of various sorts. I’ve basically learned to only use screws as sort of a cocktail of locating dowels and preload fasteners, and then rely on big honkin’ quality zip ties tightened so they’re almost at their breaking point, as the actual fasteners holding the parts assembly together.
It’s ugly as sin, but: if it’s stupid but it works…
I have always just used machine screws like M3 as self tappers. They provide a surprisingly strong connection as long as you have enough meat/length in the plastic your screwing into.
If I feel really fancy I will tap the whole first with a machine tap and a drill.
If you’re going to use “self-tapping” then why not just use a tap? (Industry will use self-tap to remove a step or two and save time, money.)
Trilobe/Plastite screws are great. The shape puts a lot less stress between layers than a classic round profile wood screw or plastic screw. I bought a set on Amazon as #6×0.5″ screws, and can just use default settings for an M4 SHCS as a clearance hole and M4 tap as a “tap” drill hole in Solidworks. Ever since I got them I’ve not really had to break out the soldering iron and threaded inserts unless it’s something I’ve downloaded that forces me to use them.
Hm I have several hundred taptite screws from Hammond enclosure that will probably last a lifetime for hobby/fun projects. Yay a new “standard” for my future 3D prints :-)
I don’t see how this is some giant revelation? Have you not taken apart any mass produced device before? They’ve been using various metal screws that self tap into plastic posts to hold clamshell cases together for decades.
It works fine but it’s not reliable for something that needs to be taken apart more than a couple times. The posts eventually get hollowed out by the screws and unlike a threaded insert which could theoretically be replaced if stripped, once your hunk of self tapped plastic gets stripped out you’re reprinting the part.