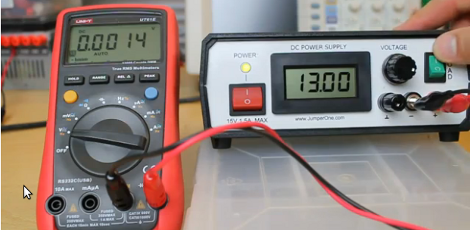
The LM317 is a favorite for many people who want quick, cheap, reliable and ajustable power. It only takes a few parts to set up and it does its job rather well. Sometimes though, you just need a power supply.While there are a million tutorials out there, not many go as in depth as [Phil] does in his 2 newest videos.
Covering everything from the wall outlet to the final output, [Phil] explains each part step by step, stating what it does and the math and formulas behind it all to produce quality results. He then goes over to a working model and reviews each part showing its real output on a oscilloscope, which is very handy if you do not have one yourself.
In the second video he takes that knowledge and builds it all up into a professional looking bench top model with LCD meter readout and varnished paper to complete the front look. If you’re looking to build your first bench supply or want a better grasp on what exactly is happening in the one you have now, you should join us after the break for these 2 quality productions.
[youtube=http://www.youtube.com/watch?v=2EFnqZUxFZ4&w=450]
[youtube=http://www.youtube.com/watch?v=hUGzeeTaJCs&w=450]


Look further and you will find a tutorial out on the intarwebs for using a pair of big t03 transistors to boost the output of the 317 to epic levels…
When you need 5.1v at 65amps….
>>When you need 5.1v at 65amps
:O
I don’t think you’re doing it right.
If you want 65 Amps, don’t use a linear regulator, even with a bypass transistor. You’re going to get uber inefficiencies.
Fun fact: the VAX 11/750 had a 135A 5V power supply. http://computer-refuge.org/compcollect/dec/vax/11750/11750-5V-ps-big.jpg
Another fun(?) fact: an older NEC letter sorting machine has a 300A 5V power supply.
video isnt playing back well, yet it plays flawlessly on youtube. Perhaps related to the plugin used?
The LM317 is a variable voltage regulator chip. I’d wondered how those things work.
Great vid, nice project!
Most modern desktop computer supplies have around 20Amp 5 volt rails, if not more. The five volt rail is usually low voltage high current, the 12 volt rail is higher voltage, slightly less current, but more total power.
Very useful info here. I was in the process of building a power supply myself. I am going to use it for future Arduino projects. My searching on the internet resulted in several schematics, but nothing with this much put together this well.
Anyone notice the mouse pointer in the screenshot yet?
what mouse pointer ….
It was hiding behind my own pointer. Filthy little pointers that are.
i wonder what size fuses he used for everything?
Man… where was *this guy* when I was making my way through my Electronics courses in college??? Very nicely done – a lot of thought put into the presentation and not just a read of a text book.
The actual build looks better than some commercial p/s I’ve seen (and he includes some good tips for beginners such as mains separation and discussion on building the bridge rectifier from discrete diodes vs. a single component).
Ladies and Gentleman, this is a fine example of how tutorials should be done. Then again I may be biased because this was the way where taught in tech school. Build it this way, measure and observe the results; next try these modifications, measure observe the results again. What changes did you see, why did you see those changes?
That was excellent! I am inspired.
Love it, was planing on building another this weekend!