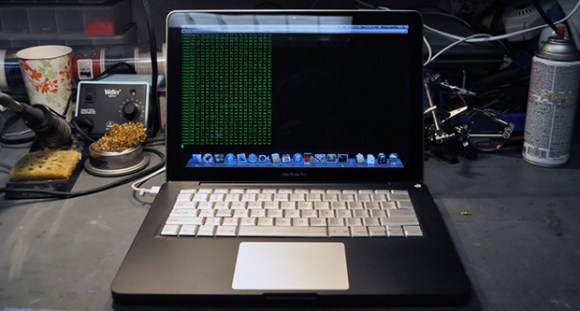
As a favor to a friend, [Phil] traded a unibody MacBook logic board for one with a broken headphone jack, a busted keyboard controller, and a nonfunctional fan. Not one to let bad hardware go to waste, he set off to repair this now-broken laptop by scavenging parts wherever he could. The whole thing ended up working, and became a very impressive display of soldering skill in the process.
The first step for the keyboard transplant was to cut a properly sized hole in the newer unibody MacBook for an older, pre-unibody MacBook Pro 17″ keyboard. This was done by cutting out the keyboard pan of the pre-unibody case and very carefully epoxying it into the unibody chassis. The MBP had a separate keyboard and trackpad controller, so of course [Paul] needed to find some space inside the chassis for these new electronics. This space was found next to the internal hard drive, and a liberal application of hot glue held everything together.
In the future, [Phil] plans on adding more LEDs, a 3.5 mm jack, and a USB to TTL converter – a necessity for any true ‘hacker’ laptop. It’s still a wonderful piece of work, and an incredible amount of effort and skill to get it where it is today.


Cool hacking…. but why not just get a replacement proper keyboard and trackpad on eBay and not ruin the resale value?
“busted keyboard controller” –> Probably why ;)
I think the resale value of a 2009 Unibody Macbook is pretty low these days.
Because the keyboard controller on his logic board wasn’t working. The PU keyboard has it’s own controller and can be connected as a USB device. Thus allowing him to use the ‘broken’ logic board.
It’s a kuldge but it works. hats off.
Hot glue? Well chewed gum is organic and a much better glue when it drys out. It is amazing what watered down crap is sold in stores as adhesives. The public is kept from the good stuff because of huffers and the EPA.
I use hot glue because its not a pain to get off something after I put it on. It comes off in one piece without much effort or tools involved. If I really wanted something to stick there is epoxy for that.
Hot glue is a great adhesive. Try squirting a blob of hot glue on almost anything, let it cool without smearing it. Then put a few drops of rubbing alcohol on it and give the glue a little tug. The alcohol breaks the bond and forces the glue to let go. I have tried this with a bunch of types of hot glue and materials and the result is the same every time. It really is great for small model airplanes and electronics where you want to quickly mount something and remove it later.
I wonder what kind of person it takes to snip duck tape and electrical tape. Last few rolls I bought were garbage, ultimately had to melt the electrical tape to itself to get it to stick, and the duck tape I had to tie.
Gaffers tape is the best. Just saying…
No, adhere things with the tears of your enemies women. Nothing can beat that.
You both make good points and here is my two cents, well actually my dad’s two cents since he hangs out at Lowe’s to escape family functions.
He noticed the same thing you did: The glue on the new tape is crap. His pointer from one of his Lowe’s buddies is to go for the Pro stuff or Contractor Special Rolls as the regular electrical tape and duct tape on the shelf is all China crap and the same stuff they sell at the dollar tree. The pro and contractor level stuff is higher grade and indeed has more/better glue. I always steal a couple of rolls when I am at home visiting :)
Gaffer’s tape is good stuff, but a beast on removal. I had two synths that I literally had to dremel the stuff off of as it had been on there for decades. No alcohol/goo gone/ or oils would budge the bottom coat lol. Impressive indeed! If you have any removal techniques I would love to hear them :)
You can get good glues all day, they’re not in stores because most people are happy with the old standbys. 99% of glue this to that tasks normal people engage in can probably be solved with Goop(tm). Chewing gum is almost all synthetic now…
Giant kudos for an excellent hack/repair job. Very cool.
And I don’t even like Macs…
That my friends is how you ruin a Macbook Pro
http://i.imgur.com/wZQui3a.jpg
Its good to see people keeping the pc err mac modding spirit alive
“And I don’t even like Macs…” Seconded.
Won’t the hot glue come dripping out of the thing once the CPU gets a little work? ^^
The things being held into place by hot glue are very light, and no where near the CPU. Also, with the giant holes I drilled in the bottom cover, heat is no longer a worry. :)
Wait, is it Phil or Paul? I’m confused now.
It’s Phil.
The new USB port is crooked :(
It’s a tiny bit crooked, the first time I did it… it was way out of whack. I removed it, and did it over again.
The only thing I don’t like about this tope of laptop is that I had to stop wearing a watch. the wrist band would scratch up the top case. But now I don’t stress about time so much. ;-)
Now you just have to upgrade the OS to Linux and it will be a job well done!
rEFInd is a godsend. DebianKrew4Lyfe.
Talking about broken laptops: http://lektiondestages.blogspot.de/2013/06/tldr-reviving-acer-aspire-3820-tg-with.html
Simultaneously great and . . .rough work. I can’t speak for everyone, but I bet that a lot of apple service providers have trashed case tops for that model laying around. We probably have dozens for that model in our scrap piles in the back room. Nice work on kludging the 17incher trackpad in though :).
Bah. As in trashed case tops with enough working hardware that the original keyboard could have been used in some fashion ;P
the web page is Jamies http://www.jwz.org ode to matrix