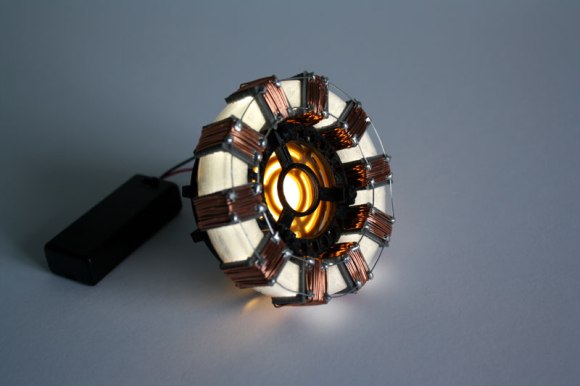
[James] just keeps cranking on the idea of the perfect arc reactor replica. This time around he’s made most of the parts using a 3D printer. His write-up covers the basics of the build, but he also used this opportunity to make some tutorial videos on designing the parts using Autodesk 123D.
This is definitely an improvement on his last prop, which was built out of dollar store parts. When designing the components he tried to be as true to the original movie design as possible, while keeping in mind the limitations of using a home 3D printer; he printed them on a Lolzbot AO-101.
The videos below give you a good idea of what it’s like to model parts using 123D. The tool set is pretty simple compared to something like Blender 3D. But [James] uses them in such a way that the components get complex fairly quickly. The second video includes some footage of the parts being printed, as well as the assembly process that adds wrapped wire for looks, and LEDs for illumination.


Reminds me of an old piezo-mic/buzzer…
Well done :)
In the movie they slather on a second layer of artificial skin onto his chest and paint it to seem real. Then countersink it into the fake skin. Fascinating :3
3D printer – bah! Tony built his in a cave! With scrap!
looks like the compass sensor in my car lol. (2001 Mitsubishi Eclipse)
Just because it was 3d printed, doesn’t mean it belongs on HAD.