
What’s your favorite OpenSCAD command? Perhaps it’s intersection() or difference()? Or are you a polygon() and extrude() modeler? For me, the most useful, and maybe most often overlooked, function is hull(). Hull() does just what it says on the can — creates a convex hull around the objects that are passed to it as children — but that turns out to be invaluable.
Hull() solves a number of newbie problems: making things round and connecting things together. And with a little ingenuity, hull() can provide a nearly complete modelling strategy all on its own. If you use OpenSCAD and your creations end up with hard edges, or you spend too much time figuring out angles, or if you just want to experience another way to get the job done, read on!
The Rounded Box
 There are multiple ways to make a rounded box. One is to draw a 3D box and
 minkowski() around it with an appropriate cylinder. Another method, that renders a lot faster, is to draw a 2D square, offset() it with rounded edges, and extrude this upwards. I’ve even seen people make rounding tools and difference them out of the model.
For me, the most intuitive method is to place the four cylinders that would be the box’s round edges, and connect them all together with hull(). If you’ve never really understood hull() before, this is a great place to start.
Hull() takes any number of objects and builds their convex hull; the action is like wrapping cling film tightly around the shapes and solidifying the result. To make the promised rounded box, take the hull() over four cylinders, one located at each of four edges. Not much more to say about it than that, right?
points = [ [0,0,0], [10,0,0], [0,10,0], [10,10,0] ];

module rounded_box(points, radius, height){
    hull(){
        for (p = points){
            translate(p) cylinder(r=radius, h=height);
        }
    }
}
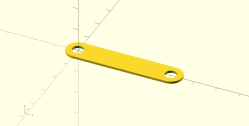
Sure, there’s more! Rounded triangles, hexagons, heptagons, octagons, and other-gons. And there’s no reason to keep it regular either, just change the corner points. But perhaps the most useful simple application of hull() for me has been making rounded ends on plates, bars, or linkages.
module cylinders(points, diameter, thickness){
for (p=points){
translate(p) cylinder(d=diameter, h=thickness, center=true);
}
}
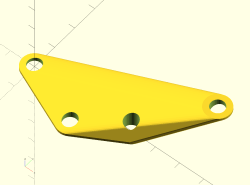
module plate(points, diameter, thickness, hole_diameter){
difference(){
hull() cylinders(points, diameter, thickness);
cylinders(points, hole_diameter, thickness+1);
}
}
module bar(length, width, thickness, hole_diameter){
plate([[0,0,0], [length,0,0]], width, thickness, hole_diameter);
}
Armed with bar() and plate(), and the dimensions of all the parts in a Jansen linkage, for instance, you’re most of the way to a printable Strandbeest. Notice how pleasant the workflow is: figure out where you need your holes, type them into a vector of points, and OpenSCAD takes care of the rest. Thanks, hull()!
Joining Objects Together
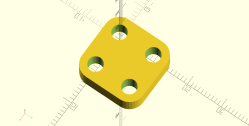
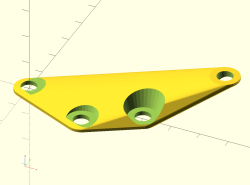
But wait, there’s more! In the bars-and-plates example above, all points are constrained to a plane. If you need a complex, three-dimensional mounting plate, you simply have to push the points into the third dimension, and clean up after the mess that you’ve just made.
points = [ [0,0,0], [40,0,0], [23,-10,0], [60,19,10] ];
difference(){
    plate(points, 10, 1, 5.5);
    for (p=points){
        translate(p + [0,0,1])
            cylinder(d1=10, d2=15, h=7);
        translate(p + [0,0,-1])
            mirror([0,0,1])
            cylinder(d1=10, d2=15, h=7);
    }
}

Once you start thinking of using hull() to connect up objects arbitrarily located in 3D space, you’re on the way to mastery, and we can leave simple mounting plates behind. For instance, I made a plant-lamp stand out of 20/20 aluminum extrusion with just a few simple shapes and some hull().
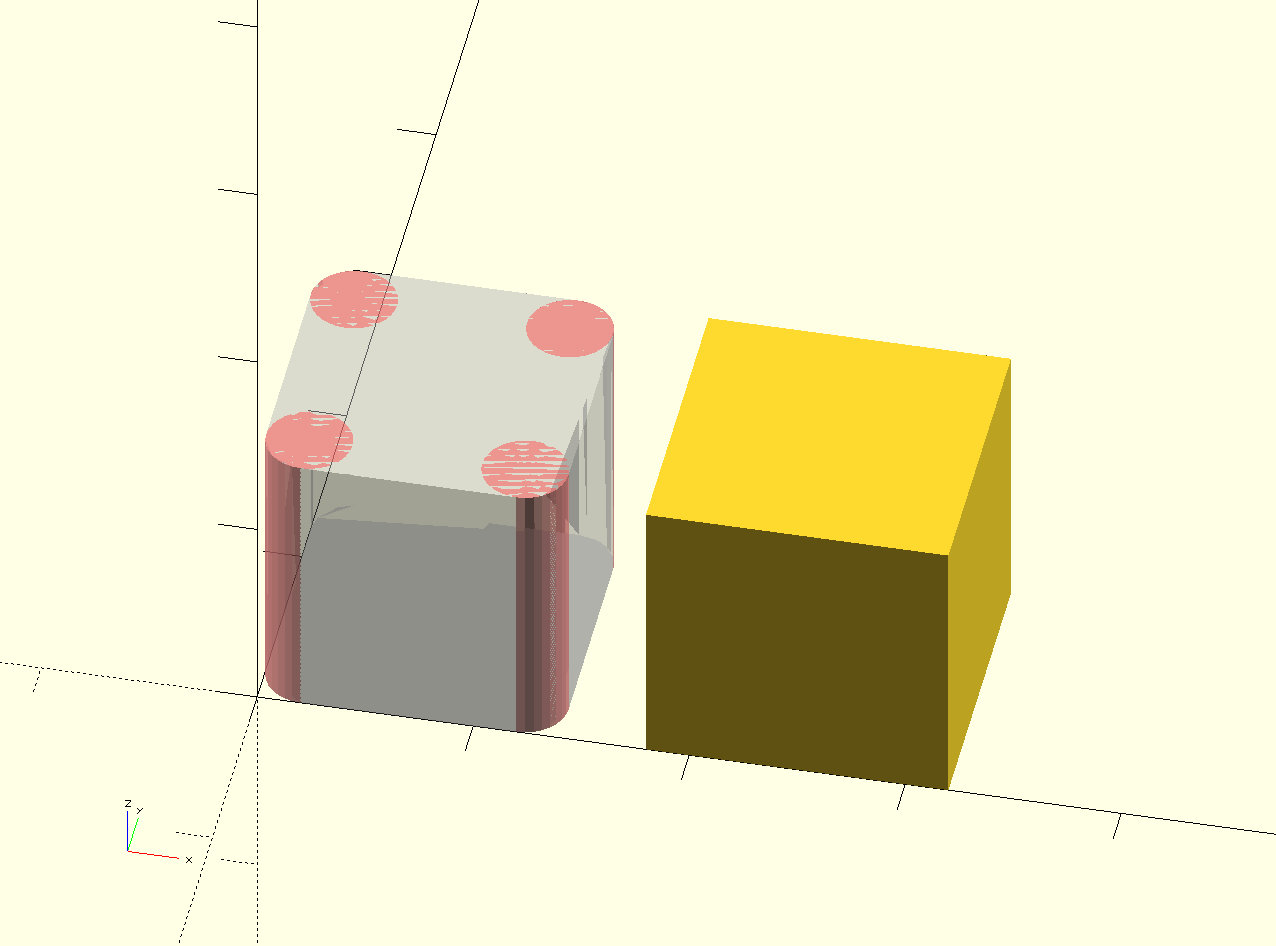
The lamp’s legs need to attach to the extrusion somewhere, so I started with a 25 mm cube, punched through with the profile. Next, the feet need to hit the floor, so I placed two more (thin) cubes far enough apart so that they could accommodate the plant’s pot. Each foot is individually hull()ed to the center block, the model rotated, and it’s off to the printer. Because I had the extrusion profile already worked out, the entire design took under fifteen minutes. The print took something like five hours.

Hull() came to the rescue again in a very similar design problem that might look entirely different on the surface. A piece of my bike light bracket broke. For the tab that fits into the light, a simple cube would do, and screwing the bracket onto the seat-tube clamp just required a hole. But how to connect the hole with the cube, without worrying too much about the shape?
The one refinement here is that the hull() can’t surround the entire mounting tab, because it wouldn’t fit into the light’s slot, so I made a landing pad for the hull out of another simple cube, shown here in red.

This is a general strategy: position the objects that you’d like to join together in 3D space, embed a landing pad in each of the objects, and hull() them together, in pairs or as a group as appropriate. The shape of the landing pads determines the shape of the connector, and the results of hull() over 3D objects and space can often be surprising, and often surprisingly elegant, so you’ll want to experiment. But once you get used to thinking of hull() as an all-purpose connector, you’ll find uses for this technique everywhere.
Extending, Getting Creative
With a few helper functions, you can make modeling with hull() a bit easier. For instance, in the lamp example above, we needed to hull() one foot together with the central block, and then repeat the action for the other foot:
hull(){
    mount_block();
    foot_block(1);
}
hull(){
    mount_block();
    foot_block(-1);
}
So much duplication! That won’t do. Similarly, if you want to make creative organic shapes, you’ll find it handy to hull() objects together sequentially in a chain, rather than all together in a lump.
module multiHull(){
    for (i = [1 : $children-1])
        hull(){
            children(0);
            children(i);
        }
}

module sequentialHull(){
    for (i = [0: $children-2])
        hull(){
            children(i);
            children(i+1);
        }
}
 Both of these functions take advantage of the
 children() mechanism, which lets you embed sub-objects into a module of your own. multiHull() takes care of the lamp situation; it hull()s the first child object pairwise with each of the others. sequentialHull() connects the first object to the second, the second to the third, and so on.
The one limitation of these functions is that they can’t accept objects inside a for() loop as children, because for() loops in OpenSCAD end with an implicit union() command, joining all of the elements of the loop together in one piece. This means that, in some cases, you’ll end up writing the for() and hull() loops out explicitly yourself. I still find these functions useful. For instance, here’s the lamp foot code:
multiHull(){
    mount_block();
    foot_block(1);
    foot_block(-1);
}
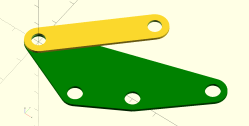
To show off these functions, let’s make a generic PCB cradle — the sort of thing you want under just about any bare-board device if you have small metal parts floating around on your desk, for instance. Starting off with the locations of the mounting holes (go, go, calipers!), multiHull() some cylinders together with a central point to make a cross that connects them all together. If you want something more substantial, you can use a sequentialHull() to go around those points in a ring, making a square border. And finally, if you would also like bumper walls to fully cradle the PCB, create two rounded-edge boxes by hull()ing cylinders and taking their difference. Check out the code: everything is done with hull(), cylinder(), and difference().
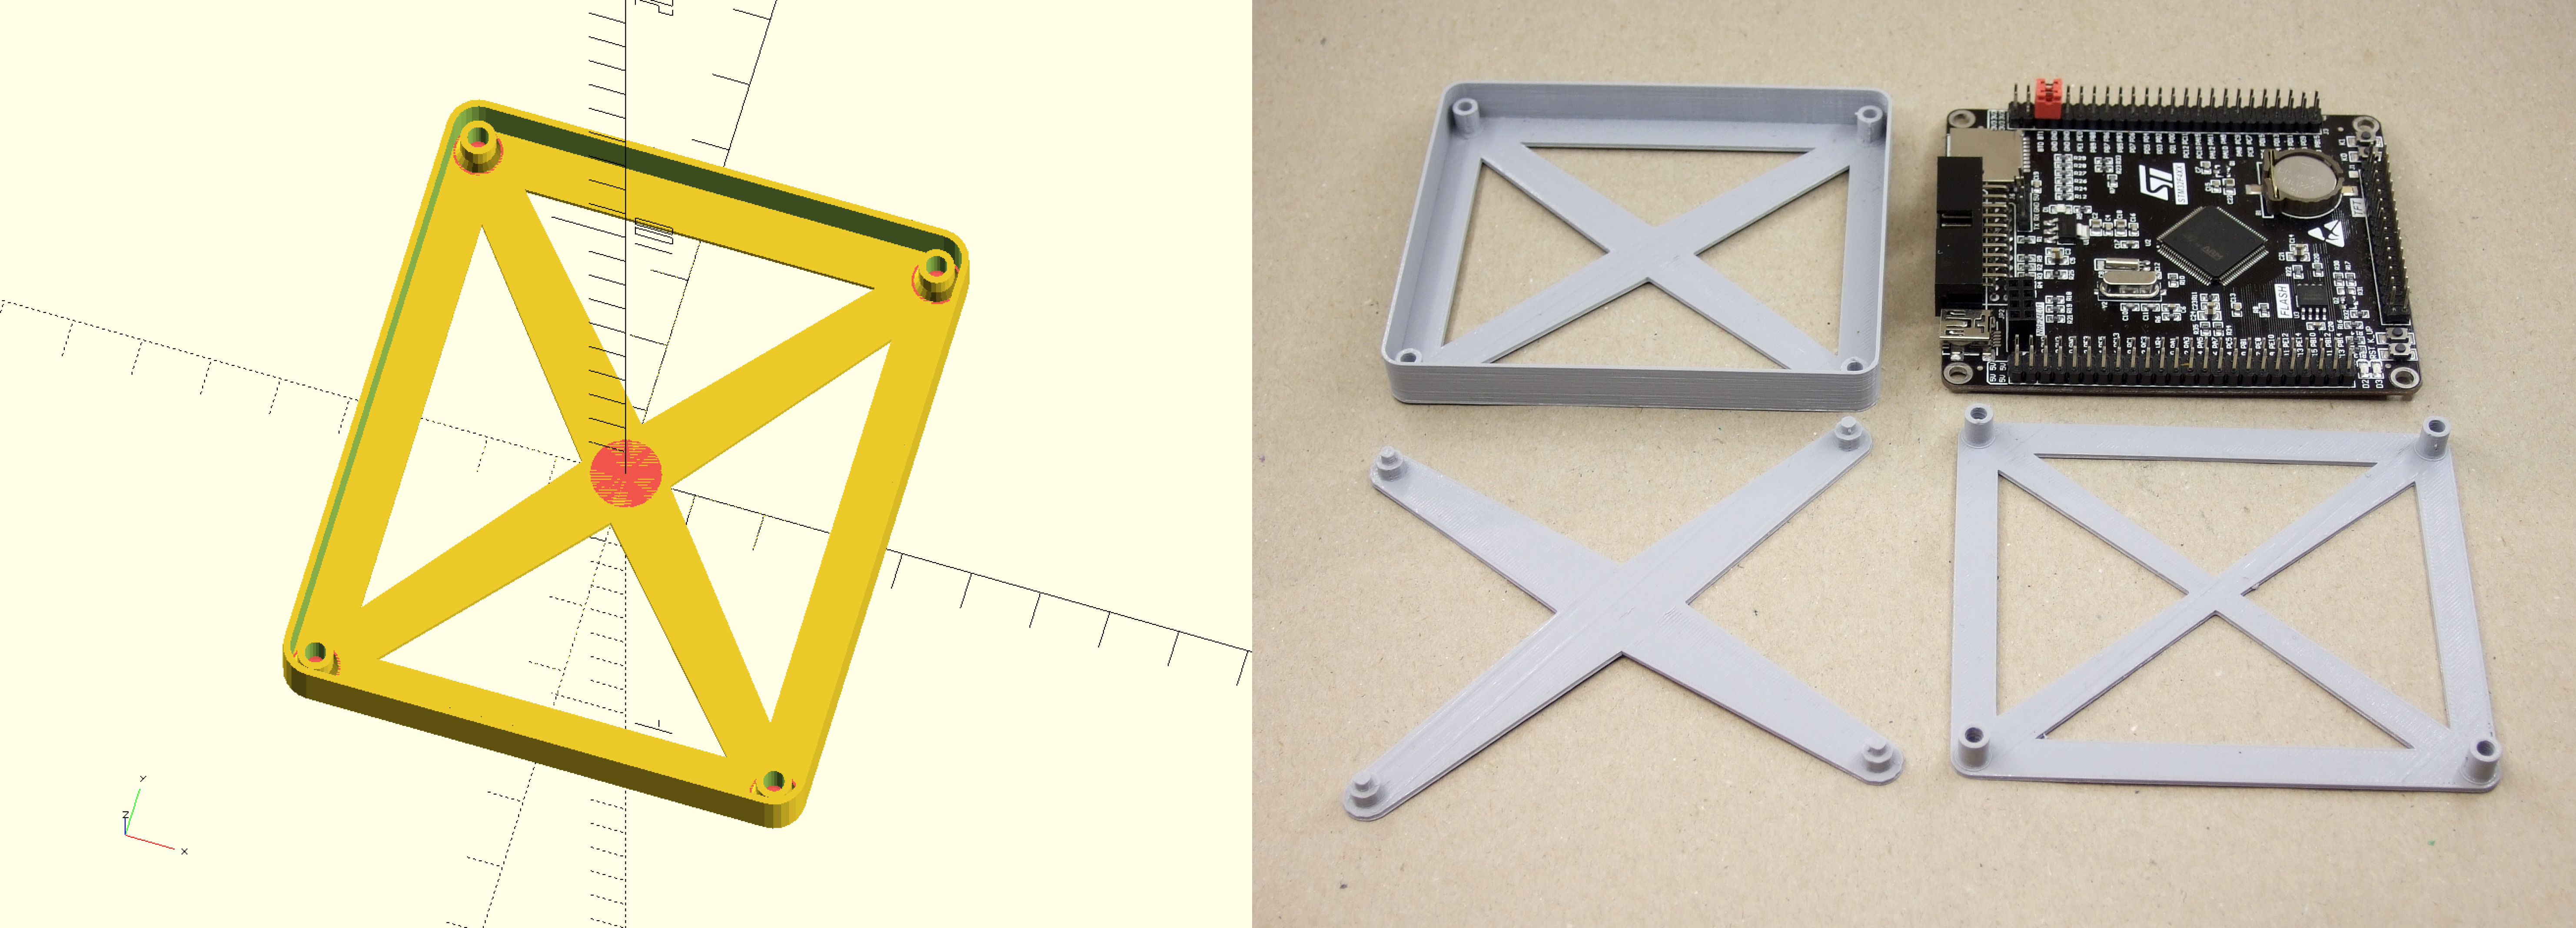
All of the hull() functions here, and a few more, are in a hull.scad file so that you can include them in your projects with a simple use <hull.scad> at the top of your code. If you use OpenSCAD, but haven’t fully embraced hull() as a useful modelling strategy, I hope that this writeup will help point you in the right direction with some useful design patterns. Enjoy!


Thanks, I’m on the verge of downloading OpenSCAD, it’s nice to see some existing code with explanations.
minkowski() is my favorite function- it’s great for adding fillets to edges.
minkowski() is a sharp sword – it’s handy for softening edges, but it’s also a huge performance hit when overused.
I agree with both!
A great function that I use a lot for creating fillets between two parts does some really cool tricks with minkowski sums and unions:
https://github.com/clothbot/ClothBotCreations/blob/master/utilities/fillet.scad
But yeah, with complicated models it clobbers the compile time. But then, that’s something you only do once per model anyway. One or two minutes extra for something that’s going to be a multi-hour print? No worries.
My experience with OpenSCAD over the years is that it invariably crashes within about 5-60 minutes every time I try to use it. I’ve tried it several times over the past 5-6 years, on different computers and different versions of Windows and the experience is always the same.
That said, this looks like a nice feature. It’s sort of like a cross between a boolean join and a loft operation all in one.
Welcome to 3d design? I thought we had all accepted this and set up automatic incremental file saving.
Speak for yourself. I’m not okay with garbage software, just because it’s common.
That said, I haven’t had any problems with the current version crashing.
I don’t work with super complex objects, though, so YMMV.
Just imagine HaD crashing as often. I’m sure a workaround would be running two browsers at once.
I don’t have problems with OpenSCAD crashing, but here’s an awesome tip:
Don’t edit your code in OpenSCAD! Its editor isn’t very good anyway. Use your favorite external code editor and turn on Design => Automatic Reload and Compile. Then set the OpenSCAD window as always-on-top if your OS supports it, or tile the text editor and OpenSCAD windows. Sublime has a package for OpenSCAD syntax and I’d wager VSCode or Atom probably do, too. No more losing work!
https://en.wikibooks.org/wiki/OpenSCAD_User_Manual/Using_an_external_Editor_with_OpenSCAD
+1
This is how I work as well, and I have no issues with crashing.
I use openscad at home on Linux at work on Macbook and sometimes on windows and it never crashed. I too use external editor and git for version controll and it works like a charm. Though sometimes on Linux it stops live view for some reason.
I’ve been using freecad most of times but it got so unstable that right now it’s not worth it for me
I’ve never had OpenSCAD lock up on Windows, but FreeCAD and SolveSpace certainly did when I tried to extrude an imported DXF of a gear. OpenSCAD had no problem at all. I gave up on SolveSpace due to its apallingly punative error message dialogs.
Can’t say I have any complaints about OpenSCAD, either, across many versions over several years. If I leave a few projects open for a few weeks (yes, weeks. other priorities) I’ll eventually have memory leak problems. Seems to be more related to bad video drivers, though.
You run it in Windows? I don’t have this problem running it in Linux. Maybe that’s the difference?
It’s been working just fine in Win10 for me. Version 2015.03-2 if that makes any difference.
I can’t think of a single time OpenSCAD has crashed for me, and I’ve been using it almost exclusively for all my 3D design over the last couple of years.
Though perhaps it’s some Windows issue. It’s been a long time since I’ve used that OS.
It used to crash a lot in 2014. There were issues with the upstream libs. I think that’s all in the past. Maybe you have an old version?
I use Linux, external editor, v.2015.03, and it’s rock solid.
Tieing? Really?
Everyone knows it is spelled Thai-ing!
“Tieing” is apparently archaic and deprecated, but I’ve been spelling it that way all my life. (I’m not that old, though. It’s been out of fashion for a century.)
If it’s OK, I’ll leave it — we’re like the #5 hit for the misspelling in search engines. But I’ll spell it your new-fangled way in the future.
That sonoff basic with the cables hanging out. I’ve a few of these and put them in a box with some safe strain relief. Please do the same.
Thanks Elliot, this makes eg Onshape’s loft command look clumsy.
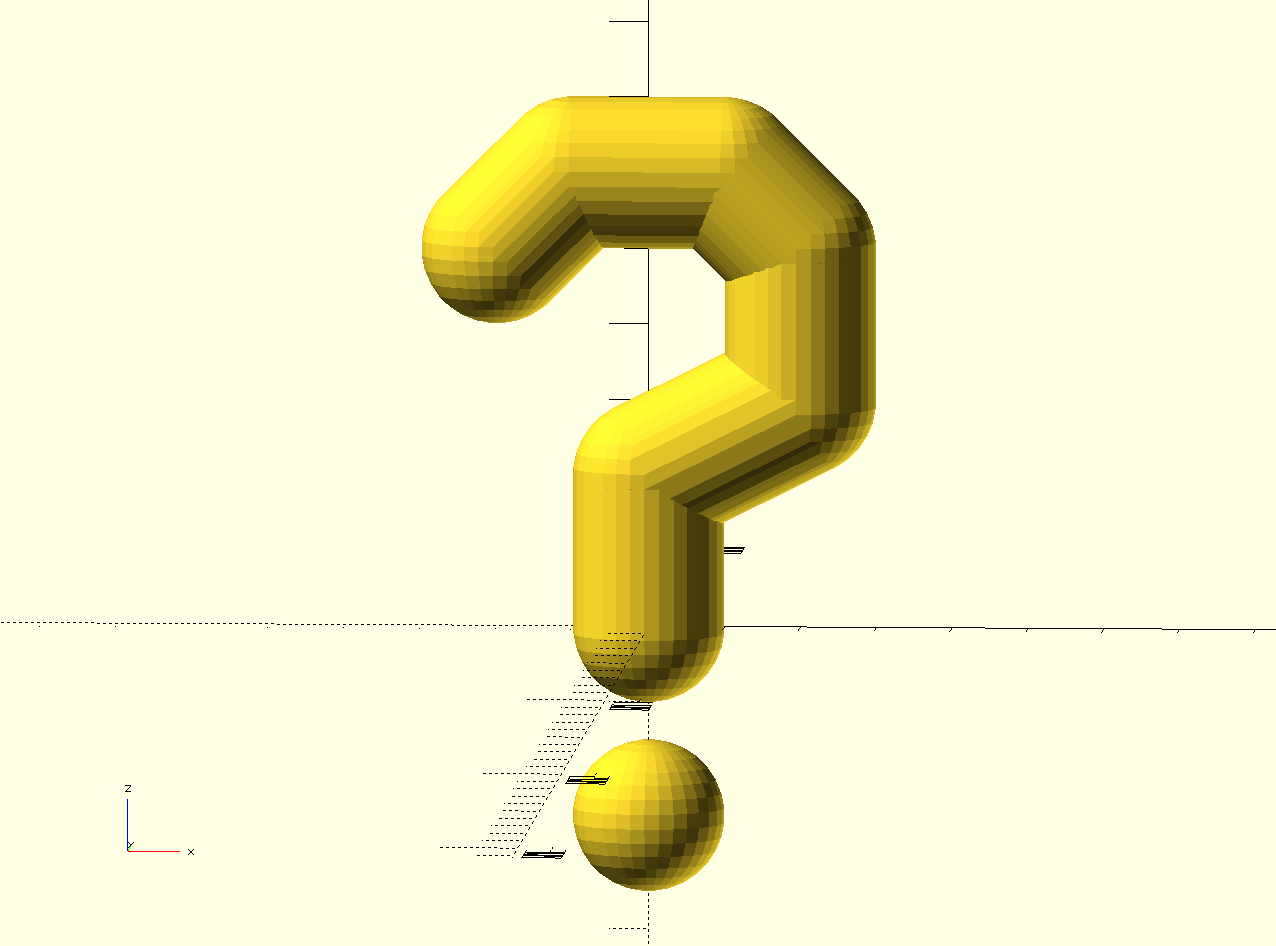
For whatever reason I found that hull is more efficient when working with spheres than some other techniques. But I’ve only done one thing (A generic hex with arrow for tabletop games) with OpenSCAD so far and it was a while ago. I think it was that some of the other techniques involved iteratively creating a bunch of geometry in a wasteful manner.
Differencing two hull()s of the same object with an offset in size is my favorite way to generate complex skins. In fact I just praised it last evening: https://hackaday.io/project/45404-arcus-3d-p1-pnp-for-3d-printers/log/91569-mirror-arm-done
minkowski() and hull() both *really* slow down if you use sphere() as your corners. Stick to cylinder() and cube() and things run 10x faster.
That is a beautiful model!
I could have just called my article “In OpenSCAD, hull is your friend.” and saved a lot of typing…
This is a great writeup on hull(), which I needed a nudge to get more comfortable with! children() too
My one hull() trick is to make a “translated extrusion”, ie: a cube with its top or bottom plane at a different XY, which normal extrude can’t do because it only goes straight up, by hulling between two cubes of nominal height and different position translations. This is much easier than writing out the full XYZ array for a polyhedron.
et voila! https://twitter.com/oskitone/status/928432714314760192
Here’s something I use quite frequently which I think is a good demo of using children():
module Spokes(n)
{
segment=360 / n;
for (i=[1:n])
{
rotate([0, 0, segment*i])
rotate([90, 0, 0])
children();
}
}
//This creates the given number of spokes for say a wheel, for example three spoked cylinders:
Spokes(3)
cylinder(r=SPOKE_RAD, h=SPOKE_LEN);
Children() is great for making “operators” that multiply, position, or modify other objects. These are fantastic examples!
My only gripe is that you can’t pass the children inside a for() loop, which I often want to do b/c I like the define-bunch-of-crucial-points workflow. So I often end up cut/pasting where I could be code-reusing. Still, no biggie, but it’s not “right”.
Still, between looping, children, and some of the “advanced” modeling techniques like hull and such, OpenSCAD is _much_ more powerful than many folks give it credit for being.
Agree wholeheartedly, it is super powerful even if it takes a while to get the code right.
One thing I would really like (tell me if it is available and I’ve just missed) it are simple input and output dialogs.
For instance,
Input(“How many sides for your polygon””, sides);
would put up a OK/Cancel messagebox with that string and an edit field, and wait for input.
and
Output(“your polygon has ${0} sides”, sides);
(not the message that goes to the output console pane, but a proper modal messagebox dialog).
A bit like the customisation thing on thingiverse, but right there in OpenSCAD.
That sounds like the perfect Google Summer of Code challenge right there.
I imagine it would be trivial to whip up a python script which does the same thing too via substitution.
Could you just use shear after extrusion, or am I misunderstanding what you’re doing?
Does anybody know where there is a changelog where I can see the differences between the last stable and the last dev-snapshot? The stable is quite old and wanted to check it out, on the first look it seems quite equal…
Use the development version.
You won’t get far with stable before you find yourself missing options you wish you had, and then you’ll discover they have already been implemented in dev. The development version has been perfectly stable in my experience. Use your own editor as noted above.
I use the stable quit intensive since years and the only big issue I have is the single core stl rendering which takes painfully long with some models I have. This has not improved as far as I know. And from opening the dev version and having a quick look, I found no big changes. So probably there are new commands or options to old ones? But without documentation its hard to find. I’m a bit afraid doing a git diff and browse the sources but I curious (-:
I just checked my dev copy, and rendering appears to still be single core. Or at least that’s how I have it running..
The changes that come to mind off hand are additional options in linear_extrude() and rotate_extrude(). Like for rotate_extrude() you can now specify an angle instead of having to difference your result. They are documented in the online help. As it seems to ‘just work’ and has useful stuff added, I have found no reason not to use the dev version.
A few years ago, I was working on a package to do raised and embossed lettering using Hershey fonts, and hull()ing together spheres was the method I hit upon. It worked, though as has been mentioned, that can be a real performance hit. I think I abandoned the project when proper font packages became available. Still, there’s something nice about the look of letters seemingly engraved into the material, where scale can be set independently from the “tool size” of the underlying spheres.
If you can get away with it, like for characters, use cylinders instead of spheres. The number of edge-to-edge pairs is N^2 with cylinders, but N^3 with spheres.
Or just make a cup of tea during the compile time like in the old days.
That must have been before sword fighting in office chairs.
Great article – thank you. I’try these ideas on my line tracer bot I’m building
I found chainedHull() in an openSCAD wikibook that’s basically your sequentialHull(), but I didn’t think of multiHull(). That’s going to be a useful addition, thanks.