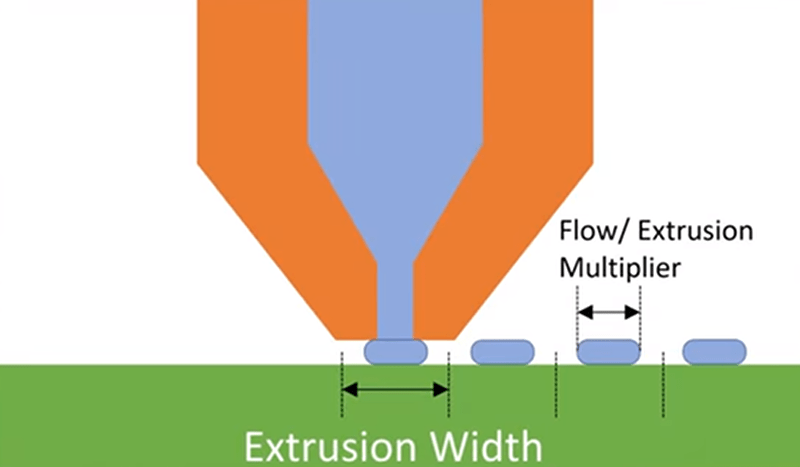
When you 3D print something, you probably adjust the layer height based on your desired print quality. Speed is another parameter that many people adjust. But what about extrusion width? The parameter is there, but most people leave it at the defaults. [Stephan] wondered about it, and after running some tests, made a video you can see below trying to determine if it affected strength and print quality.
The tests were pretty straightforward. Some Benchys and other test pieces at each setting were observed and — in some cases — destroyed. He ranged the width from 90% to 250% of a 0.4mm nozzle. Important to note, his results are from a nozzle that has a flat lip around the aperture. If yours doesn’t look like that, you will see different results.
Until he went to 140%, the appearance of the Benchy test print looked good. Once he got higher than 140%, there were print artifacts. Strength testing shows that higher widths actually were stronger to a point. In addition to a test piece, he also printed some practical hooks to see how much they could hold with different shell and infill parameters.
This video is part of a series where he examines the strength of parts based on different parameters. Well worth checking out. Everyone wants stronger parts. Some add coffee to PLA, others choose steel.


A few years ago I made the mistake of letting Slic3r set the line widths automagickly. It set infill smaller than the nozzle diameter which was a disaster. I have never trusted it to set the line widths automatically again. I find that setting the line width to match the nozzle diameter seems to result in highest print quality. I never set a line width greater than 0.5mm for a 0.4 mm nozzle because of print quality degradation. I always check the gcode rendering before printing and adjust line widths to get exactly what I want in narrow features of the print.
I’ve always been annoyed by those gaps in thin walls but didn’t know I could fix it. Thanks for this suggestion.. totally trying it on my next print!
This doesn’t fix it. it just scale it up.
since the breaks are along the print layers, try printing them on their side, alternate some long runs across the x and y axis, like plywood, favor x for a few runs, then favor y for a few. I bet you would get better strength.
Unless your goal is to measure the inter-layer bond strength in the first place.
Another important factor in volumetric calculations is filament diameter. No filament is 1.75 or 2.85mm on the nose.
I have had a number of rolls that are +/- .01 of 1.75 mm.. in one direction. I don’t know if it’s the spoiling process or if it’s extruded out of round but the perpendicular side of where the manufacturer measures typically varies within the .1 mm range throughout a spool.
I did measure the filament spool in 10 parts (every approx 1 meter) and got an average of 1.735mm (the size ranged from 1.720mm to 1.743mm – This is what you get when you buy cheap filament from China haha). Then I adjusted the settings in Cura and decreased the filament width by 0.01mm (put 1.725mm as filament size) and got better layer heights. I am currently making a filament width sensor that measures the filament every x minutes and adjusts the filament feed rate accordingly :) but I don’t have a lot of free time to do so :(
What’s old is new again! Skeinforge (IIRC) used to have a parameter called “width/height” or similar. You would specify the squish ratio directly, b/c it was known to help layer adhesion.
Slic3r got rid of it, in a streamlining effort. (Skeinforge had redundant parameters — configuring it was a black art.) And then “w/h” became mostly automated.
I used to run 120% standard. And with a 0.5 nozzle, and 3 mm filament. In ABS. Uphill both ways. The bad old days. Prints look much better now, but they may have been stronger back then. It’s great to see this info scienced around in these modern times.
you say “rarely used,” I say “used daily.” There’s no better setting for a robust vase mode print than increasing extrusion width.
Alternating line width for all layers would be even better.