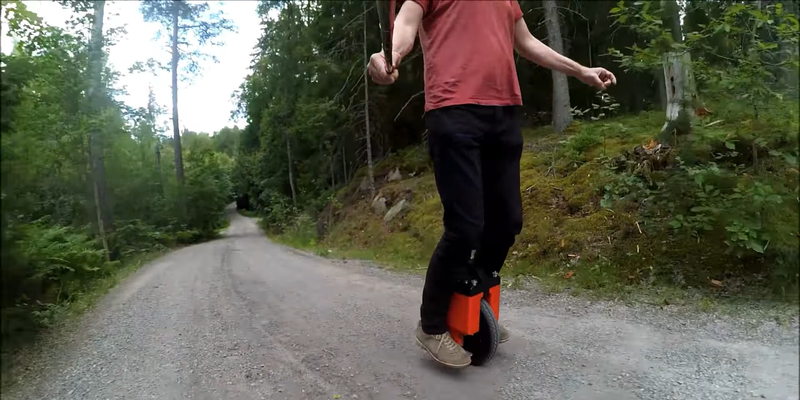
Actually riding around at 30 km/h on a 3D printed means of transportation is pretty gnarly, if not foolhardy. So we were actually pleased when we dug deeper and discovered that [E-Mat]’s unicycle build is actually just a very nice cover and battery holder.
We say “just”, but a 3D-printed design takes a couple of cheap parts (the wheel and pedals) from the Far East and turns them into a very finished-looking finished product. Custom bits like this fulfill the 3D printing dream — nobody’s making it, so you make it yourself. And make it look pro.
It turns out that other people have noticed this motor/controller/pedal combo as well. Here’s some documentation to get you started.
It’s funny. Just four years ago, self-balancing powered unicycles were the realm of the insane hacker. Then came some hacker improvements, and now we’re at the point where you can mail-order all the parts and 3D print yourself a fancy enclosure.
Thanks [nonice] for the tip!


NICE !!
you should attach the selfie stick directly on the unicycle. I bet that would give a cool perspective
I had attempted a Unicycle using a Brushless DC motor where I built the controller and self balancing logic using an mbed hardware. I was using PID controller as you have done so ( I believe), but got stuck in being able to drive at a constant speed. The issue was not with the motor drive, but rather with the control software that needs to work hard between maintaining the balance and providing a constant speed. The video on this link was what it was in 2011 and it didn’t improve beyond this. https://www.youtube.com/watch?v=6DlapRyK0c4
Your video is very very cool and I wanted to shoot something like this. Can you throw some light on you controller software where the PID controller is good enough for maintaining the balance, but I had trouble with the outer loop. I tried using a speed loop for the outer loop on a smaller two wheel robot and it was fairly successful, but didn’t try on the bigger one since the unicycle is now in a dismantled state and the batteries are dead. Your insights would be greatly appreciated. My design didn’t graduate to using an LQR controller since I strongly believe that this problem can be solved with a double loop PID controller and I felt LQR controller was a bit complicated. ALso noticed that a complementary filter filter performed better than a kalman filter in IMU measurements (probably since I understood the complementary filter better and managed to tune ot well)
–KK
I like the bit where you imply that self made parts are inherently more likely to be dangerous than cheap components from China.
Yawn
“Cheap shitty pink USB charger from China”
Hoping to eventually see one of these where the wheel looks like stone and the axle/footrests look like a thick wooden stick.
how difficult is this to ride for a noob?
I bet it’s easier than riding a normal unicycle!
Even so, it looks like five minutes with that thing and I’d be walking away with fewer teeth in my face than I started with.
Yeah, I’d be too afraid to try it.
A bit might flip and then so would I!