Kerbal Space Program will have you hurling little green men into the wastes of outer space, landing expended boosters back on the launchpad, and using resources on the fourth planet from the Sun to bring a crew back home. Kerbal is the greatest space simulator ever created, teaches orbital mechanics better than the Air Force textbook, but it is missing one thing: switches and blinky LEDs.
[SgtNoodle] felt this severe oversight by the creators of Kerbal could be remedied by building his Kerbal Control Panel, which adds physical buttons, switches, and a real 6-axis joystick for roleplaying as an Apollo astronaut.
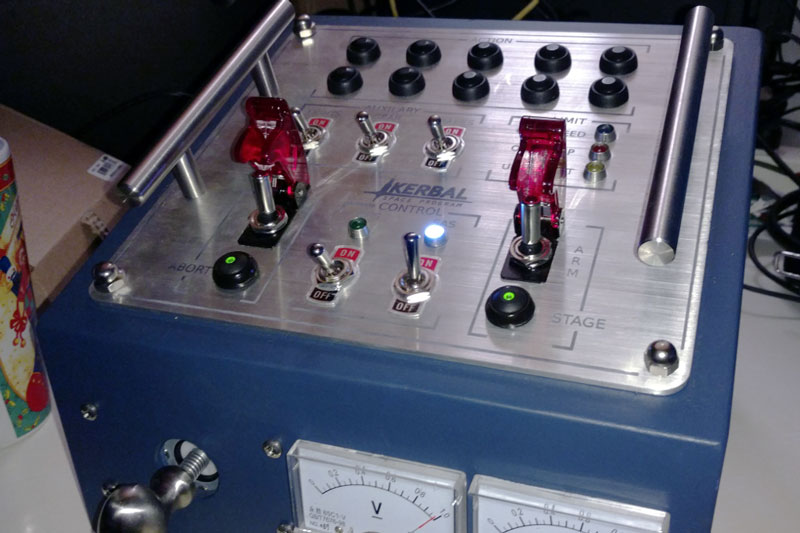
The star of this build is the custom six-axis joystick, used for translation control when docking, maneuvering, or simply puttering around in space. Four axis joysticks are easy, but to move forward and backward, [SgtNoodle] replaced the shaft of a normal arcade joystick with a carriage bolt, added a washer on one end, and used two limit switches to give this MDF cockpit Z+ and Z- control.
The rest of the build is equally well detailed, with a CNC’d front panel, toggle switches and missile switch covers, with everything connected to an Arduino Mega. This Arduino interfaces the switches to the game with the kRPC mod, which creates a script-driven interface to the game. So, toggling the landing gear switch, for instance, triggers a script which interfaces with KSP to lower your landing gear prior to a nice, safe landing. Or, more likely, a terrifying crash.


nice job
> six axis joystick
It’s a 3 axis joystick, used for translation control in 3 dimensions. To be precise it’s a regular 2-axis arcade joystick with a third push-pull axis added. The section heading in the article says “3-Axis Translation Joystick”
Right, it is a 6-direction joystick, not a 6-axis joystick.
There was a video game console in the 1970s, the Fairchild Channel F (just predated the Atari 2600), that had a joystick like this. Left / right, up / down, in / out, AND a built-in paddle, used by twisting the shaft. Pretty neat idea.
I think it looks like he fabricated the front panel with hand tools, which makes it even more impressive.
Seriously impressive! Looks great!!
HaD needs to RTFA ;)
“I drilled out all the holes for the buttons and switches using a cordless drill.”
There’s no mention of CNC, it is all the more impressive considering how much of it was manual labor!
“I used an Arduino UNO knock-off to interface to all the switches and LEDs.”
That’s not an Arduino Mega, Richard.
I am very impressed with the toner transfer onto the aluminum… I have tried it before but never got it to work well at all. I guess I will have to try it again.
If SgtNoodle is reading, I would love some more details on how you managed to do it. Was it just using a clothes iron (like I have done for PCBs), or what? You mention at the end you did it one piece at a time; what sort of temperatures / pressures did you use? How did you prevent the entire block of aluminum from acting as a heat sink and just heating up at the same rate? etc…
Cheers
This stuff exists by the way.. http://www.decalpaper.com/category-s/3.htm
But also the classic way was to use self adhesive paper, the kind you moisten to stick, print on the glue side, then spray laquer over it to form a film. Then cut out and waterslide transfer.
Yeah I just used a clothes iron set to the highest temperature setting, and as much pressure as humanly possible. The trick to reworking previously applied areas was to stick a blank piece of paper over it so that the existing toner wouldn’t be directly touched by the hot iron. The block definitely acted as a heat sink, but the previously applied toner didn’t seem to mind being reheated as long as it was protected by the paper.
Hate to say it, but the word “auxiliary” is misspelled on the panel. Other than that, looks awesome.
Lol, oops.
I totally want one!
Site Down
Had a DNS issue. Should be back up!
I’d forgotten about the sandpaper-on-a-two-by-four method that we used in Solar Car until reading this, sgtnoodle ;)