It is no secret that we often use and abuse bash to write things that ought to be in a different language. But bash does have its attractions. In the modern world, it is practically everywhere. It can also be very expressive, but perhaps hard to read.
We’ve talked about Amber before, a language that is made to be easier to read and write, but transpiles to bash so it can run anywhere. The FOSDEM 2026 conference featured a paper by [Daniele Scasciafratte] that shows how to best use Amber. If you prefer slides to a video, you can read a copy of the presentation.
The best place to start is at the beginning, so the video demonstrates a simple cube wireframe drawn by connecting eight points together with lines. This is simple enough, but modern 3D graphics are really triangles stitched together to make essentially every shape we see on the screen. For [NCOT Technology]’s software, he’s using the Utah Teapot, essentially the “hello world” of 3D graphics programming. The first step is drawing all of the triangles to make the teapot wireframe. Then the triangles are made opaque, which is a step in the right direction but isn’t quite complete. The next steps to make it look more like a teapot are to hide the back faces of the triangles, figure out which of them face the viewer at any given moment, and then make sure that all of these triangles are drawn in the correct orientation.
Rendering a teapot is one thing, but to get to something more modern-looking like a first-person shooter, he also demonstrates all the matrix math that allows the player to move around an object. Technically, the object moves around the viewer, but the end effect is one that eventually makes it so we can play our favorite games, from DOOM to DOOM Eternal. He notes that his code isn’t perfect, but he did it from the ground up and didn’t use anything to build it other than his computer and his own brain, and now understands 3D graphics on a much deeper level than simply using an engine or API would generally allow for. The 3D world can also be explored through the magic of Excel.
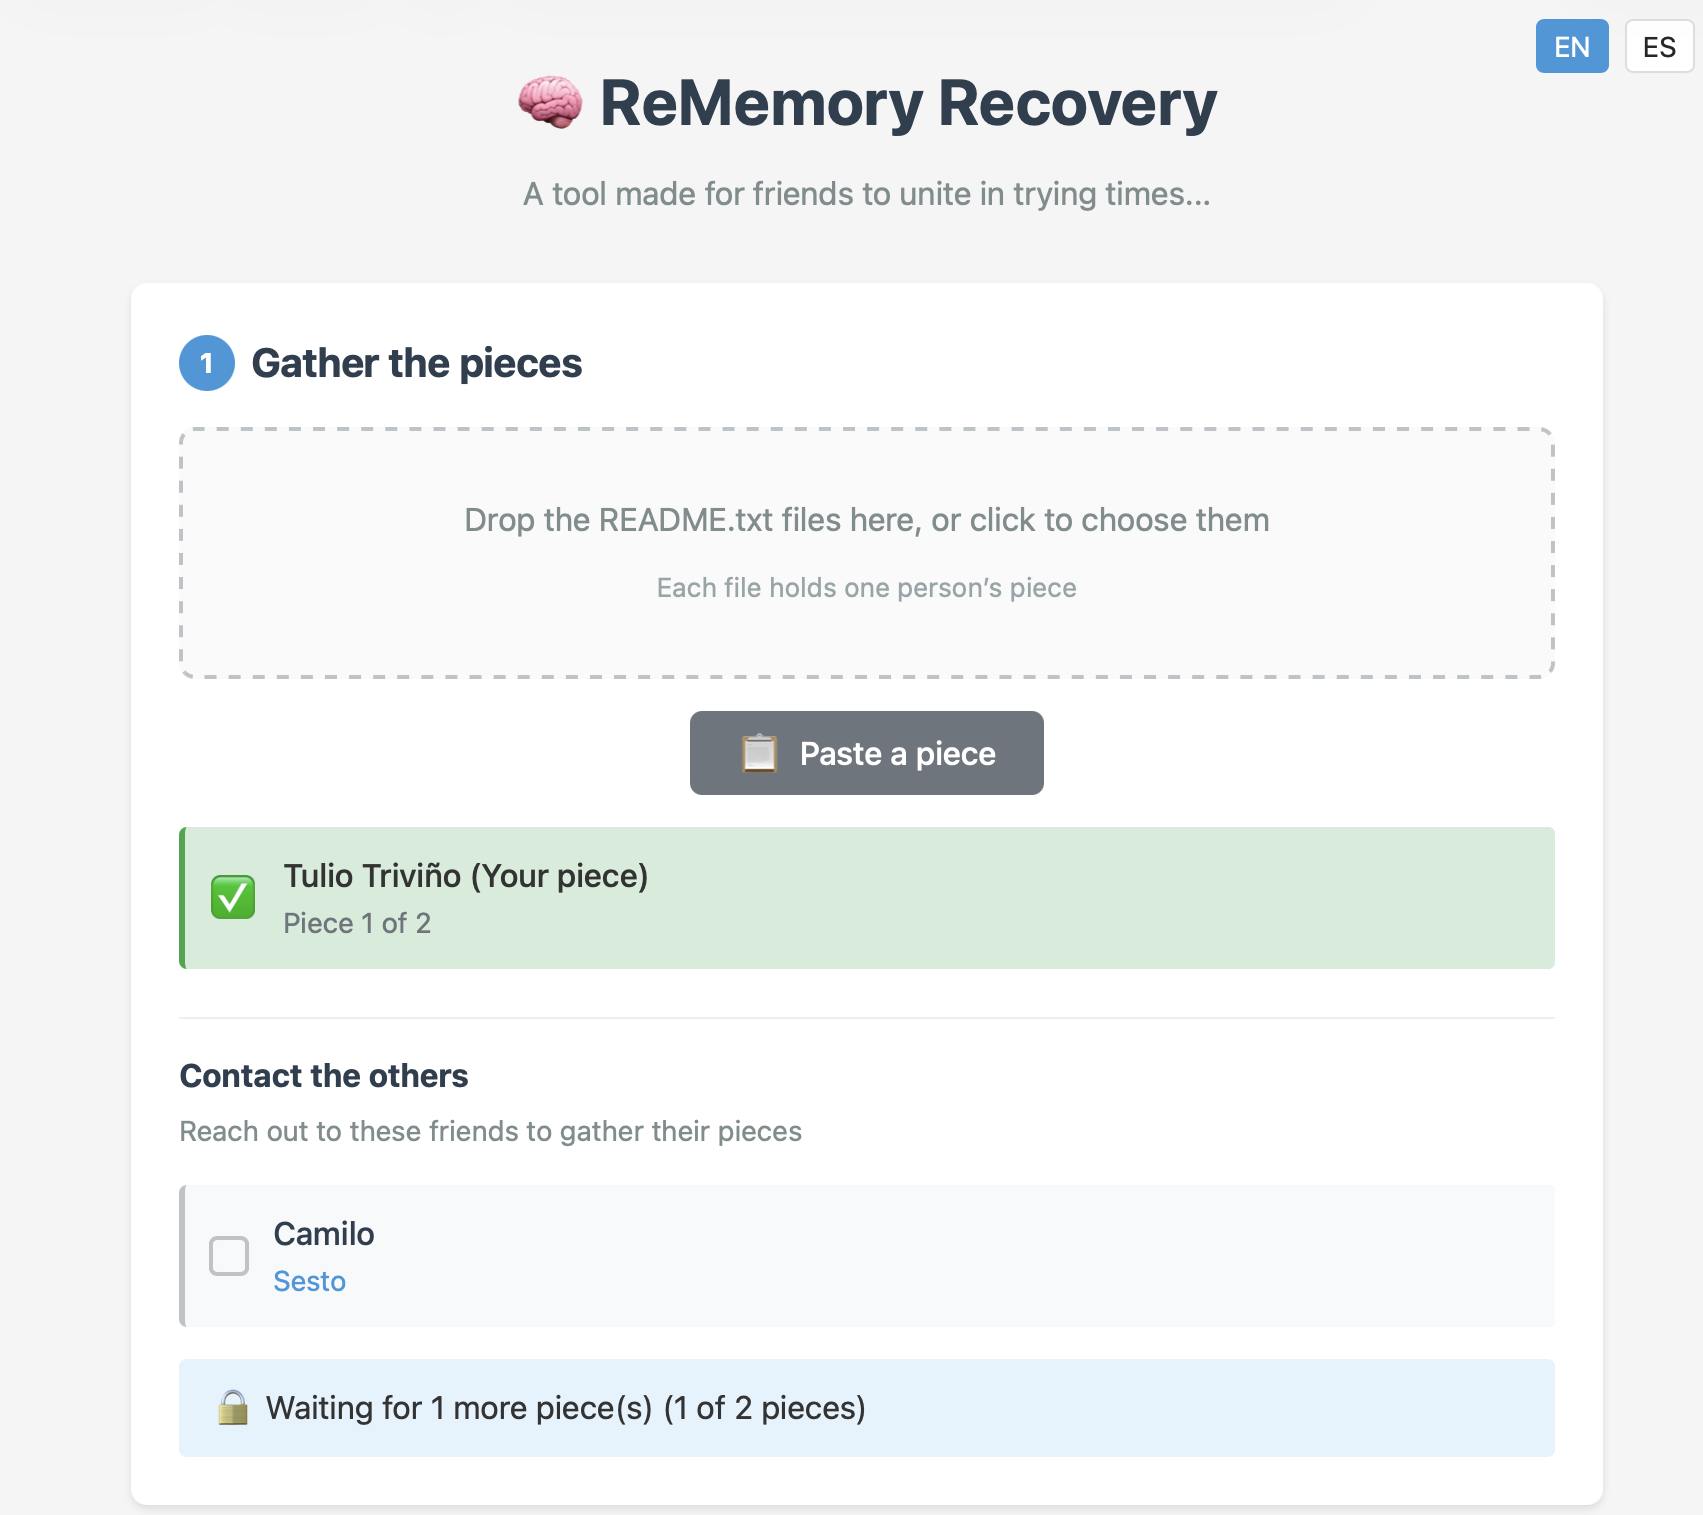
What would happen if you lost your memory, even partially? With so much of our lives being digital, forgetting your passwords (or the master key to your password manager) could be disastrous. Haunted by that specter after a concussion, [eljojo] created ReMemory, a tool based on Shamir’s Secret Sharing to help your friends help you.
Shamir’s Secret Sharing, for the uninitiated, is a way to split up important data between parties so that the full picture is only available when a quorum comes together. The classic example is giving everyone a couple of digits out of the combination to the bank vault, but no one the full combination. Together, they can open the vault.
ReMemory works the same way. Rather than the combination to a bank vault, the locally-hosted, browser-based interface splits the encryption key to your sensitive data. If you’re old fashioned that might be a plaintext list of passwords, or for the more modern the recovery codes to your password manager. It could be literally anything, like your Aunt Edna’s famous cupcake recipe, which surely should not be lost to time.
Aunt Edna could probably handle this.
You can chose how many friends to split your data betwixt, and how many will be required to meet quorum– the minimum, of course, being two, but the suggested default is to split the data five ways, and allow decryption from any three parties. Each bundle includes the complete recovery tool, so anyone in your circle of trust can start the process of decrypting your data if they get the others on board. Since it’s self-hosted and browser based, those friends don’t have to be particularly tech-savvy, as long as they can be trusted to hold onto the files. Everything is explained in the readme included in each bundle.
This does have the downside of requiring you to have multiple close friends, at least some of whom you trust to come through in a crunch, and all of whom you trust not to collude behind your back. Still, if you’re the social type, this seems like it might be a useful tool. The code is available under an Apache 2.0 license, so you can audit it for yourself — a must for any tool you plan on entrusting your secrets to.
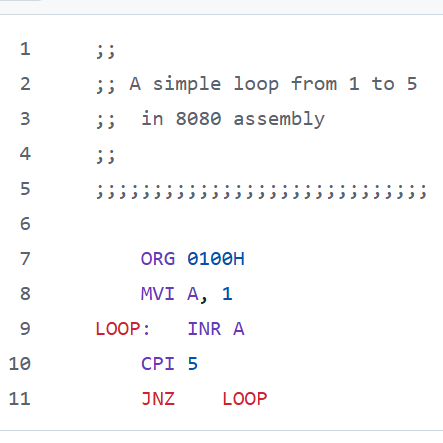
Assembly language (like the above) goes in, a binary comes out.
The script exists in part as a celebration of the power inherent in a standard Unix shell with quite ordinary POSIX-compliant command line tools like awk, sed, and printf. But [Chris] admits that mostly he found the whole project amusing.
It’s designed in a way that adding support for 6502 and 6809 machine code would be easy, assuming 8080 support isn’t already funny enough on its own.
It’s not particularly efficient and it’s got some quirks, most of which involve syntax handling (hexadecimal notation should stick to 0 or 0x prefixes instead of $ to avoid shell misinterpretations) but it works.
Want to give it a try? It’s a shell script, so pull a copy and and just make it executable. As long as the usual command-line tools exist (meaning your system is from sometime in the last thirty-odd years), it should run just fine as-is.
An ambitious bash script like this one recalls how our own Al Williams shared ways to make better bash scripts by treating it just a bit more like the full-blown programming language it qualifies as.
Over the past couple of years with the Jenny’s Daily Drivers series, we’ve looked at a number of unusual or noteworthy operating systems. Among them has been ReactOS, an open source clone of a millennium-era Windows OS, which we tried back in November. It’s one of those slow-burn projects we know has been around for a long time, but still it’s a surprise to find we’ve reached the 30th anniversary of the first ReactOS code commit.
The post is a run through the project’s history, and having followed it for a long time we recognize some of the milestones from the various ISOs we downloaded and tried back in the day. At the end it looks into the future with plans to support more up-to-date hardware as well as UEFI, which we hope will keep it relevant.
When we tried it, we found an OS which could indeed be a Daily Driver on which a Hackaday article could be written — even if it wasn’t the slickest experience on the block. It doesn’t matter that it’s taken a while, if you’re used to Windows XP this has become a usable replacement. We came to the conclusion that like FreeDOS it could find a niche in places where people need a modern version of the old OS to run older software, but perhaps as it now moves towards its mature phase it will move beyond that. We salute the ReactOS developers for bringing it this far, and for not giving up.
Generally, one opens a web browser or an app to use YouTube. However, if you’re looking to just listen to the audio, you can actually do that right from the terminal. You just need Shellbeats from [lalo-space].
Shellbeats is primarily intended for playing music from YouTube, and is well equipped for this task. It allows searching YouTube directly from the terminal, as well as streaming tracks or entire playlists from the command line interface. You can also make and edit playlists from within the tool, and even download the whole lot as MP3s if so desired. It’s all keyboard-operated and nicely lightweight. The overall experience isn’t dissimilar from operating a simple LCD-based MP3 player from 20 years ago.
There’s plenty of other fun stuff you can do in the terminal, too, as we’ve explored previously. If you’re working on your own media player hacks, be sure to notify us on the tipsline!
In 1993, DOOM was a great game to play if you had a 486 with a VGA monitor and nothing to do all weekend. In 2026, you can play it on a set of earbuds instead, if for some reason that’s something you’ve always dreamed of doing.
The project comes to us from [Arin Sarkisian], who figured out that the Pinebuds Pro had enough processing power to run one of the seminal FPS games from the 1990s. Inside these earbuds is a Cortex-M4F, which is set to run at 100 MHz. [Arin] figured out it could easily be cranked up to 300 MHz with low power mode switched off, which would come in handy for one main reason. See, the earbuds might be able to run the DOOM engine, but they don’t have a display.
Thus, [Arin] figured the easiest way to get the video data out would be via the Cortex-M4F’s serial UART running at 2.4 mbps. Running the game at a resolution of 320 x 200 at 3 frames per second would consume this entire bandwidth. However, all those extra clock cycles allow running an MJPEG compression algorithm that allow spitting out up to 18 frames per second. Much better!
All that was left to do was to figure out a control scheme. To that end, a web server is set up off-board that passes key presses to the buds and accepts and displays the MJPEG stream to the player. If you’re so inclined you can even play the game yourself on the project website, though you might just have to get in a queue. In the meantime, you can watch the Twitch stream of whoever else is playing at the time.
Files are on GitHub—both the earbud firmware and the web interface used to play the game. It was perhaps only a matter of time until we saw DOOM on earbuds; no surprise given that we’ve already seen it played on everything from receipt printers to cookware. No matter how cliche, we’re going to keep publishing interesting DOOM ports—so keep them coming to the tipsline.