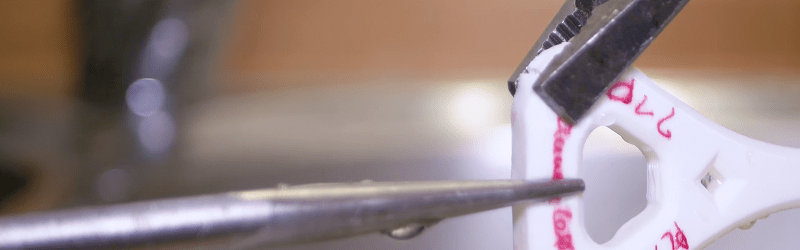
[Thomas] wanted to try baking some carbon fiber 3D printing filament because the vendor had promised higher strength and rigidity after the parts were annealed in the oven. Being of a scientific mindset, he did some controls and found that annealing parts printed with the carbon fiber-bearing filament didn’t benefit much from the treatment. However, parts printed with standard PLA became quite a bit stronger and more rigid.
The downside? The parts (regardless of material) tend to shrink a bit in the X and Y axis. They also tend to expand in the Z direction. However, the dimension changes were not that much. The test parts shrunk by about 5% and grew by 2%. He didn’t mention if this was repeatable, which is a shame because if it is repeatable, it isn’t a big deal to adjust part dimensions before printing. Of course, if it isn’t repeatable, it will be difficult to get a particular finished size after the annealing process.
The resulting PLA parts were 40% stronger and 25% more rigid than the same part before treatment. In addition, the parts had better resistance to heat, which is a common issue with PLA parts. The heating process is as simple as putting the parts in a 110° C oven for an hour, so it shouldn’t require any special equipment to replicate the test.
We’d be interested to see how fine details survive the heating and cooling. However, even if this isn’t for every part, it could be another trick in your arsenal for making 3D printed parts.
If you have the urge to try different filament types, this earlier post will keep you busy for at least a month. The vendor [Thomas] used for the carbon fiber filament makes a lot of different exotic blends.


My employer sent me to a seminar hosted by our Solidworks distributer who happens to distribute a line of industrial 3D printers. These printers use nylon by default, but a proprietary extruder is able to lay down kevlar and barbon fiber-laced filaments. I was skeptical because I’d rea here that the chopped fibers added little strength. The sales rep handed me a printed carbon/nylon femur and said I could keep it if I could break it.
I ended up standing on it, and it still wouldn’t break. turns out they aren’t using chopped fibers, but actual strands running parallel with the filament and laid down parallel with each layer.
https://www.youtube.com/watch?v=m1I5zttnYjY
Carbon fiber plus hydraulic presses = very quickly broken carbon fiber. Did the sales rep say what you could use to try to break it?
Ah, the Markforged. Good part alignment planning results in great strength.
Fiber filled should be good for strength along the axis of the fiber. Across the fibers, such as between the layers of FDM printed material, the fibers would not contribute to strength.
Perhaps boil it suspended in a pressure cooker instead, give a more even heat spread.
Or a silicone oil bath, then you may prevent slumping too.
Silicone oil sous vide–yum, yum!
Thanks Rodney! You made my morning with that one! I almost choked on my coffee!! I sous vide 2-3 x a week …
Then it could undergo hydrolysis, which means breakage (lysis) by water.
Pla will undergo hydrolysis at this temperature (or just over 55 degrees Celsius) which will trigger it’s degradation process. In the end, the part will end up having a shorter lifetime and become brittle with time.
In order to minimize this, try and run your annealing process at or below 55 Celsius and if you must go over this threshold, try and use a desiccant bed in your oven to reduce the availability of moisture. You’d still get the stiffness increase associated with a fully crystallised part and the strength increase that comes with the reduction in radius of the crack tips in your part.
Ive read a lot of discussion of this concept of heating PLA to strengthen, this was the first mention of humidity as a factor. Makes a lot of sense. The lower temp makes sense as well.
I read of one person (Fred Pinczuk in the comments of Thomas Sanladerer’s Youtube video) who heats it, with a staged cooldown, on the print bed. He uses a raft and puts a small box over it to contain the heat, then lowers the temp in stages. Said he gets great results with little warping.
I thoght that was clever, you already HAVE a nice Temp controlled heat source, plus it keeps the Wife from yelling at you about using her convection oven for plastic baking, LOL (JOKE!! – You should NEVER bake parts in an oven you’ll later use for FOOD, people!!).
Seriously, adding some DRIED desiccant is a great idea. For those who are new to all this, be sure it’s DRIED desiccant. If it has had a chance to soak up moisture, when you heat it it will RELEASE the moisture. Not a good thing for the poor plastic part…. :-)
Thanks Fernando!
For hydrolysis you need water, as the name of the reaction suggests. I don’t know what the percentage of water in a finished PLA 3D print is, if any.
For hydrolysis you need presence of water. I don’t know if there is enough humidity outside or water molecules inside the objekt to make a difference.
Have you tried different fill patters to see if the shrinkage is different.
isn’t it possible to use delft clay to make a mold around the printed part, then bake it in the oven so the layers melt together in a better way while maintaining the right dimensions?
Hello? Color? Natural or lighter colored plastics do have better phyisical parameters as they are more homogeneous. Darker colors – more bigger particles – less homogeneous. So I do wander if the “normal” PLA of the same color as the HTPLA (dark gray-black) would stay in the measured parameters.
btw only imho, i read it somewhere and not quite rigorously tested that hypthese, but it seems reasonable from the common sense view.
Is it OK to bake PLA in your kitchen oven? That is; is it non-toxic?
No Will, it is NOT OK. You shouldn’t bake plastic in an oven you’ll use for food.
Even if it’s “food safe” plastic, that rating is for the plastic in a final, cooled state. Besides, any colored plastics, you have NO idea what that Chinese, unregulated manufacturer, put IN the plastic to get that color!
Much of the filament we use is manufactured in China. They have been fined repeatedly for using unsafe materials
EVEN LEAD!!) in children’s toys. Do you think they care about filament?
Food oven – baking plastic = BAD idea. You can pick up a used convection oven for a song at a Goodwill (in the US) or other thrift store.
You can also use the heated bed if you print the part on a raft. Simply put a small box over the part and set the bed temp. If you watch the Thomas Sanladerer video, and scroll down to the comments, look for Fred Pinczuk’s comments, he discusses it. Brilliant idea!
So this does not seem to work at all for PLA. You say 110 C but thats 230 F. So you perhaps mean 110F? My pieces basically completely melted in 5 mins.
https://youtu.be/CZX8eHC7fws?t=33
I have not personally tried this, but he did say 110C. However, this says for regular PLA, try about 70C: https://rigid.ink/blogs/news/how-to-anneal-your-3d-prints-for-strength
Ah, sorry, I tried to leave a time mark link but I guess WordPress strips the time mark. Look at 33 seconds.