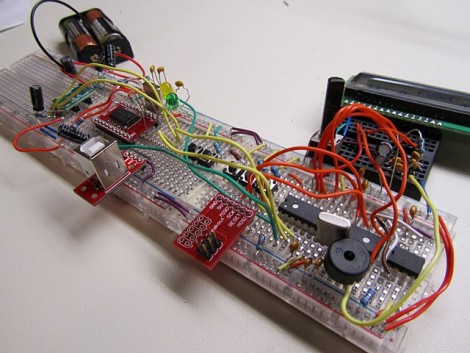
[Zach] enjoys playing the game Catch Phrase, but the complexity of the words makes this game a no-go for the little ones. We remember that the game used to be mechanical, using paper disks with the words on them. Those would be easy to recreate with your own dictionary set, but since it has transitioned to an electronic unit that option is out the window. So [Zach] decided to build his own version of the game that lets you use custom word sets after drawing inspiration from another Catch Phrase hack.
He’s calling it AVRphrase since it uses an AVR ATmega328. You’ll also find five buttons, a piezo buzzer, and a character LCD included in the design. He saw the project all the way through to the end, having a PCB manufactured, and installing it in a project box. A demonstration of the finished game can be seen after the break. [Zach] ended up with 9 working units at a cost of about $30 each.
[youtube=http://www.youtube.com/watch?v=GgQYeQkNT_c&w=470]


Nice, this is the kind of stuff I want to see, perfect for your own project inspiration. A breadboard full of goodness there.
Yes, one breadboard is never enough in the realm of digital electronics. Better have a second one ready in case you need to connect 2 chained 74HC595s, drive both the register and the latch with a single clock and use the whole construction to drive an LCD or something. GET BIGGER DAMN BREADBOARDS!!!
@mi6x3m
You mean like this? http://www.flickr.com/photos/50703335@N05/5336671768/
Yes, im gonna be the noob who says it…
clear breadboards? Never seen one. I want one.
@dustandechoes91 — I got the breadboards (and a lot of my other prototyping stuff) from Sparkfun. There’s a link below to the breadboards.
http://www.sparkfun.com/categories/149
@someone
Sparkfun sells them. But I don’t want one.
@bluewraith: yeah, more and more!
Zach: why didn’t you use an AVR with integrated USB? They’re much more flexible than using the approach you used.
@Jas — That probably would have been a better way to go. I’m pretty new to microcontrollers in general, and I was confident that I could do it with the USB-UART converter within my time constraints. I definitely want to try out the AVRs w/ integrated USB in the future, but I didn’t want to bite off more than I could chew with this project.
Excellent project and a good writeup – it’s nice to see a project evolve with revisions and forethought rather than a slapdash Arduino hack using grossly over-spec’ed components and a mush of poor code (that’s right, I said it.)
That said, and not to make an example of this project per se, but is anyone else wondering why so many projects make use of banal UARTs, RS-232 and FTDI et al USB-UART bridges when the excellent V-USB stack can get the part count/board size/cost down and often provide the same functionality (or more), often without requiring host drivers at all?
If there are technical hurdles maybe I’ll write a tutorial that @szczys can post in the AVR series – any HaD readers interested in that?
what Kuy? arduino uses a mega328 just like this, and frankly there is enough over spec’ed sparfun crap on there they should have paid for a banner
why is a mega328 on a breakout board SIN!!! but 15 lbs of retardedly overpriced premade lego bricks (so precious doesn’t have to look up a datasheet) wired to a mega328 okay?
there I said it
@Osgeld: If you read the article it shows the progression of the project from the pile of proto above to a more refined and efficient custom PCB. The author also squeezed the code down onto a surface-mount mega48, which occupied 99.7% of its flash. That’s proper engineering, no?
My comment was actually about the USB-UART bridge and considering the V-USB stack.
I’ve added another post that links to my design files (schematic, board, firmware, Processing sketch) if anyone is interested in trying to make their own. You can view them here:
http://zjembedded.blogspot.com/2011/01/avrphrase-design-files.html