Two hands holding a 3d printed alarm clock with an LCD display, snooze button and knob on top

IO Connected Radio Alarm Clock

[CoreWeaver] creates an alarm clock that includes features one might expect in such a project, including an FM radio, snooze button inputs and a display, but goes beyond the basic functionality to include temperature sensing and a PC connection, opening the way for customizable functionality.

Block diagram for the IO connected Alarm Clock

An Atmega328 is used for the main microcontroller which communicates via I2C both to a DS1307 real time clock (RTC) and a TEA5767 FM module. The main power comes from a 9V power source with an LM317 and LM7805 linear regulators providing a 3.3V and 5V power rail, respectively. Most of the electronics are powered using 5V except for the TEA5767, which is powered from the 3.3V rail and has its I2C communication levels shifted from 5V to 3.3V. The audio output of the TEA5767 feeds directly into the TDA7052 audio amplifier to drive the speakers. Since the RTC has an auxiliary coin cell battery for power, the alarm clock can keep accurate time even when not plugged in. Continue reading “IO Connected Radio Alarm Clock”

Ethersweep: An Easy-To-Deploy Ethernet Connected Stepper Controller

[Neumi] over on Hackaday.IO wanted a simple-to-use way to drive stepper motors, which could be quickly deployed in a wide variety of applications yet to be determined. The solution is named Ethersweep, and is a small PCB stack that sits on the rear of the common NEMA17-format stepper motor. The only physical connectivity, beside the motor, are ethernet and a power supply via the user friendly XT30 connector. The system can be closed loop, with both an end-stop input as well as an on-board AMS AS5600 magnetic rotary encoder (which senses the rotating magnetic field on the rear side of the motor assembly – clever!) giving the necessary feedback. Leveraging the Trinamic TMC2208 stepper motor driver gives Ethersweep silky smooth and quiet motor control, which could be very important for some applications. A rear-facing OLED display shows some useful debug information as well as the all important IP address that was assigned to the unit.

Control is performed with the ubiquitous ATMega328 microcontroller, with the Arduino software stack deployed, 
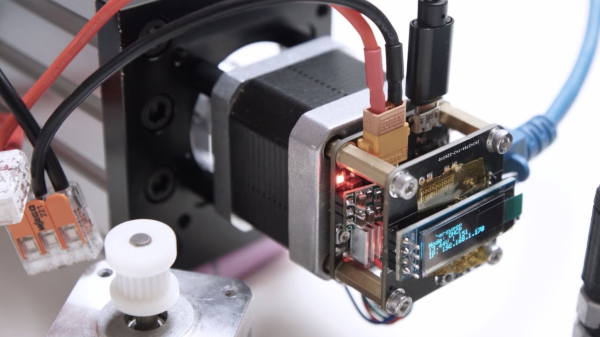
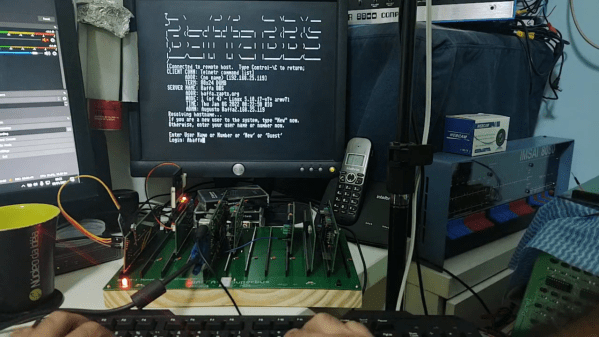
making uploading firmware a breeze. To that end, a USB port is also provided, hooked up to the uC with the cheap CP2102 USB bridge chip as per most Arduino-like designs. The thing that makes this build a little unusual is the ethernet port. The hardware side of things is taken care of with the Wiznet W5500 ethernet chip, which implements the MAC and PHY in a single device, needing only a few passives and a magjack to operate. The chip also handles the whole TCP/IP stack internally, so only needs an external SPI interface to talk to the host device.

Continue reading “Ethersweep: An Easy-To-Deploy Ethernet Connected Stepper Controller”

Retro Serial Terminal Uses Modern Chips To Get CP/M Machine Talking

The hobbyists of the early days of the home computer era worked wonders with the comparatively primitive chips of the day, and what couldn’t be accomplished with a Z80 or a 6502 was often relegated to complex designs based on logic chips and discrete components. One wonders what these hackers could have accomplished with the modern components we take for granted.

Perhaps it would be something like this minimal serial terminal for the current crop of homebrew retrocomputers. The board is by [Augusto Baffa] and is used in his Baffa-2 homebrew microcomputer, an RC2014-esque Z80 machine that runs CP/M. This terminal board is one of many peripheral boards that plug into the Baffa-2’s backplane, but it’s one of the few that seems to have taken the shortcut of using modern microcontrollers to get its job done. The board sports a pair of ATmega328s; one handles serial communication with the Baffa-2 backplane, while the other takes care of running the VGA interface. The card also has a PS/2 keyboard interface, and supports VT-100 ANSI escapes. The video below shows it in action with a 17″ LCD monitor in the old 4:3 aspect ratio.

We like the way this terminal card gets the job done simply and easily, and we really like the look of the Baffa-2 itself. We also spied an IMSAI 8080 and an Altair 8800 in the background of the video. We’d love to know more about those.

Continue reading “Retro Serial Terminal Uses Modern Chips To Get CP/M Machine Talking”

An HP15-C emulator PCB

Calculate Like It’s 1989 With This HP15C Emulator

Back in the day, your choice of calculator said a lot about your chops, and nothing made a stronger statement than the legendary Hewlett-Packard Voyager series of programmable calculators. From the landscape layout to the cryptic keycaps to the Reverse Polish Notation, everything about these calculators spoke to a seriousness of purpose.

Sadly, these calculators are hard to come by at any price these days. So if you covet their unique look and feel, your best bet might be to do like [alxgarza] and build your own Voyager-series emulator. This particular build emulates the HP15C and runs on an ATMega328. Purists may object to the 192×64 LCD matrix display rather than the ten-digit seven-segment display of the original, but we don’t mind the update at all. The PCB that the emulator is built on is just about the right size, and the keyboard is built up from discrete switches that are as satisfyingly clicky as the originals. We also appreciate the use of nothing but through-hole components — it seems suitably retro. The video below shows that the calculator is perfectly usable without a case; a 3D-printed case is available, though, as is an overlay that replicates the keypad of the original.

We’ve seen emulators for other classic calculators of yore, including Sinclair, Texas Instruments, and even other HP lines. But this one has a really nice design that gets us going.

Continue reading “Calculate Like It’s 1989 With This HP15C Emulator”

Accurate Digital Clock Keeps Ticking With FPGA

Even the most punctual among us are content to synchronize their clocks to external time sources like navigation satellite constellations, network time servers, frequency-controlled AC mains, or signals broadcast by radio stations such as WWV, CHU, and DFC77 — but not [zaphod]. After building a couple of more traditional clocks over the years, he set his sights on making a completely isolated digital clock that doesn’t rely on external synchronization (well, except to initialize the time at first power-up).

The accuracy goal he set for himself was that of a Casio F-91W wristwatch, which is specified to maintain +/- 30 seconds per month (about 12 ppm). At the heart of the design is an oven-controlled crystal oscillator whose stability is in the single-digits parts-per-billion.

The counter chain that accumulates the time is implemented in an FPGA — admittedly overkill, but [zaphod] wanted to learn FPGA programming for this project as well. An ATmega328 drives the display and does other bookkeeping tasks. The whole design is partitioned into three PCBs which fit inside a custom 3D-printed case.

[zaphod] does a thorough job documenting his build, including the bugs and failures along the way. We like the honest summary he wrote at the project’s conclusion, noting things that could be improved or should have been done differently. Be sure to check out the GitHub repository, where all the source code and PCB design files are posted. How accurate is your wristwatch, if you even wear one anymore?

12-Note Polyphony On An Arduino Synth

When synthesizers first hit the scene back in the mid-20th century, many were monophonic instruments, capable of producing just one pitch at a time. This was a major limitation, and over time polyphonic synthesizers began to flood into the scene, greatly expanding performance possibilities. [Kevin] decided to build his own polyphonic synthesizer, but far from taking the easy route, he built it around the Arduino Uno – not a platform particularly well known for its musical abilities! 

[Kevin]’s build manages 12-note polyphony, an impressive feat for the ATmega328 at the heart of the Arduino Uno. It’s done by running an interrupt on a timer at a steady rate, and implementing 12 counters, one per note. When a counter overflows, a digital IO pin is flipped. This outputs a square wave at a certain pitch on the IO pin, producing the given note. The outputs of 12 digital IO pins are mixed together with a simple resistor arrangement, producing a basic square wave synth. Tuning isn’t perfect, but [Kevin] notes a few ways it could be improved down the line.

[Kevin] has added features along the way, expanding the simple synth to work over several octaves via MIDI, while also building a small tactile button keyboard, too. It’s a project that serves as a great gateway into basic synthesis and music electronics, and we’re sure [Kevin] learned a lot along the way. We’ve seen other microcontroller synths before too, like this tiny device that fits inside a MIDI plug. Video after the break.

Continue reading “12-Note Polyphony On An Arduino Synth”

Squeezing Every Bit From An ATMega

While the ATMega328 is “mega” for a microcontroller, it’s still a fairly limited platform. It has plenty of I/O and working memory for most tasks, but this Battleship game that [thorlancaster328] has put together really stretches the capabilities of this tiny chip. Normally a Battleship game wouldn’t be that complicated, but this one has audio, an LED display, and can also play a fine rendition of Nyan Cat to boot, which really puts the Atmel chip through its paces.

The audio is played through a 512-byte buffer and an interrupt triggers the microcontroller when to fill the buffer while it works on the other processes. The 12×12 LED display is also fed through a shift register triggered by the same interrupt as the audio, and since the build uses so many shift registers the microcontroller can actually output four separate displays (two players, each with a dispaly for shots and one for ships). It will also eventually support a player-vs-computer mode for the battleship game, and also has a mode where it plays Nyan cat just to demonstrate its own capabilities.

We’re pretty impressed with the amount of work this small microcontroller is doing, largely thanks to code optimization from its creator [thorlancaster328]. If there’s enough interest he also says he will provide the source code too. Until then, be sure to check out this other way of pushing a small microcontroller to its limits.

Thanks to [Thinkerer] for the tip!