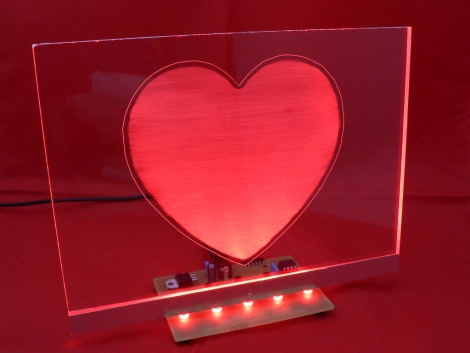
Instructables user [Simon] admits he addicted to electronics. Lucky for him, his wife of 15 years is pretty cool with, or at least tolerant of his need to fiddle with anything that plugs in. As a gift for their wedding anniversary, he decided it would be neat to combine his love for his wife with his love for electronics. The result is the the RGB LED “Love Heart” you see above. He built an RGB LED circuit controlled by a PIC12F683 microcontroller, which shines into a hand-etched plexi-glass panel.
The LED color is controlled using PWM, as you would expect. What you might not expect however, is the lengths [Simon] would travel to ensure nearly perfect color and brightness matching across the 5 LEDs he used in his project. Since RGB LEDs do not have a uniform output brightness, he used a Lux meter to precisely measure the white balance of each LED. He then plotted the results in Excel before coding the PWM driver. Now that’s devotion! Once the LEDs were settled, he went about constructing the rest of the LED panel.
If you are interested in building one for your sweetheart, [Simon] has you covered – he provides all of the schematics, templates, and source code required to get the job done.
Continue reading to see a video of his heart panel in action.
[youtube=http://www.youtube.com/watch?v=bgqvyfl-Fv4&w=470]


This is sweet. Hm, I wonder if my girlfriend would like this as a present…
This is pretty awesome. I hope she likes it.
I would have finished it off with a picture frame, otherwise it’s a nice build.
@Pedro, that’s a good idea!
I thought that the heart would become boring to look at so adding a picture would be a good idea.
Meeehh , I would have cut out the heart shape and stick the leds around the edges.
This way you can mix different colors in the center of the heart.
Much more eye pleasing than the current design (quite boring to me).
Spin it…
Hmm, combined with access to a LASER cutter/engraver, this concept can be used for some other pretty awesome displays.