At home, [Daniel] has an extremely powerful dual quad-core Xeon system with ECC RAM that he uses for heavy lifting tasks – compiling, CUDA processing, and actual computing. Of course the electric bill for running this box all the time would be crazy, so Wake on LAN it is. There’s only one problem: for some reason, the BIOS doesn’t have Wake on LAN. The solution, of course, was a microcontroller system that would listen for the magic WoL packet and turn the computer on when it was received. This project eventually turned into a great case mod with an integrated LCD that powers the computer up over Ethernet, shows the current running processes, CPU and memory usage, and is an excellent use of a TI dev board.
The dev board in question is a TI Sitara AM355x starter kit that runs Linux, has two Ethernet ports and a touch sensitive LCD, and more than enough power to handle something as simple as a system monitor. To power on his monster computer from the dev board, [Daniel] is using a LED on the board, an inverter, a ULN2003 driver chip, and a relay connected to the computer’s power button. It’s not exactly a masterpiece of craftsmanship, but the dev board looks good mounted in the case, and from the videos below, it’s a great way to get system information embedded right into a computer case.


Hahaha this is a brilliant example of the ‘feature creep’ bug that we all suffer from – Kudos on being able to finish the design with all those additional features, It looks fantastic!
Feature creep tends to happen when you use a $200 dev board to do what a $10 NIC could do just as easily. Don’t get me wrong, I would love to have that kit and would likely end up using it for something equally as ridiculous.
As for the article, it was a great writeup and definitely got me thinking of ideas for using a smaller screen on my current PC case.
Have a similar system right next to me. Rackable dual quad core xeons, boatloads of memory, raid 5, hot swap and all that. Got it for 200 bucks off ebay. Just make sure it has a roamer module. Amazing little out of band management tool with lcd and all.
Just inredible how cheap these beasts are. Be warned though, they are proper rack servers so are incredibly loud.
This all feels strangely familiar :D
I have dual quad core xeons too. I lack a raid, but with a reasonable amount of ram (16GB) I can put everything I need in there and it even has WOL. I got mine from ebay as well, all in all ~200€. It came without a case, but I just boltet it on a wood chassis and put 4 massive 120mm fans on it for noise reasons (both quiet and loud, depending on how you like it)
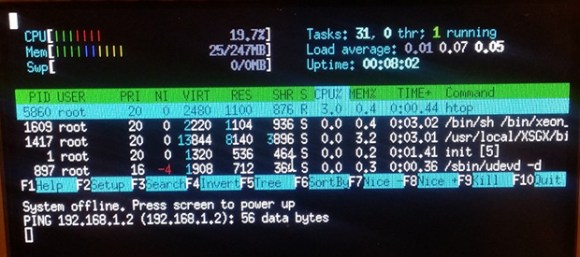
And yes, htop is a very great tool. I think it even should replace top by default..
To enable Wake-on-LAN for an add-on NIC, you need to enable power on by PCIe in the BIOS.
Ironically, most on-board LAN controllers include WoL under this setting, without saying it. I bet his motherboard supports it.
I’d be amazed if it didn’t, I haven’t seen a BIOS not include it since it was invented. As you say, it’s probably hidden by some other obscure setting. Not much standardisation on interface design in BIOSes.
Whatever happened to AMI’s Winbios? I had that on my old 486. It was a simple Windows 3.1-like screen with windows and icons to set the settings, ran with mouse or keyboard. Really surprised we still use the antique, confusing mess we’re stuck with nowadays.
All of the dell optiplex and dell latitude laptops we have at my work currently use something similar. It’s really not as nice looking as winbios was but it’s certainly a little nicer to look at than traditional bioses. if only because it can provide more screen real-estate and list off what all the options do when you’re selecting.
I have an ASUS with UEFI, it features a somewhat more modern interface (mouse/kbd/GUI – google “asus uefi” but i assume other brands are similiar, just havent seen them) but they still seem to mess up placing settings all over the place (and especially hiding sub-menus if you havent enabled something obscure somewhere else first) :-)
>$10 NIC could do just as easily
Exactly. I remember PCI network cards with wol cable
http://1.bp.blogspot.com/-UU63DZ_hx7M/TzuSHnchVBI/AAAAAAAAAG8/VxA5TI4AqtE/s1600/nic_wol-copia.jpg
As I said in the article, there is a WOL header present on the motherboard, however there is no option in the BIOS to enable it.
I think the presence of the header is a fair clue there IS an option, and it’s just hidden somewhere.
http://www.supermicro.com/support/faqs/results.cfm?id=57
Here… a board named similarly to yours (a W instead of a V) in the FAQ. It says WoL is not there as an option (okay, I’m surprised), but that it’s enabled by default anyway. To change it, they recommend doing it from within your OS (well, Windows) and using the driver options therein to set it.
That beside, it’s still a very nice case mod you’ve got there!
one of the cables coming out of that nic will AUTOMAGICALLY change voltage when said nic receives magic packet, without BIOS intervention.
basically this is the signal that bios interpretes when it decides if you want wol enabled or not, you can use it directly (optocoupled do PSon pin) = no need for separate SBC
I never finished testing it but I once tried powering a NIC card standalone and using the WOL magic packet to trigger a relay. I still wonder if this is possible
sounds like a good project for tonight, wonder what the pinout on that thing is…
htop is a lovely top replacement :D
I like the silicon labs method using a simple MCU tied into the RX bus between the PHY and MAC:
http://www.silabs.com/products/mcu/pages/wake-on-lan.aspx
42mW + PHY power, so probably ~150mW waiting for that magic packet
Should have said, for this application there would be no real MAC, just a board with a PHY, the MCU, and the relay should do it
ULN* and electromagnetic relay is overkill… I’ve succesfully used optocoupler for triggering computer’s power switch… Iguess that in most cases you can even use the microcontroller output directly connected to right pin on motherboard (one of the two wires going to switch) if you can tell if it has to be pulled up or down… other wire to switch is probably just ground or positive voltage rail…
if you power the avr from vsb, all you should need to turn the computer on is the uln2003, as everything I’v seen thus far involves grounding the signal, not always 5V tho.
The dev board also has an i2c and SPI interface. You could add fan a fan controler to it as well as the wake on lan function.
Regarding the WOL option. there is no WOL related entry in the BIOS, because, as someone said earlier, it is probably enabled by default. Fun fact, after completing this mod (as in the same day), native WOL worked, twice. Twice from a few hundred magic WOL packages sent. At the current moment it’s not working. No BIOS setting has been changed in the last year or so. Also the WOL header on the motherboard doesn’t do anything, even if manually applying voltage.
Regarding the relay, I actually want/like to hear the clicking sound when power-on/off is triggered by the board, but you are right, it’s not really needed. And yes, the board is powered from the PSU’s 5V stand-by rail. And yes, there are a lot of cheaper/more power efficient ways of doing this, but I had no use for the board and wanted a quick solution. Also the case looks awesome now :)
Perhaps you have lazy hardware that keeping pressing “mute” on those pesky WOL packets ;-)