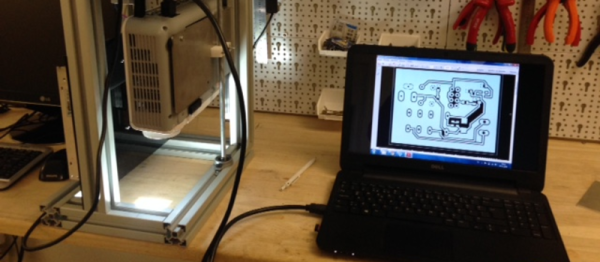
There’s so many ways to skin the home-fabrication-of-PCBs cat! Here’s yet another. [Nuri Erginer] had a DLP projector on hand, and with the addition of some reducing optics, managed to turn it into a one-shot PCB exposer.
If you’ve ever used photo-resist PCB material before, you know the drill: print out your circuit onto transparency film, layer the transparency with the sensitized PCB, expose with a UV light for a while, dissolve away the unexposed resist, and then etch. Here, [Nuri] combines the first three steps in one by exposing the board directly from a DLP projector.
The catch is that the projector’s resolution limits the size of the board that you can make. To fab a board that’s 10cm x 10cm, at XGA resolution (1024×768), you’ll end up with a feature size of around 0.004″ in the good direction and 0.005″ in the other.
For DIP parts, that’s marginal, but for fine-pitch or small SMT parts, that won’t do. On the other hand, for a smaller board, optimally one in the same 4:3 ratio, it could work. And because it exposes in one shot, you can’t beat the speed. Cool hack, [Nuri]!
When you need more precision, strapping a UV laser to an accurate 2D robot is a good way to go, but it’s gonna take a while longer.