PCB etching seems to be a subject that sharply divides our community into those who are experts in it and etch themselves every PCB they use, and those who have significant quantities of ferric chloride stained clothing in their past and for whom the advent of cheap commercial PCB manufacture and CNC milled PCB prototyping have been the best thing since sliced bread.
Your likely success when etching your own boards is most dependent on the quality of your preparation and your equipment. If you began your PCB career with etch-resist transfers and a permanent marker with a Tupperware tub of etchant, then later progressed to laser toner or photographic masking and a bubble etcher, you’ll understand this.
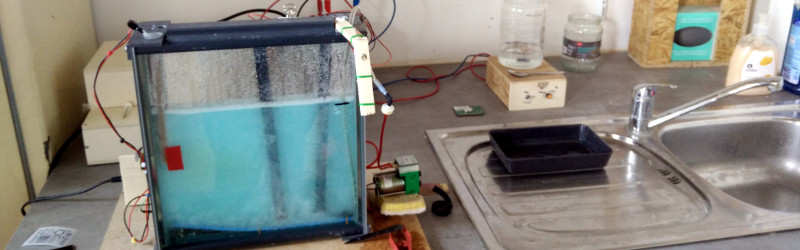
[Jana Marie Hemsing] has drawn our attention to this very nicely built PCB etching suite (Translation, German original) at the Warpzone hackerspace (Translation, German original) in Münster, Germany. The foil pattern is printed on transparency and exposed to UV light over a photoresist coated board with a vacuum pump arrangement to ensure as good a contact as possible to the board for the sharpest result. They have two exposers, one for single sided and the other for double-sided boards, both are very well-built from what looks like plywood.
The attention to detail continues with a home-made magnetic stirrer and heated bubble etching tank Their etchant of choice is sodium persulphate, so there are none of those brown ferric chloride stains.
PCB etching is nothing new, indeed we have covered the subject extensively over the years. But we think you’ll agree, if you’re going to etch your own PCBs you should have as good a set-up as you can, and Warpzone’s PCB suite is rather well put together. Those of us in spaces with lesser facilities should be getting ideas from it.


People shouldn’t think a vac pull down is necessary to get good results. Mechanical pressure to firmly and evenly press the PCB against the artwork works just fine.
Personally I use sponge mat between the PCB and lid of my (single sided) exposure box, and a simple velcro (err, make that, non branded hook and loop fastener) strap to cinch it down. The sponge mat (made from two layers of anti slip shower mat) both distributes the mechanical force, and prevents the PCB from slipping out of place when I cinch it down.
I’d only think you’d need vacuum close masking if you’ve got multiple reflections happening in your light box…… Or have managed to screw up the design so creatively that light no longer travels in straight lines.
Yes I also use a sponge rubber on the lid of my light box.
To keep it nice and firm I place a weight ( sla battery) on top of the board.
And yep after close to 30 years of etching pcbs I still use a Tupperware container lol.
But have progressed from that aweful brown ferric chloride to sodium per sulphate and have just started using hydrochloric acid and hydrogen peroxide.
It’s a nice build by the way and good to see people putting some effort into their equipment.
i moved from etching my own to getting the boards produced only because my boards always started to start corroding within months, and thin traces would be completely useless within a year. are there any homebrew ways of protecting the copper after the etch?
This ( http://hackaday.com/2012/09/10/put-a-solder-mask-on-those-homebrew-pcbs/ ) combined with making sure you clean off all flux from the board. Some flux can turn acidic over time and that’ll promote the corrosion of traces.
It’s ridiculous to say that taking advantage of cheap PCB manufacturing means you’re not an expert.
Agreed! Only a fool or masochist would try to use home PCB manufacturing methods in conjunction with your typical BGA package.
I use an old picture frame to keep mask tight to the board. Tape the mask to the glass, place the board on it face down, attach the back of the frame, flip it over, place under light source. Works great and cost nothing.
I use new(-ish) picture frame, and I don’t tape my masks, as they are made of paper. To make it UV-transparent I use few drops of baby oil (that’s oil for babies, not made of babies). As for UV I use old nail polish hardening lamp. When it works, it works great…
How does the oil make it UV transparent? I’m asking honestly, I’ve never attempted making my own PCBs.
Drop some oil (or even just some oily food) on paper and hold it up to a light – it magically becomes translucent. The oil fills in the gaps between the paper fibers. So, instead of lots of air-paper and paper-air boundaries (with air and paper having drastically different refractive indexes), the light only has to pass through two air-oil boundaries and lots of paper-oil boundaries (and oil has a much higher refractive index than air, so is closer to the paper fibers). It’s similar to if you had a stack of thin glass sheets- they’re much harder to see through than one thick glass sheet, until you fill the gaps between them with something dense.
Awesome, thanks for the explanation!
Pretty interesting trick with that baby oil. Have to give that a try some day. Up until now, i’ve always used transparency foils, but they are rather expensive, and the resulting traces are not as sharp and dark as i would like. Some brands even warp quite a bit when used in laser printers, even if they are made specifically for lasers, because of the heat in the fusing process. Paper would definately be cheaper and easyer to print on.
I still miss my high school electronics lab. Etch machine, vac UV exposer, all of the instruments we needed, some metal shop bending and cutting stations for making enclosures and plenty of cheap, cast off, or donated parts and unexposed boards; not to mention a former Titan II ICBM tech(North American Aviation?) as an instructor and mentor.
Unfortunately since school is all about feeding the university industrial complex the vocational ed stiff for electronics, auto, and shop classes are a thing long past.
Too bad, even though I did go to university for far too long, I still greatly benefit from exposure to my electronics, auto, small engine, welding, and other voc-ed classes.
Curious here. I don’t know about the arts of PCB etching, but I’ve been playing around with electrolysis on and off. I’ve noticed it is easy to get rid of copper exposed, with the right electrolyte and voltage. It also sounds easier and safer than playing around with acids and UV light.
Is anyone using electrolysis for etching? Any thoughts? Is it a common practice? I might give it a shot when I get back to my workbench.
Electrolysis can work to save amount of etchant used. It can not replace it though. You have the issue that unconnected islands will develop that no longer have electrical connection.
You can thin the copper down with it, but you still need to take the last thinner layer off with chemicals.
Since Seychell published his excellent guide on CuCl most heavy home users use that.
Industrial situations already have other more complex regenerative methods that are much faster than electrolysis.
Only reason I mill mine is for hole alignment. Maybe someday I’ll get away from through hole stuff and go back to etching.
That is smart, the pressure of the atmosphere, which does not block UV, substitutes for a thicker material that you’d use mechanical pressure with. Very useful.