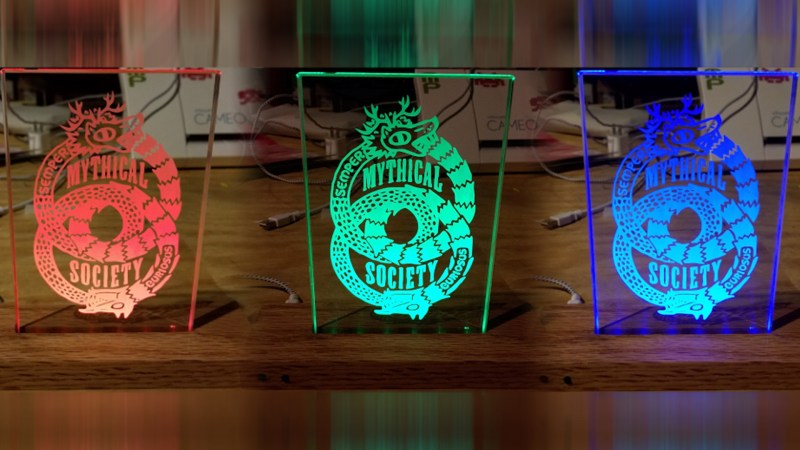
The chances are you’ve seen the myriad cheap copyright-infringing edge-lit acrylic displays from Chinese suppliers everywhere on the internet, and indeed, etching acrylic with a modest CNC laser cutter has become easily viable to a lot of us in more recent years. However, if you want to kick things up a notch, [Michael Vieau] shows us how to build a plaque from scratch using not acrylic, but rather etched glass to make the finished product look that much more professional.
There are a few different steps to this build and each one is beautifully detailed for anyone who wants to follow along. First, the electronics driving the WS2812 lights are designed from scratch based on an ATtiny microcontroller on a PCB designed in Fritzing, and the sources necessary for replicating those at home are all available on [Michael’s] GitHub. He even notes how he custom-built a pogo-pin header at the end of the USBASP programmer to be able to easily use the same ICSP pinout in future projects.
But since a lot of you are likely all too familiar with the ins and outs of your basic Arduino projects, you’ll be more interested in the next steps, detailing how he milled the solid wood base and etched the glass that fits onto it. The process is actually surprisingly simple, all you need is to mask out the design you want through the use of a vinyl cutter and then pouring some etching solution over it. [Michael] recommends double-etching the design for a crisper look, and putting everything together is just as simple with his fastener of choice: hot glue.
Much as there was an age when Nixie displays adorned every piece of equipment, it seems like ease of manufacture is veering us towards an age of edge-lit displays. From word clocks to pendants and badges, we’re delighted to see this style of decoration emerge, including in replacing Nixies themselves!


Why use an Arduino? Most LED lighting can be powered by mains with capacitors, etc. (discreet) without the fuss of a computer to be programmed. Just a thought.
“the electronics driving the WS2812 lights” WS2812s are digital LEDs and offer a red, green, and blue LED in a 5050 package that you can control individually. This allows you to pick any color you want (well, almost any), and sequence them as you see fit. They do not light up at all without the digital signal, thus the microcontroller.
Programming an arduino is hardly a fuss and provides future configurability well beyond a hard wired mains powered LED. If all you want is a static light, then yes simple is better, but if you want to be able to change colors or even have it act as an indicator or any other number of more complex variations then you are going to need to go beyond simple.
Cool project.
Remember, however, that hydroflouric acid (and the etching paste probably contains that stuff) is highly poisonous. Better do some research about precautions before reproducing this really cool effect.
Nope, not the stuff he is using…https://www.glassetchingsecrets.com/wp-content/uploads/Armour-Etch-msds.pdf
Yes, exactly that stuff. It contains Ammonium bifluoride or NH4F HF
That HF at the end is what Gauchi is warning about and it is present when ammonium bifluoride is dissolved in water.
Well not exactly that stuff. I meant it doesn’t have straight hydroflouric acid which some glass etchants have had in the past. As you have pointed out, most now use Ammonium bifluoride which can create hydroflouric acid when combined with water (even sweat from your hand). My point was that Ammonium bifluoride was used because it is less hazardous (although I will concede that is arguable)
I will also concede that Gaughi’s point still stands that you should do your homework when dealing with caustic chemicals, because like this case Ammonium bifluoride can relatively easily become hydroflouric acid, which is pretty nasty stuff if you don’t take precautions.
Gauchi,
Thank you for the warning. I’ll add that info to my post.
– Michael
I can’t imagine anybody would sell HF off the shelf. If you absorb it through your skin, it will react with the calcium in your blood and stop your heart. This is not something I can EVER imagine would be on the shelf at Hobby Lobby. Here’s a link with ingredients of a glass etchant: https://www.glassetchingsecrets.com/blog/whats-etching-cream-made-of/
Right, Ammonium Bifluoride, which is essentially equal to lower concentration HF in solution and incredibly dangerous as far as chemicals go:
https://www.fishersci.com/shop/msdsproxy?productName=A6643
The linked etching cream contains 20-40% of that chemical:
http://www.dick-blick.com/msds/DBH_SDS_609661004.pdf
It looks like the light falls off near the top, possibly to obstruction by the lower elements. I’d be interested in a technique for getting light up to the top as clear as it is the bottom, maybe a slightly sloped plane in the back of the glass so that the top elements are further forward than the bottom?
Anthony,
You make a good point, and there is some drop off of the light towards the top. However, it’s not very noticeable in the real world. The camera makes it look a lot worse than it is.
– Michael
Make a small hole on the bottom of the etching reservatory and let the etchant drip, slowly reducing the level of reservatory, letting part of the glass exposed, thus creating a gradient in the depth of the etched pattern.
(off course the etchant drips shall be contained in another reservatory)
Could a “frame” be put around the exposed edges, reflective at the top and absorptive at the bottom, to mitigate the effect? The frame might even be a few layers of paint.
A good looking project.
Very complicated patterns can be a pain to transfer using vinyl, especially ones with a lot of tiny features such as lettering, fields of dots, and so on. In these cases you can pattern transfer using a silk screen. You can make a silkscreen from a transparency using a bright light, then tape the finished pattern to the glass and etch through the silk. The glass etchant doesn’t damage the silk of the silk-screen.
I still have the original silkscreen patterns from when I did this.
Similarly, sodium bifluoride will disassociate into sodium fluoride and hydrofluoric acid when in a polar solvent such as water. I suspect, however, that the resulting HF concentration is lower or at least rate-limited compared to using diluted hydrofluoric acid, which may be why this product has a 3 in the health portion of the NFPA diamond as opposed to the 4 pure HF gets.
Follow the directions and use the protective equipment as directed!
Sandblasting looks much better than chemical etch. And you never ruin a design from the etchant bleeding under the vinyl.
If you have a compressor, you can pick up a cheap sandblaster at Harbor Freight.