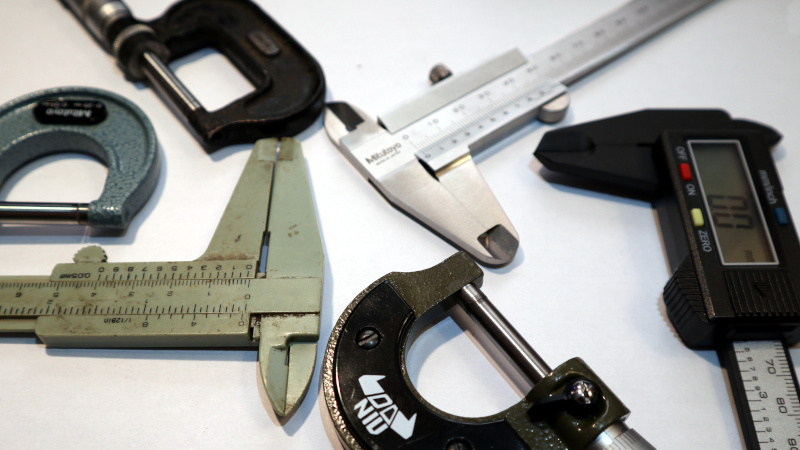
I needed a temperature controller module recently, so off I went to Banggood to order one. As one does I found myself browsing, one thing led to another, and I bought a micrometer screw gauge. While micrometers are pretty expensive devices, reflecting their high precision engineering and construction, this micrometer cost me only about £8, or just under $10, definitely in the spirit of our long-running series of reviewing very cheap tools in search of a diamond in the rough. But perhaps more importantly, this is also the cue for an examination of high precision dimensional measurement. So I’ve assembled a collection of micrometers and vernier calipers of varying quality, and it’s time to dive in and measure some very small things.
Some of you will be metrology enthusiasts with an array of the finest devices available, but I am guessing that many of you will not. The ubiquitous precision measurement device in our community appears to be the digital caliper, a sliding clamp with an LCD display, an instrument that can be had in its most basic form for a very small outlay indeed. For the purposes of this piece though we’re not looking at digital devices but their analogue precursors. If you want a feel for metrology and you’d like some of those heritage tools that parents pass onto their kids then it’s time to learn something about the vernier caliper and the micrometer.
Traditional Metrology In A Digital Age
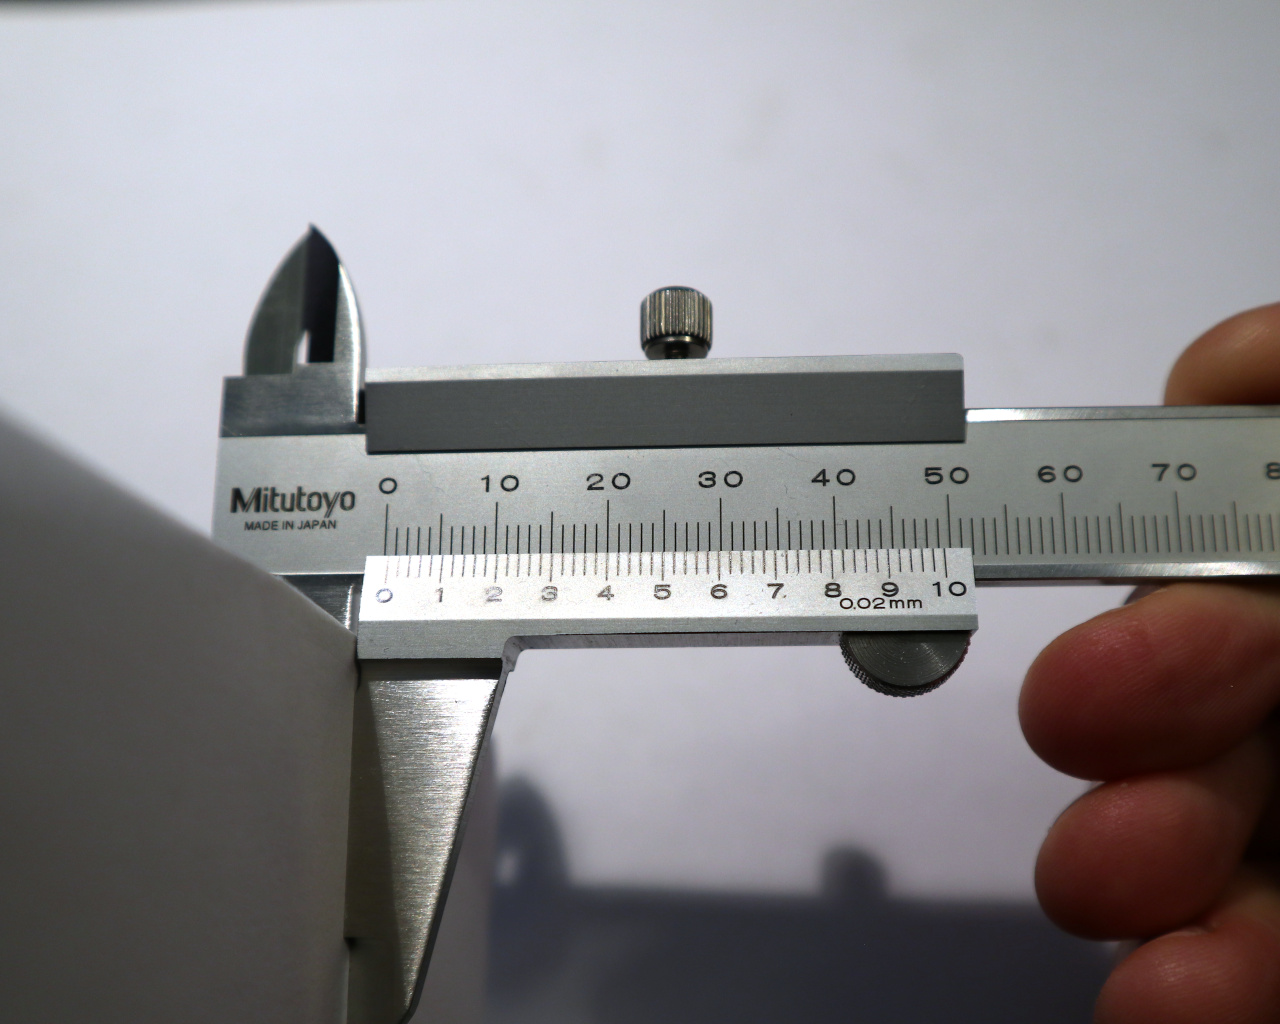
A Vernier caliper is a graduated sliding clamp usually over 150mm long, with a Vernier scale that allows the reading of fractions of its graduation. It will typically have two sets of jaws for both internal and external measurements, and an extending probe for depth measurements. On the body of the clamp are the millimetres or inches, and on the sliding jaw is a scale graduated in a constant fraction of the main scale. It’s a mathematical trick that allows the user to turn “ten and a bit millimetres” into “10.12 mm”, by working along the Vernier scale until one of the gradations lines up with a gradation on the main scale, and reading the fraction of a millimetre figure from the Vernier scale.
I have a friend with a background in a family business grinding tungsten carbide to a very high precision indeed who jokingly refers to a vernier caliper as “the guessing stick” because its precision is several factors of ten above her working zone, but the ability to add an extra digit and fraction of a digit’s precision to a millimetre reading depending on the Vernier scale in question over the whole relatively long range of the caliper makes it a very useful instrument indeed.
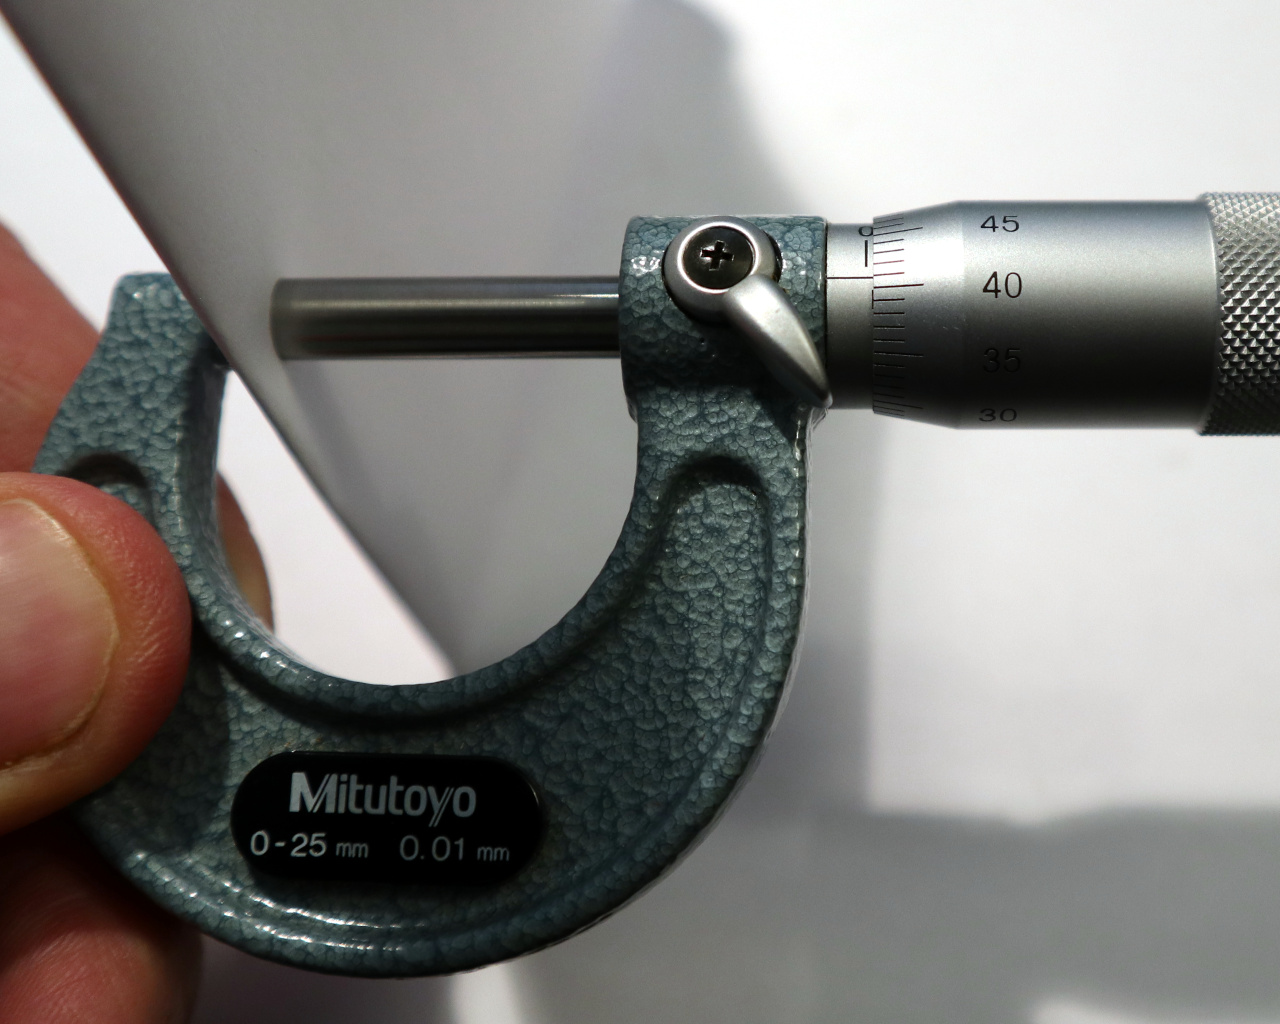
A micrometer is a G clamp with jaws in its most common form around 25 mm in size, and with a very accurately calibrated screw thread. It has a handle with both a scale in millimetres or inches along its length and a fractional scale on the handle that turns the thread. Using it is a case of closing it on the item to be measured, reading the millimetres from the length scale, and the fractions of a millimetre from the handle scale. A typical micrometer has a precision of a hundredth of a millimetre or a thousandth of an inch, but there are micrometers that combine the two micrometer scales with a Vernier scale round the shaft of the instrument to give an extra fraction of a digit’s precision on top of that. All precision metrology instruments should be taken care of to preserve their calibration, and the micrometer has a ratchet on its end to ensure a constant torque when it is tightened. It should always be tightened using this ratchet, to protect the thread from wear and distortion.
Vernier Caliper Shootout
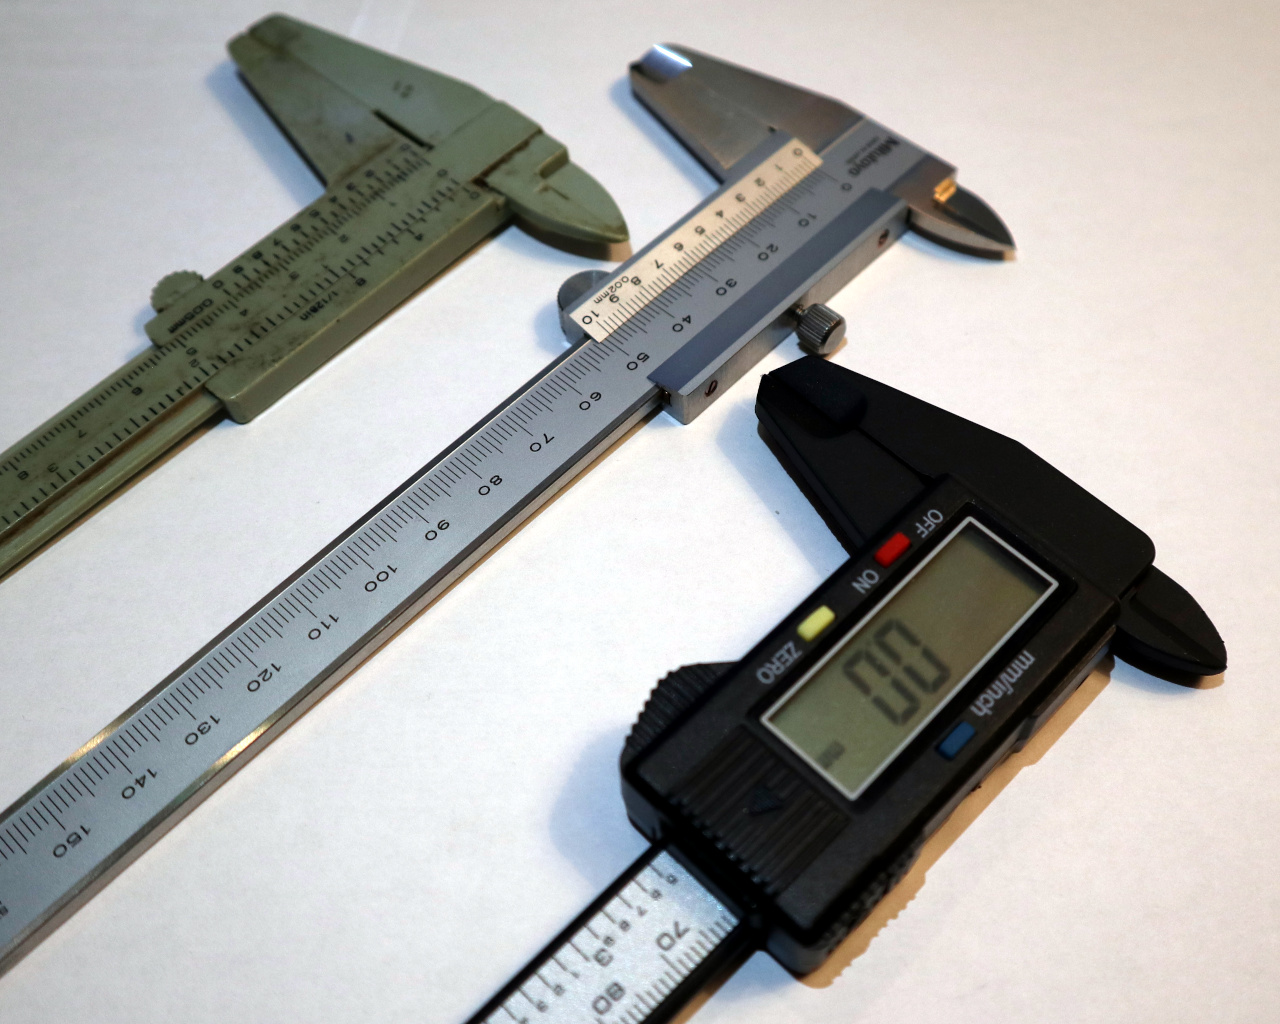
I’ve amassed a selection of both for comparison. In the caliper corner are a very cheap (around £5, or $6) digital caliper, another very cheap plastic analogue Vernier caliper, and my Mitutoyo 530-122 Vernier caliper. The former two are my quick measurement tools of choice, when you see a product dimension in one of my Hackaday pieces it will have been measured on one of them. The plastic Vernier caliper has been with me for about twenty years, for its £1 ($1.50 in 2000) purchase price it has been probably the best values I have ever had in a tool. The Mitutoyo is their entry-level model, I seem to remember it cost me around £30 (about $37), and it comes out of its box when I need a precision measurement that I can really trust.
The plastic calipers are both insubstantial, being slightly flexible and lightweight, with jaws that don’t quite meet along their whole length and which have a discernible slight play on them. The digital one claims a 0.1 mm precision while the Vernier one claims a 0.05 mm precision, which I can imagine might be optimistic in both cases due to those jaws. It’s a case of evaluating them based on their use case and cost though, so as long as I am using them as instruments that can knock around in my drawer to take quick millimetre measurements rather than machining nuclear reactor parts, then they are adequate for that task. By contrast it is immediately apparent on picking up the Mitutoyo caliper that it is a much higher quality instrument, being machined from stainless steel it has a much more substantial weight. The overwhelming impression is one of solidity, the jaws meet perfectly and have no discernible play, and the sliding action is smooth but with a constant slight resistance. It has a precision of 0.02 mm, which is considerably more believable than the figure on the plastic calipers.
Having examined the calipers, how do they perform? It’s time to put them through their paces by comparative measurement. I’ve taken some of the items I have to hand, a sheet of printer paper and a bare badge PCB. It’s important to note that all the measurements on this page are the result of repeated tries to ensure a consistent reading, with these instruments it’s easy to secure a poor reading by misaligning the jaws over the item to be measured.
| Thickness of paper | PCB (2 sides copper) | PCB (No copper) | |
|---|---|---|---|
| Cheap digital caliper | 0.0mm | 1.6 mm | 1.5mm |
| Plastic caliper | 0.1mm | 1.55mm | 1.40mm |
| Mitutoyo | 0.1mm | 1.60mm | 1.56mm |
Straight away the lower resolution of the cheap digital caliper becomes obvious, as it resolves the copper layers on a PCB to be a whopping 0.1 mm. It’s a surprise that it doesn’t resolve the 0.1 mm sheet of paper as such, but this is likely to be an error induced by the play in the jaws. Likewise the plastic Vernier caliper gives a significantly different reading from the Mitutoyo, probably also due to its inconsistent meeting of its jaws.
Micrometer Shootout
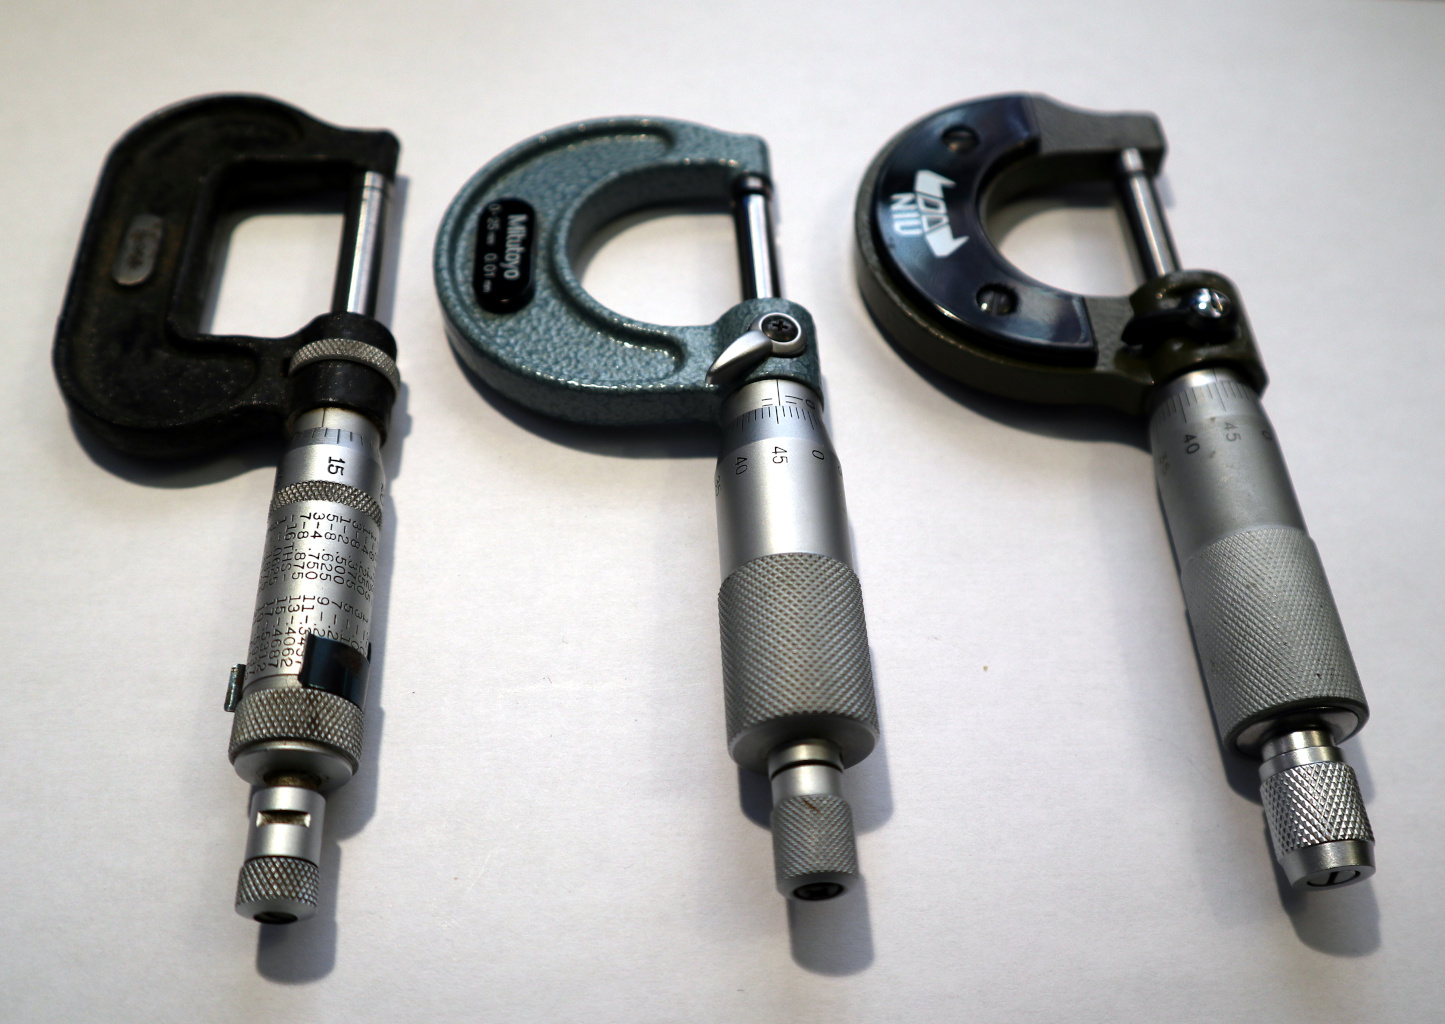
Meanwhile aside from my £8 micrometer I’ve borrowed a couple of considerably higher quality instruments, a Mitutoyo 103-137 metric model which sells for about £57 ($70), and a vintage 1960s Moore & Wright No. 964 Imperial model. The latter is no longer made but is I think equivalent to current M&W models costing over £50 ($61). They are both general purpose 0 – 25mm/0 – 1″ workshop micrometers, and their owner has taken care of them so they are in very good condition.
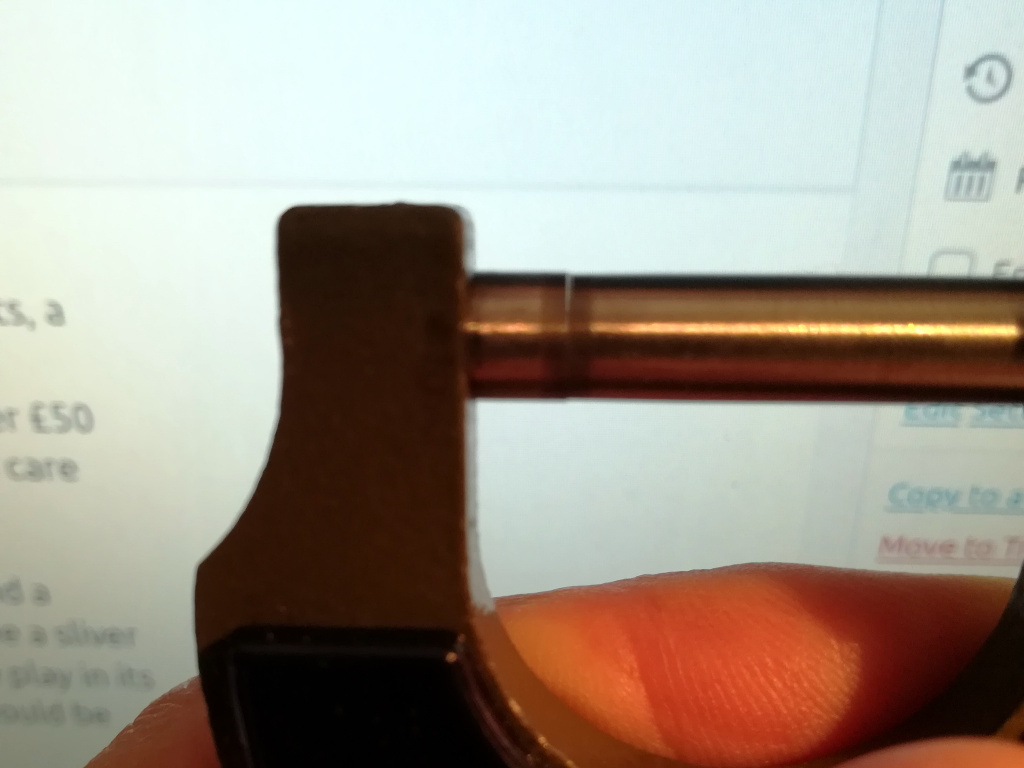
The £8 Daniu-branded micrometer is substantially built, with an enamel-painted drop-forged frame and a machined aluminium micrometer head and ratchet. All is not well in its machining however, as I can see a sliver of light indicating imperfect flatness between its jaws when they are closed, and there is discernible play in its thread. It has a 0.01 mm resolution, but given the not-entirely-flat jaws and the play in the thread I would be inclined to add a significant error bar to this.
By comparison both the Mitutoyo and the Moore & Wright have very similar drop-forged frames and machined aluminium heads, but it soon becomes evident where the extra money has been spent. There is no discernible play in either instrument, and their action is smooth with a slightly greater resistance than the cheaper one. The faces of their jaws have been lapped to a mirror finish, and there is no discernible gap between the jaws when they are closed.
Looking at the performance of the micrometers I’ve yet again performed a series of measurements with each. The sheet of paper has been replaced with a hair plucked from my own head, in homage to that lesson in engineering elementary school when you’re told a micrometer can measure a human hair.
| Human hair | PCB (2 sides copper) | PCB (No copper) | |
|---|---|---|---|
| Daniu | 0.02mm | 1.59mm | 1.54mm |
| Mitutoyo | 0.065mm* | 1.62mm | 1.55mm |
| M&W | 0.0025″* (0.0635mm) | 0.064″ (1.625mm) | 0.061″ (1.549mm) |
| * The extra 0.5 precision comes from judging the reading to be midway between two points. | |||
Straight away we can see that the Mitutoyo and Moore & Wright agree with each other pretty closely, while the Daniu differs significantly on some readings. The play in the thread and not entirely flat jaws make consistent readings difficult, as the reading depends on the alignment of jaws and thread at the distance in question.
Getting What You Paid For
Having examined both decent and cheap Vernier calipers and micrometers, I’ve established that a decent quality instrument beats a very cheap one. My plastic calipers are fine for the quick millimetric measurements I use them for but maybe not for higher precision work. Unsurprisingly an £8 micrometer doesn’t deliver consistent readings at its claimed resolution but would be adequate at a digit’s less precision. The real story lies in how useful the quality instruments can be even in the age of digital metrology, and that the starting price for a decent one perhaps isn’t as high as you might think.
There’s also another point which is a little frivolous but with which I suspect more than a few readers will identify, and that’s the feel of a quality instrument. There are some tools that it’s a pleasure to own, the ones that stay with you for life if you take care of them and which are passed down to your children and eventually as family heirlooms to theirs. It’s with regret that I’m handing back my borrowed micrometers to their owners, and it’s likely I’ll be making space for one of my own in my life before too long. If you understand this and you don’t own a Vernier caliper or a micrometer yet, then something tells me you too may be ordering one or the other pretty soon.


I have eschewed the digital caliper for a dial gauge caliper. No batteries, no vernier It always works.
I have a gang of micrometers if and when I need greater precision, but I rarely do.
I’m there with you on this one. I have a passel of micrometers and calipers ranging from cheap plastic to $300 tool room Mitotoyo’s, but I find that my day-to-day go to is a 6″ Starett dial caliper that I’ve had for 20 years.
I have a digital mitutoyo and a dial brown & sharpe (my childhood teacher insisted that these are sliding scale gauges, and calipers is a term applied only to split-leg steel devices that don’t measure at all, merely transfer a measurement from a workpiece to a measurement tool, but wikipedia doesn’t seem to agree with him.)
I value the digital one’s ability to automatically rezero, which makes finding center distances between holes easier, but the other thing I like is that it doesn’t have an exposed mechanical gear rack like the B&S, that little metal chips can get into, even, somehow, when it lives in its fitted wooden case when not actively being used to measure.
That’s true about calipers, though hadn’t remembered until now.
About 1974 I had metal shop in high school (half the year metal, half the year woodworking) and suddenly I can hear the shop teacher talking about calipers in his Scottish accent. And yes, they were simply to transfer measurements.
> devices that don’t measure at all
That depends on your definition of measure. They do measure “one of this”, or “half of that”, or even “square root of this” etc. because of the techniques you use with them – such as walking the calipers around a circle to divide it into equal parts. Just because you don’t assign a number doesn’t mean it isn’t a measurement.
I hear you, since I got a dial caliper, I haven’t really had the itch to expand the measuring toolbox, seems like you can measure anything and everything as long as you are careful with how you set it up.
Same here. For general absolute measurement I use a dial caliper, that’s what I keep handy. If I am working on fitting/modifying something and I need a lot of relative measurements I will dig out the digital caliper.
OK, soapbox alert on. Engineering, hacking even life is all about compromise. Nothing wrong with that. People who use vernier calipers and micrometer screw gauges are making compromises just like everyone else. These instruments cannot measure anything large, or even medium sized for most values of medium. They are also not the cheapest or the easiest to use. The crazy thing is that the article even discusses trade-offs between cost and precision. Also, were these instruments calibrated recently or at all? Are you controlling temperature of the instrument or temperature of the piece. Do you care? Compromises everywhere. Soapbox alert off.
Having said all that I do share your love of micrometer screw gauges. Thank you for the article.
I would disagree with you on the size question. All the ones featured above are the small versions. They’re available up into the MASSIVE.
And yes. Temperature. These are bench tools, not lab tools. In other words, about as good as you can get to do the job in hand.
“about as good as you can get to do the job in hand. ”
I remember a documentary on TV in the UK, where the motorcyclist and engineer Guy Martin was rebuilding a Supermarine Spitfire.
After chatting to his build team and the camera for 5 or so minutes, with the hefty locking pin that held the wing on in his hand, he was unable to fit the pin in place until it had cooled down to Room temperature and shrunk to size. Precision engineering.
“making compromises just like everyone else”
Nor always, because if you get something wrong it could mean your own or someone else’s safety.
A few things you should never cost optimize on:
1. Your fluke multi-meter
2. Starrett vernier calipers (mitutoyo is also good if you can avoid the counterfeiters)
3, A gauge block set you will use a few times a year
4. a small AAA surface plate (under $200 for a small portable one)
5. Micrometer with carbide jaws (mitutoyo is very good, again if you can avoid the counterfeiters)
6. thread wire set
I’d rather spend the $1k up front, than end up guessing at the precision of the components I encounter. Somehow it feels like a sin to waste time chasing a cheap unreliable process.
Its a personal choice everyone needs to make at some point…
I don’t know why, but well made equipment often improves the emotional experience of building things… ;-)
A year or two ago I would have gone with Mitutoyo all day long but having had need for some technical help and parts I have absolutely stopped buying them. All I got was absolutely no response whatsoever, I tried several times and eventually just drew a line under them.
Worth buying is not only a matter of how well it works when you get it.
Several years ago, I needed replacement anvils (only needed one, maybe the second, but did all three) for a small internal micrometer (25-50mm). They are carbide, but they do wear out. Mitu tech support was not responsive, so I went to an internal contact who was able to deal with support for me. Got the parts via the official supplier ($US40 for the parts, $US60 for shipping, hence just getting the full set… whats $12 more to do them all?).
Wrong part. The thread didn’t match. Nothing in the Mitu documentation or literature made any mention of the thread spec, nor that it has been changed sometime around years 2000. The Mitu people were unaware, as well. Eventually tracked down the part number of the correct anvils (file cabinet google on the part of my contact tracked down lit from the early 90’s with the, then, correct part number, which was cross referenced to the current part. Apparently, nothing referenced the part to the tool it goes to. It was (is?) a part they make and supply that, by their data, exists solely for it’s own purposes.
The wrong ones were not returnable (They are what you ordered, bud) so another $US75 (shipping, again) and several weeks later….
The difference between dealing with Mitu and Starrett, in my experience, is that all of the reps for Starrett know that there have been changes, know where to find the information, and know what to ask to identify the correct part, even when there isn’t supporting documentation.
This really does depend on what you do. In 45 years of home-shop-machining I have never needed gauge blocks or a surface plate. (I have occasionally used the mill table as a low-grade surface plate, but never missed the gauge blocks).
Ditto the thread wires. I have had to make a thread to a standard no more than a couple of times, and on those occasions I have used whatever suitable wire I could find to make the measurement. I do single-point a lot of threads (I have a CNC lathe, it’s trivial) but I almost always have the two parts, so just need to make them match each other.
Your list of necessities is only really relevant to people in the game of making interchangeable parts to drawings. For the typical home-shop hack-a-day-er your list would simply be a waste of money.
I understand that you probably take pleasure in owning high quality metrology equipment, I do too. But to claim that everybody needs it is a stretch.
Personally, I’d probably still chase those threads with a clean adjustable die and a bottoming-tap if I was in your shop. Everyone initially sets their own standards for workmanship… for awhile a least…
If you ever have to restore early steam engines or equipment, one will find almost every bolt was custom fit from some factories… really easy to bust those century-old castings if anyone assumes they had repeatability even under the same roof.
I personally think it is not good practice to encourage that kind of short-term thinking for people learning how to build things. We should contact Starrett, and ask them to post a prize-pack for a few students who demonstrate serious skill. ;-)
I would need a lot of dies, for reasons you hinted at. Mainly I work on vehicles from the teens and 20s, so lots of brass thread, BA, Whitworth, cycle threads and one-off threads not conforming to any standard.
I will certainly use a die for a standard Whitworth or BSF thread, as it’s hard to get the thread rounding right any other way.
My most recent (youtube) project was a custom Acme tap for someone’s lathe, as it’s pretty much impossible to get a 9/16 x 8tpi LH Acme tap off the shelf.
I use a $40 iGaging digital caliper that gives consistent readings and runs for over a year on a battery. Unlike the cheapos, the battery cover can’t easily fall off and get lost. I’ve used it almost every day for the last 2 years and it has been perfect.
“It’s important to note that all the measurements on this page are the result of repeated tries to ensure a consistent reading, with these instruments it’s easy to secure a poor reading by misaligning the jaws over the item to be measured.”
For the Vernier calipers did this include zero adjustment as well? Pretty sure the Mituyo’s can be adjusted out, but doesn’t look like the cheap caliper can. Doesn’t look like it would matter that much as the offset between the Mituyo and the cheapo caliper isn’t consistent (and it’s zero for the paper).
That being said, if the plastic Vernier claims 0.05 mm accuracy that’s actually not far off: the average error between the Mituyo and plastic Vernier is 0.07 mm and you’d expect 0.06 mm (since the Mituyo’s is 0.03 mm). Even the smallest positive zero adjustment (0.01 mm) would bring that to expectation.
Yeah actually, I’ve got a very lightly scribed, so hard to read, 6″ steel caliper forget the brand, it’s one of those older respected ones, not in biz any more, which I’m super careful not to abuse or bang around. Then I have one of those cheapy plastic ones. After not trusting the plastic one for anything other than a “guessing stick” as Jenny puts it, I started comparing the two and realised that it was surprisingly good. Hence the steel one got put away somewhere, and the plastic one does all the donkey work.
Neither Vernier has a zero adjustment. The plastic one is cheap andflexible, but if the Mitutoyo goes off zero then you’ve REALLY mistreated it.
Pretty much what I tell students: The beauty of the vernier is that there is nothing to go invisibly wrong.
Dial have a number of pathologies (cyclic error, rack pitch error, hidden mechanical damage, skipping teeth, cleanliness, and so on) that one should be aware of, and digital are black boxes that can really get you IF you don’t pay attention.
Digital have come along way at the inexpensive end (re accuracy and reliability), but there is still a trade off: ease of use versus number of hidden things to go wrong accidentally or by device fault. (tell me you’ve never twigged the zero-set on a digital tool accidentally)
But in the end, a digital slide caliper, a dial type, or a vernier type, are still slide calipers and Abbe’s principle rules.
My uncle gave me my first micrometer and dial caliper some time in my 20’s, I still use them today when I need too.
The biggest problem however is I’m LEFT HANDED. So yeah, using them is always a two handed affair. And shopping for left handed calipers and mic’s… yeah that’s fun… Let’s just pay the “Left Hand Tax”, thank you very much.
Left handed calipers are not particularly more expensive than calipers for normal folk.
I have a left handed one for lathe use.
Lefty: https://www.machine-dro.co.uk/left-handed-digital-calipers-150mm-6
Righty: https://www.machine-dro.co.uk/6-inch-imperial-digital-calipers-with-fractions
(It turns out to be hard to find an exact comparison there, there are cheaper ones with smaller displays or plastic frames, and more expensive ones with more features)
Well, that sure beats what I was looking at…
https://www.mcmaster.com/left-handed-calipers/
If you’re in the States, try might Travers tools in-house TTC brand. Not exactly Mitutoyo, but reasonable cost and totally serviceable for day-to-day use.
https://www.travers.com/left-hand-electronic-calipers
I have a left-hand unit for one particular machining operation I do all the time, where a right-hand caliper leaves the display on the wrong side.
Thanks, that’s quite reasonable.
I am also of the sinister persuasion, though am quite comfortable with right-handed tools as they are essentially the rule. Even for those not blessed, though, there are measurements that require the use of the left hand for access at times.
The ONLY common semi-precision or precision manual measuring tool that can be (substantially) converted is the standard screw micrometer. How, you say?
Speaking to the nearly universal (today) design with the thimble set on a taper, and the scale sleeve rotatable for fine adjustment of the zero, turn the sleeve 180 degrees, remove the thimble and reset it the same. The screw is still not as comfortable as one mignt like, being right handed, but you can read it while holding in your left hand. My preferred flavour for this has a lock ring rather than a lever, since it is accessible from both sides.
Actually, my preferred flavour for micrometers in general has the lock ring. The lever types, even from top brands, tend to be fragile, wear out of alignment, and, if used for the same measure a lot, may mar the spindle where they are repeatedly set (this is a LOT of similar measurements, but I have done it)
Unfortunately, for the digital mic’s, a remote display is the best choice. For calipers, digital with remote display is about it, as well.
I’d give my right arm to be ambidextrous.
What would you be left with?
I wouldn’t be all right.
I’m left handed too, and prefer a micrometer with a left hand thread.
Im left handed as well, but society has forced me to identify as right so many times. Can we be next?
I am I guess sesquidextrous, I’ll start doing stuff with my left hand, because it’s nearest or the right is already doing something, and come to a stop puzzled why it’s not working, and then realize I’m trying to do something that’s specifically handed.
I tend toward the philosophy of, “If it needs super tight tolerances, you designed it wrong.” Compare Babbage’s problems against the Tinkertoy computer, Sten guns vs SA80 (For their first couple of years in service). Which I realise does not cover every problem (engineering opportunity) but show people how to use micrometers and they’re over-engineering stuff like crazy. You are winning when you need to use it as little as possible. If you specify a contact of a precise alloy of phosphor bronze with an exact 0.24 N spring force, with a thickness of 0.23, width of 3.29 and length of 15.2, capable of carrying 4.27A you are obsessing over land fill, vs “bit of metal capable of carrying 5A” which is probably far more serviceable and repairable in the long run.
However, I would have preferred to see those repeated measurements to see how easy it was to achieve repeatability with the various tool. I’ll take one that goes 1.45 1.45 1.45 all day even if we think it’s 0.2 out vs the one going 1.63, 1.67, 1.65…
Jenny,
unless your friend lives at an unreasonable distance, I wondered if you could have used one of their tools to establish a “baseline”.
I like my digital micrometers, it’s far harder to make place errors when reading them. (always a risk with both verniers and micrometers) “So, 0.7 then 5 and 3 small divisions, that’s 0.753 then…” (no, that is 0.708)
I once had the dubious pleasure of using a travelling microscope with a vernier calibrated in 50ths of a mm.
So you had to read the full mm, then double the vernier reading….
I recently bought some 3-point bore micrometers from that eBay and wish I had done so decades ago. They are such more more convincing than the little telescope gauges. They settle in to place solidly and give a consistent number, rather than the excessively democratic votes you get from multiple telescoping bore gauge measurements.
The only problem is that you need an awful lot of them as they each have rather a small range.
I’ve found shopping estate sales is an excellent place to get high quality micrometers for reasonable prices. Am engineer or qa person took pride in these tools and used them at home.
I live in a NASA town. I think our engineers are buried with theirs.
The older ones are buried with their slide rules.
Professional machinist. Based on what I’ve mostly seen on HaD, most makers here could do 90% of what they need precision measurements for with 2 tools- a 0-1″ micrometer, and a good quality 12″ caliper.
Mitutoyo is my brand of choice when I need true quality that doesn’t need to be swiss (some things do need to be swiss/german for ultra high tolerance stuff I do). They are reasonably priced, usually 2/3rds to 1/2 the cost of Starret, and of equal or higher quality. Mitutoyo is thf only company I will buy a digital caliper from- theirs are far superior to all others (linear encoders in body). Worth the cost!
My recommendation if you don’t want go do serious investment in a 0-1″ micrometer and 12″ digital calipers for maybe 350$ from Mitutoyo is go with SPI. SPI is not as well made at all, but it’s no longer straight junk. For casual makers, their stuff is good, and like 1/2 to 1/3 the price of even Mitutoyo.
Biggest warning- unless you know what to look for- avoid buying older used micrometers. They only need to be dropped once the wrong way in their history to be useless and thrown out of square.
Good Vernier calipers (like master verniers) are $, but you can get close to the accuracy of a cheaper micrometer with a really good pair. They usually don’t have the ID jaws though (which always end up dinged somehow anyway).
Lastly- if you need accurate, truly accurate measurement- invest in a gauge pin or single gauge block to zero your device measurements against. These are called standards- its how you’ll know youre actually measuring an exact size.
Hope this helps some people, SPI stuff is good enough for normal people’s finer work, and for maybe 150$, you can get both a 0-1″ micrometer and 12″ dial calipers. Remember- digitals and Verniers don’t have any gear teeth to get fouled up by chips like dial calipers do…
I completely agree on the Mitutoyo ones, aside from the battery lasting a lot longer than the cheapo ones, the more expensive ones also tend to use inductive rather than a capacitive encoder which means dirt is less likely to throw off the measurement.
the one I use
https://www.amazon.co.uk/Mitutoyo-500-196-30-Absolute-Digimatic-Electronic/dp/B00IG46NL2
If you do decide to get a cheapy one then try to make sure it’s using an SR44 instead of an LR44 battery, the SR44’s are better for test equipment as the voltage won’t gradually trail off but instead remain constant.
Yep- I use the 4″ AOS inductive scale version of that for much of my rough toolmaking, though I use dial calipers at work since they are issued to me. Shop guys almost always swear by dial calipers. They measure accurately even over light oil and dirt.
If you have only used cheapie digital calipers, you have no clue at all what you’re missing by not going mitutoyo- they just never skip or lose their place.
For the record- gold colored Titanium nitride (TiN) mitutoyo dial calipers are excellent.
It is possible to get calipers relapped if you wear them out- but few places still do this, and its expensive- often 1/2 the cost of new though. Makes most economical sense on 12-18″ calipers, or master Vernier calipers, which are already expensive.
By they measure accurately over light oil and dirt- I meant the AOS digital mitutoyos.
Dial calipers will foul up very very easily- difficult to keep clean around the EDMs I work with, tons of fine metal sludge, gotta be really careful.
> It’s a mathematical trick that allows the user to turn “ten and a bit millimetres” into “10.12 mm”, by working along the Vernier scale
When the Vernier scale has ten divisions, your can’t actually read 10.12 mm from it. You can, but you’re fooling yourself. When there appears to be one line that is in good alignment, you’re on the tenth or 10.1 +-0.025 and if two lines appear to align you’re on a 1/20th or 10.15 +-0.025.
You may kinda sorta kid yourself into seeing that the line is a bit more this side or bit more that side, but the whole thing isn’t that accurate to begin with.
Or, you can think of the Vernier caliper doing Swedish rounding.
I like my $20 HF digital calipers. I have had one set for many years. The battery died, and sadly, the replacement that came with it was also just about dead too. I had to go out into the virus laden world to fetch a replacement. I think I have 3 of 4 sets of them now, in most of my shops. I have at least one pair of plastic calipers too. They are surprisingly accurate but only read in mm, and are harder to read with the crosshatch. I have to put my magnifying headgear on to use them. A dial caliper would be OK but you would still have the in/mm thing to contend with. There is a lot to be said about just being able to push a button. It is also handy on occasion to be able to zero them out when they are not mechanically at zero. Something that is hard to do with their non digital counterparts. I think the big deal is having something that works for you. Something that is accurate enough for your ends and something you can get good readings from without jumping through too many hoops.
One problem with micrometers is range. It takes a whole bunch of micrometers, each with their very small range, to match the flexibility you get with a single tool with calipers. With how expensive a good set of micrometers is, this can be a significant barrier to entry unless you know you need the precision and accuracy.
But they each have their place. I have both digital calipers and analog micrometers next to my lathe and mill – get a first order approximation of the dimension with much faster calipers, and then come back with the correct mic when you get close. I also have another set of digital calipers by my 3D printers, where caliper-grade accuracy is generally about as accurate as I can hit with my 3D printers anyway.
I also have a HF digital caliper. It’s generally good, but occasionally it forgets where it is, or miscounts, or something like that. To be safe, I have to do every measurement twice and then a sanity check.
“but occasionally it forgets where it is”
What does it do, freak out or something? Do you have to be all “It’s okay caliper, you’re at home, in the workshop…” ;-)
I got a HF digital calipers _many_ years ago, probably in the late 1990’s, and I don’t know who they were sourcing them from back then but it has an absolute encoder. I can turn it off anywhere and turn it back on and get exactly the same number, move it as fast as I want and not lose counts. It’s not as accurate as my mitutoyo but it’s close: slightly worse repeatability on a gage block.
I’ve gotten two more since then, in the last 10 years, and they’ve both been kinda awful: lose position, can’t move fast without skipping, but I was getting them for people who had nothing and they’re better than nothing.
The cheaper ones are “absolute” in the sense that they never actually turn off. They just shut down the LCD and reduce the update interval.
The way it works, you’ve got a comb pattern printed on a thin strip PCB, and the calipers count the teeth on the comb to a precision of about 1/16″ or better, and then it measures the capacitance between the teeth to figure out whether it’s closer to step A or step B. It remembers the coarse value and re-measures the fine value every time so it’s both absolute and relative.
I always understood that using the ratchet on a dial gauge was to ensure a consistent measuring force and not to minimize wear, although I am sure it does that also. I try to use a micrometer wherever possible as it is hard to apply a consistent measuring force with vernier/dial/digital calipers. Their design means they seem to flex a bit and I have found that even small differences in measurement force makes quite a difference to the readings.
Guys who use mics and calipers for a living- I rarely see anyone actually using the ratchet on them. We watch how each other use our tools over the years.
The skilled people develop a feel for their micrometers, and it is much lighter than the ratcheting thimble. We calibrate our micrometers and calipers against hemispherical standard rods before use, note if they are measuring off, and then if very off- we adjust the micrometer drums for wear in the thread. Most good ones come with a wrench for this to adjust it after it wears. Poor ones do not, but even SPI comes with a wrench nowadays. There are kits of specific gauge blocks and quartz optical flats for checking micrometer pitch errors too you can use if you’re quite serious.
To be clear- I have been gifted SPI stuff- but never intentionally bought it. I’d get laughed out of my shop if I pulled those mics out. But they’d be perfectly good for home makers.
I have a 9 inch Etalon that I bought in the 70s. It cost me a fortune and it is still the go to if I need an accurate measurement. If I hold it up to the light and close it then I can get rainbow colours down to deep purple before the light is blocked completely. Even a Mitutoyo won’t do that but when I bought it the investment was huge, you could buy a house for less. :)
Etalon anything is about as good as it generally gets. Old Etalon even better.
I wish I could just hand a brand new Etalon caliper to one of these Harbor Freight caliper people- I would love to just see the look on their face after about five seconds of use.
There is an enormous difference in the quality of real measuring tools but I understand shopping at Harbor Freight. Not everyone can justify 3 or $400 for a pair of calipers. Even I shop at Harbor Freight for certain things (like dollys), but I don’t buy measuring tools there.
If you are looking for diamond in the rough, at least do not search it in quartz strata, because there is none.
I scored quite nice metrology items on specialized forum/ebay:
Mitutoyo digital calipers and various premium brand vernier micrometers (tesa, roch, mitutoyo)
One box of grade 0 carbide gage gauge for less than 150$, only with its 25mm gage being a steel mitutoyo. Normal price is at least 10x that.
One perfectly mint Johansson mikrokator, this one is only for collectible as I do not have the stand that goes with it, but it still usable as a +/- 50 micron comparator with 0 backlash, a real nice beauty. 40$, yes you read it well.
The craziest measuring tool I ever found was a specialized solid sapphire anvil (yes, you read that correctly) indicating micrometer that handled up to 8″ or so, with it’s own internal lapped platform to hold the item to be measured.
It was from the QC dept of Bulova watchmaking company, and about 500$. If I could have afforded it at the time I would have snatched it up just to have something that exotic.
Mikrokators are pretty cool- the only measuring gauge with zero physical backlash, and they measure millionths of an inch
Well if we want to do that analogy, a diamond in the rough is still rough and you have to dress it’s facets to make it shine. Maybe a few hours lapping the jaws and tuning up the cheapo micrometer might be worth it, might not be.
Back in the 70’s to early 90’s I was a Quality Manager in the aerospace industry and actually had a lot of fun and some headaches with all of those and more mentioned. Long retired from all that now but thanks for bringing back some memories to me :-)
More or less just a bit of nostalgia for me, the beige and gray plastic calipers you have is the same my father had. These and micrometers are absolutely essential.
I grew up in a precision grinding shop, where we did job work putting finish dimensions on a wide variety of customer parts. We used a lot of Starrett indicating micrometers for most run of the mill jobs. These are like the ordinary micrometers pictured above, but with a spring-loaded anvil and a dial-indicating needle built in. For each pass we’d head to the inspection room, get out the working set of gauge blocks, and wring together a stack that was the target dimension of the pass. We’d calibrate the micrometer on the block stack, then set the high and low needles to show the tolerance requirements. For repeatable processes like centerless through grinding, we could hold .001″ in our sleep; .0005″ with confidence, and even .00005″ on special occasions. (The owner would break out his box of NIST-traceable gauge blocks for those special jobs; no doubt they commanded a special price, too.)
One day we were centerless grinding a large basket of heat-treated castings that looked like valve spools, with a weirdly shaped cast butterfly connecting the cylindrical ends (on the shop floor we often didn’t know what the parts were for.) They were very scabby from their hardening baths, badly warped, and about a quarter inch over their finish size. We’d hog off fifteen thousandths from each spool, tighten the wheels, turn the basket around and immediately hog off another .015″. After a few passes, the parts were so hot they were smoking in the coolant. Even though these were very rough cuts, we still measured the parts while we ran them, because that’s how we’d know when the finish on the grinding wheel was breaking down. I remember holding one of those blisteringly hot spools clamped in the jaws of the micrometer, and watching the dial spin from +.002 to -.002 in a matter of seconds as it cooled in the air. Gave up on trying to measure them during the run after that; instead,we cooled a few samples in a different machine’s tank so we could get an accurate size of the pass.
We didn’t run their finishing passes until the next day, after they’d cooled.
It’s a good article for complete beginners not familiar with either calipers or screw micrometers.
I cringed several times at the frivolous use of the term “precision”.
Let’s make some things more clear. A measuring device has:
– Resolution – the smallest change that can be measured
– Accuracy – how close is the reported measurement to the true value
– Precision – how repeatable are the measurements
Examples: if a vernier caliper’s vernier scale is graduated in 0.02 mm, then the resolution is 0.02 mm. For a digital caliper, the smallest increment in the measurement is the resolution. E.g. if it changes from 0.00 straight to 0.05, then the resolution is 0.05. Common digital calipers have a resolution of 0.01 mm. Let’s say we have several such calipers, and do some tests with them.
Now try to measure the thickness of a gauge block (gage block) – a metal or ceramic block, precision machined to a particular thickness. Let’s take a 5.00 mm (it’s true size) and measure it five times with each of our several calipers.
Vernier caliper #1 – 4.90, 4.91, 4.90, 4.90, 4.91
It repeats quite well (+/- 0.01 mm), and so we can call this caliper precise. But the measurement actually is quite far (accuracy is -0.10 mm) from the correct value, so it’s not an accurate caliper.
Vernier caliper #2 – 4.96, 5.00, 5.04, 4.98, 5.02
It doesn’t repeat as well as #1 – repeatability here is +/- 0.04 mm. So it’s not very precise. However, it is much more accurate, because on average it gives us a measurement that is +/- 0.04 mm away from the true value.
Vernier caliper #3 – 4.99, 5.00, 4.99, 5.00, 4.99
This one is both accurate and precise.
Bottom line – resolution, accuracy and precision are all different concepts. Please use these terms correctly, and don’t interchange them willy-nilly.
I also thought this sounds quite far-fetched: “I have a friend with a background in a family business grinding tungsten carbide to a very high precision indeed who jokingly refers to a vernier caliper as “the guessing stick” because its precision is several factors of ten above her working zone, …”
I think the author meant accuracy, rather than precision – because most dial calipers repeat to <= 0.01 mm. As for accuracy: let's check the specifications of Mahr MarCal 16 ER (a ~100 EUR digital caliper) – error limit is 0.03 mm, meaning it's accuracy is +/- 0.03 mm. Now if the friend's working zone is several factors of ten… "Several" is defined as "more than two but not many", so let's say 3. So, the friend's working zone is in 0.03s of microns, or 30 nanometers? That sounds quite unlikely to me.
Final note: if you take a caliper and a micrometer with the same resolutions, and similar specs on accuracy and repeatability, the micrometer will likely give you more accurate readings. A micrometer contacts the measured object with it's round anvils, while vernier contacts the object along thin lines of it's jaws. Because of this, the possibility of misalignment (holding the measuring device at an angle to the measured object) is much higher with the vernier (if you hold it an angle, it will show a value that is larger than the true one). Both devices rely on operator's "feel" – the jaws must touch the object, but not too tight. Micrometers have a ratchet stops that produce constant measuring force regardless of the operator. Calipers are not equipped with such devices.
What the calipers lack in accuracy or repeatability department, they make up for in the convenience department. They can cover a much larger range (0-150, 0-200, 0-300 mm being commonly available and affordable), and allow external, internal, depth and step measurements. With a micrometer, you need a separate one for each kind of measurement, and their ranges are normally just 25 mm or 1". So, just for external measurements, you're looking at a set of 6 micrometers to cover the same range as a 0-150 caliper. I think it's still very useful to own a 0-25 mm (and maybe a 25-50 mm) external micrometer. Used ones in good condition can be found quite cheaply. Buy a cheap set of Chinese-made gauge blocks and you can calibrate them yourself.