We’re pretty sure that we don’t have to tell you how great cardboard is. You probably sing the praises yourself and use it for everything from a work surface protective layer to a prototype of your next amazing build. But if you still find yourself flush with cardboard even after all that, here’s one thing you can do with all those pieces that are too small to use for anything else– chuck them in an old blender, whip up some cardboard pulp, and press that gunk into some 3D-printed molds.
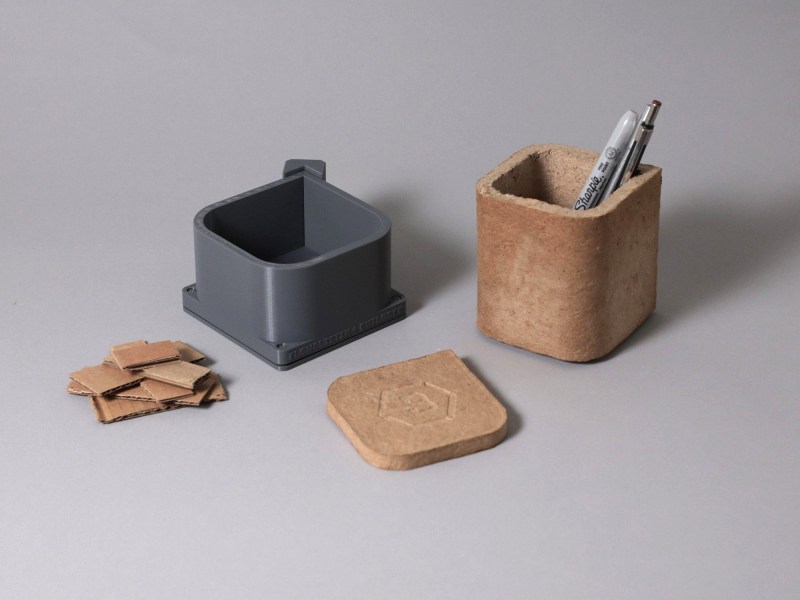
 In addition to a step-by-step of the process, [flowalistik] offers a mold set of STL files for various useful items like a pencil holder, a box with a lid, a tray, and a coaster, as well as the Fusion 360 files in case you want to change them around. You might want to seal the coaster with something protective so that it doesn’t mold/disintegrate/bloom from condensation.
Each part consists of the walls, the wall clip that keeps them closed, but allows for de-molding and reuse, the bottom lid, and the top lid. All these prints need to be pretty high-res so that they can withstand the pressure of the clamp holding it all together. [flowalistik] recommends a layer height no larger than .03mm and a 20% infill.
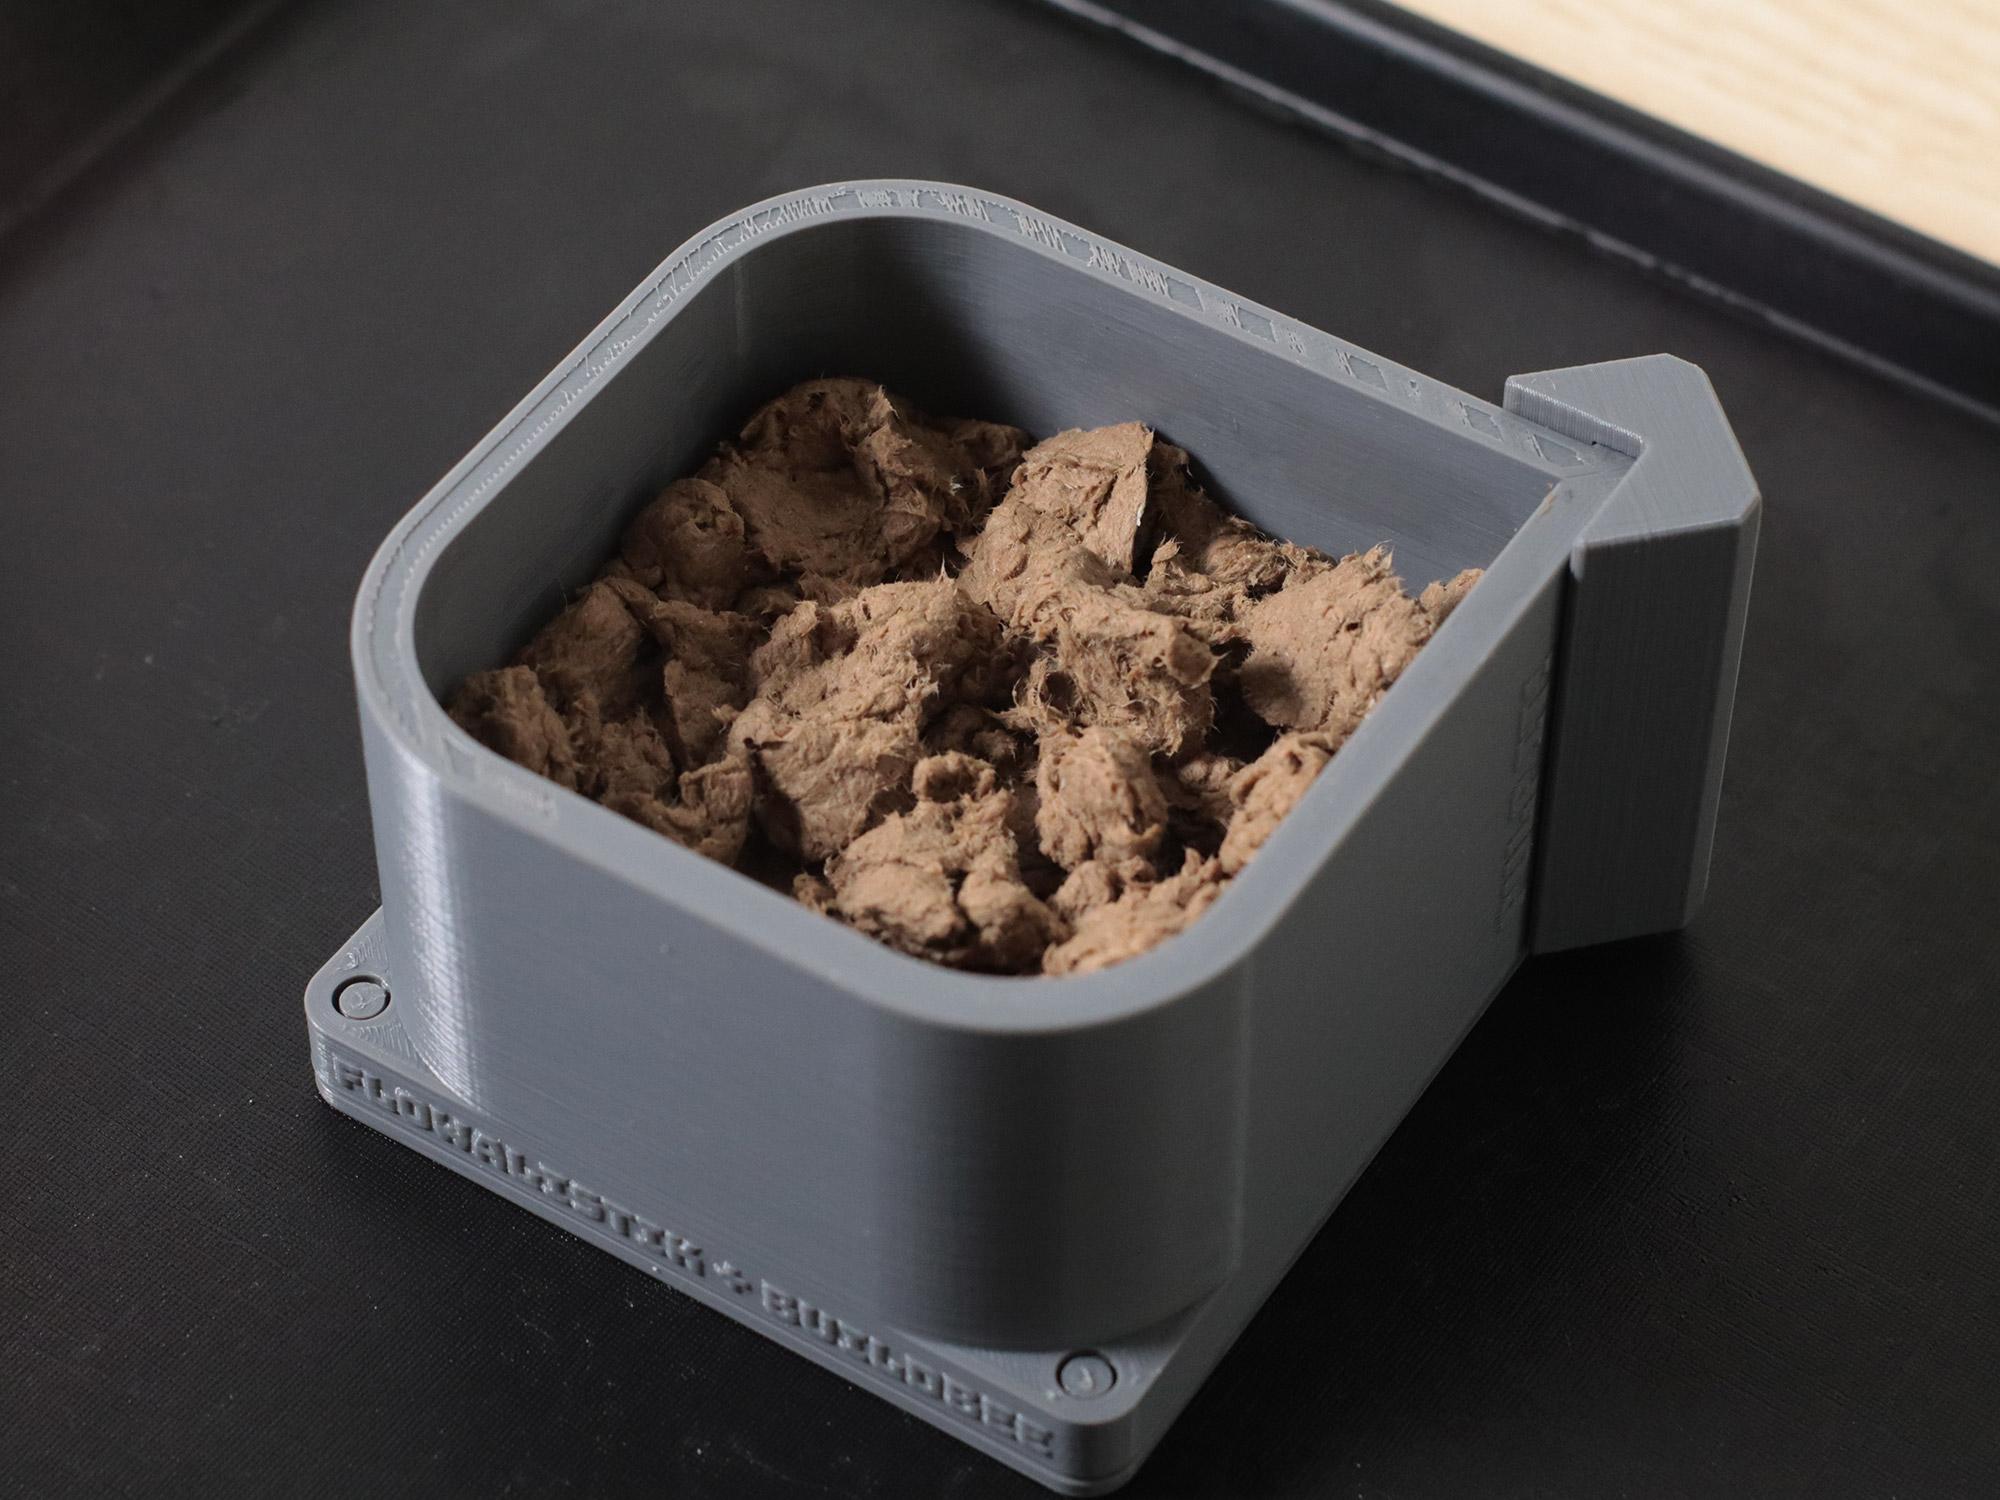
The process of making the pulp itself is fairly simple, and the recipe only calls for water and some kind of binder. To start, remove all tape, coatings, staples, and anything else non-soluble from the cardboard. Cut it into bite-sized pieces your blender will enjoy, and add water and PVA glue or rice paste. Mix it up, remove the excess water by squeezing your pulp inside of a piece of cloth, and then use it to fill up your mold. You’ll want to press out the water as you go and fill it further, then finally apply the clamp. You can start de-molding parts on a schedule, starting with the clamp after about six hours. Once it’s fully dried in about two days, you can treat it like MDF and sand, cut, or even drill it. We think some of these would look pretty good with a coat of paint.
Need your objects to be more sturdy? Keep that printer warmed up — you can use prints to cast concrete, too.


Next up, 3D printers that print using cardboard pulp.
Considering how much of the stuff I have, I’ll be set for life.
I think the auther here misread the layer height. The instructions say .3mm not .03mm.
Also I don’t think layer height affects compression strength. At least the instructions don’t mention it.
It’s tensile strength here, cardboard trying to pull the top and bottom apart. lower layer heights might help with layer adhesion/separation
If anything, low layer heights might lead to less adhesion, since a thinner bead has less area to fuse to the layer below. But it depends on the geometry, and anyway no 3D printed part has any tensile strength in the Z direction. If the part depends on that, it probably needs redesigning. But parts can be pretty strong in the XY plane, and wall thickness makes a big difference.
Also printing anything of considerable size in 0.3 layer height will take days.
Do you mean 0.03 mm layers? Thicker layers would lead to faster prints, not slower.
Totally not surprised there’s a critical typo that didn’t get fixed even 2 weeks later.
I wonder if you could build a shelter out of cardboard pulp bricks? You could use glue instead of mortar, just have to waterproof the bricks in some way. (Paint?)
Maybe the bricks could be shaped to be interlocking? I’ve heard of people using boiled linseed oil for waterproofing cob walls. I wonder if that might work on this material. Would be good if the pressed bricks had a fairly smooth surface otherwise it might take a lot to coat them. Polyurethane yacht varnish or outdoor wood paint is probably better if you don’t want something natural.
Love this idea! May try miniature prototype.
Cool, let us know if it works.
Kick it up a notch with pulp thermoforming. You may have seen this stuff as a tray that you got a SSD or phone shipped in – looks like “not quite plastic” and recycles as paper – the electronics industry has been very forward-looking about using it.
Carboard speaker?
Cardboard car?
B^)
Irresponsible: “Cardboard shortages deal another blow to strained supply chains.”
https://arstechnica.com/gadgets/2021/10/cardboard-shortages-deal-another-blow-to-strained-supply-chains/
LOL.
Use a waterproof glue as the binder? (Titebond III Ultimate?)
So, newer molds for https://hackaday.com/2019/12/26/3d-printing-paper-sort-of/ ?
Instead of additive manufacturing to construct the mold, what about making a metal one with CNC? Tensile strength would be increased. May even be able to apply low heat to speed up the mold process.
Add a little bit of salt and butter to the mix, Snack Chips!
Mmmmm!