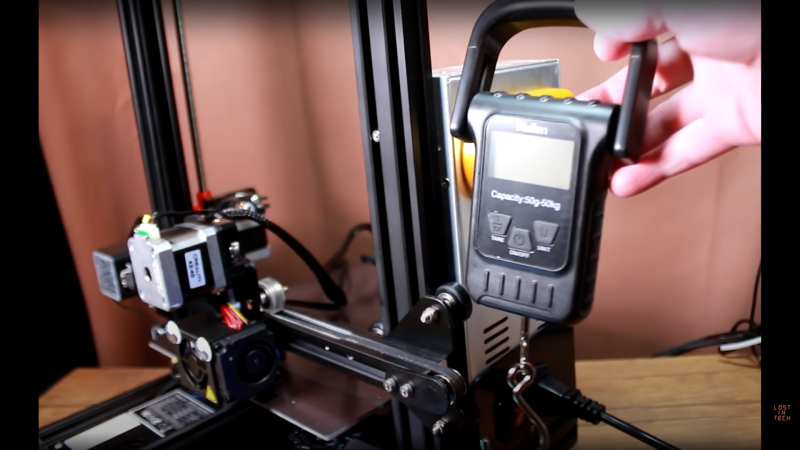
3D printer belt tension seems like a simple thing to deal with — you set the tension and then check it’s good now and then. If it gets really loose, then the teeth can slip and you’ll get some shifts in the print, ruining it, but its an easy fix. But, we hear you ask, how do you determine what the correct tension is? Well, here’s [Lost in Tech] with a video showing some measurement techniques and analysis of a typical 3D printer, (video, embedded below) using nothing more special than a set of luggage scales. A simple theory suggested was that a tighter belt tension would result in increased radial load on the stepper motor bearings, which in turn, due to friction, would result in an increase in temperature of the motor. After setting a few tension values on one of the belts, it was noted that tension values at the upper end of the range, resulted in a measured increased in temperature of two degrees celcius, and a large increase in noise. This can’t be good for the motor.
Looking at the specification sheet of a typical NEMA17 stepper motor showed a value for the maximum working radial force of 28N, so it was simply suggested that tension values resulting in a load beyond that, would offer nothing other than reduced motor lifetime. Print quality did not noticeably change, even with really loose settings, until the belt was loose enough for axis movements to significantly lag the motor input.
As [Lost in Tech] suggests, maybe that old adage of tuning belt tension to a ‘middle C’ might actually be far too tight and cause more problems for you than problems it solves?
Obviously we’ve covered many 3D printer hacks over the years, like this huge belt driven printer, just beware that even something as simple as a belt clamp can go wrong with bad design, and finally, whilst we’re thinking about belt drives, here’s a cool belt drive extruder to ponder.
Thanks to [Zane] for the tip!


Ugh… tensioning to a frequency only works if a) the belt mass/length is always the same, and b) the length of the belt is always the same. In other words, it may be OK for a particular model with a particular belt. So your mid-C for printer A will be crap for printer B.
Indeed. It is a good and fast way to set tension on a production line, but not as a one-size-fits-all.
It definitely is a method used on production lines; I know someone who made a lot of money from making them, and spent it all on fire engines.
Jon Lajoie!!
As in so much of physical things it’s getting most all the way up the slope till it starts to flatten out. Sort of a human PID control is in the process. Moon lander. At this point the musical string analogy is OK, strings are operated at that magic point on the curve for loudness vs.breakage.
Weakest link is the bearings on the idler pulley. They are very very small, much smaller compared to the bearings on the stepper.
The problem with the bearings on the stepper motor is the shaft. Most NEMA 17 5mm shafts are only rated for 3.5-5.5kg of lateral force before you start bending things. Most idlers are, at the very least – mounted in such a way that they’re anchored at both ends of the bearing. The weakest link surely isn’t the bearings, because they’re easily rated for a LOT more than that.
The cheap Tronxy I just bought has cantilevered idlers.
Here is an objective way to set your belt tension, no guesswork required:
https://benchtopmachineshop.blogspot.com/2019/04/printer-belt-tension.html
I just tightened mine until they were tight, but not too tight.
The belts on my ender 3 don’t vibrate at all when plucked, but they are taught when you press down on them with your finger. Tight enough to not be sloppy or lift away from the pulleys, but not so tight they sing when plucked. Never had a single issue with layer alignment.
Same printer, same result. Do them up till there’s no slack then tweak them up a little more so they “grab”. It’s a printer not a guitar.
ugh…
the thing about 3D printing is that MOST of the advice out there is crap.
Not your imagination, the cost optimized extruded aluminum and long elastic belt rigging designs are getting worse. The amount of effort people put into trying to fix bad nonrigid design choices in software is awe inspiring.
I think 99% of people who actually ran a FFF project 24/7 over months figure out bad ideas tend to stick around for years. Had one fellow try to convince me thread-lock was unnecessary.
There are quality kits around, but the cost is usually not hobby level.
Yes awe inspiring to write thousands of lines of code to solve a feeler gauge problem. Mind blowing actually. Too many programmers and not enough wrench turners in this hobby.
That’s why I love my steel frame Anycubic i3 Mega because the frame makes it or breaks it yet so many manufacturers choose to use aluminum and plastic to build their printers. It’s also hilarious how so many people would install auto levelers and glue when all they need is just clean the print surface from dust and fingerprints.
My megas bed tends to expand over the course of a print and have to bed level between prints if I’m running consecutive prints. Then if I print from a cold bed (obviously heated after) I have to level again. The printer has been magnificent other than that. The steel frame and dual z axis leveling is why I bought it in the first place.
Most of it is techno-voodoo. It generaly sort of works, but usually for the wrong reasons. The more I learned about 3D printing at Ultimaker. The more I learned that “everything I knew was wrong”.
You are absolutely correct about that one.
Middle C?!?? I’ve always heard to tune somewhere in the bass register. That’s like 2-3 octaves down, many halvings of the tension for a given belt.
But as others have pointed out, doing it by pitch is wrong anyway due to different belt composition and length. You want it to run with no real slack, which would cause backlash, and certainly not so loose that it ever loses grip (!). Any tighter than that just puts wear on the system.
However, the video confuses the maximum sideload on the motor with the “manufacturers spec” and suggests running at max sideload as a start, and maybe running out of spec if you want to. I mean, go nuts, cheap stepper motors are cheap, but don’t confuse a max value with a recommended value.
My gut feeling about belt tightness is that there’s something else wrong with the system: a misalignment or friction or something else that’s requiring so much drive force. Or maybe it’s just running too fast?
Also it ignores that the belt load does not have to be applied to the motor directly. Most heavy duty industrial belt systems use bearings on both ends of the belt pulleys and the motor is attached to one of the pulleys via a coupler to compensate for any misalignment of the motor and pulley. Directly putting the pulley on the motor is just done out of convenience and cost saving.
Some motor manufacturers also spec out different bearing sizes for different applications – and generally any side loading is given at a set distance from the face of the motor, so another way of increasing the loading is to get your belt as close as possible to the face (i.e. put the set screw or clamp away from the motor)
Isn’t there a difference between a max working spec and a maximum spec. One means for daily woking load and is ok to run at.
I made this mistake and kept the belt tightened so I could play a ‘bass’ note on it. Within a few months the stepper motor axle snapped (on a CR6-SE)
Now I keep it tight enough for there to be no possibility of slipping but well below any tightness to be able to play a note on it.