
I know people who have 3D printers that are little more than appliances. They buy it, they print with it, and they don’t change much of anything. That doesn’t describe me and, I’m guessing, it doesn’t describe you either. This does lead to a problem, though, when it comes to slicers. You have to keep changing profiles and modifying them. It can be hard to keep things straight. For example, if you have profiles for different nozzles, you get to make a choice: keep one profile and edit the parts that change, or keep multiple profiles and any common changes have to be propagated to the other profiles.
I’ve long wanted to create a system that lets me have baseline profiles and then just use specific profiles that change a few items in the baseline. Turns out, I didn’t need to do it. Prusa Slicer and its fork, SuperSlicer, have the capability already. Both of these, of course, are based on Slic3r, but the scripting languages are different and what I’m doing does require G-code scripting. The problem is, this capability is not documented very well and the GUI doesn’t really support it directly, which requires a little sidestepping. I’ll show you how I have things set up and where the limitations are. If you want to try your hand at it, I highly suggest you backup your configuration directory or switch to a new one.
Speaking of which, both programs take a --datadir command line argument that lets you put the configuration files where you want. If you are like me and use the slicer from different computers, this is a great way to put the files in a shared drive or use something like Syncthing to keep a few copies synced across the network.
Bundle It
Presets or profiles are usually stored in .ini files that have a very simple format. The name of each preset is in square brackets, along with an identifier of what kind of preset it is. For example, you might have:
[print:myprinter]
layer_height = 0.3
This is not great, though, because one preset lives in one file. You could, of course, keep track of a myriad of ini files and generate them on the fly. That was my first thought. However, the slicers allow you to export and import configuration bundles that populate a bunch of profiles at once.
On the face of it, that might not seem like much of a big deal since you could just zip a bunch of ini files into an archive. But there are two things that work in our favor. First, you can hide certain entries in a bundle. Second, you can have one entry inherit items from another preset in the same bundle.
What that means is you can export your configuration as a bundle and then rearrange everything so that you have all your common settings in one place and then inherit most of those setting from specific items. For example, you might have a base PLA filament type. Then a PLA type for “Brand X” which overrides only a few items. Finally, you would have a specific “Red Brand X PLA” that only has to set the color and — if you have multiple extruders — maybe the pigment factor that controls how much filament gets purged between colors.
For example:
[filament:PLA Brand X Red]
inherits = *PLA_Brand_X*]
filament_colour = #FF0000
filament_wipe_advanced_pigment = 0.7
Hidden Entries
Notice the asterisks around the PLA_Brand_X identifier? That tells the slicer not to show this entry to the user. In fact, on import, the slicer only uses these to fill out the ini file for a specific item. This allows you to not have a bunch of meaningless entries just to hold your defaults.
The downside, though, is that once you import, there is no common connection anymore between the preset and the “base class.” If you make a change, it only changes the current preset. You can work around that, though, in a few ways.
So when I mentioned exporting your existing configuration as a bundle, you’d create new entries for things like “print:*default*” to house all the common things. Note you don’t want a space after the colon, but don’t ask me why I know that.
Common Scripts
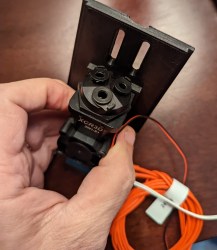
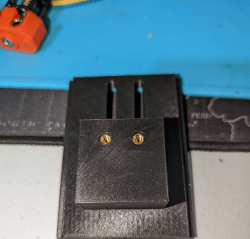
There’s one other problem. One reason I’m interested in this is that I have a system that allows me to rapidly swap hotends. Sometimes I use a switching hot end, and sometimes I use a more conventional hotend like a Dragon. The problem is that the hot ends have different extrusion factors, thermistor calibrations, and nozzle sizes. Some of these are easy to take care of with the configuration bundles. What is less easy, though is having a single unified startup and shutdown script or sending custom code to set the thermistor calibration, for example.
A mixing hot end, for example, needs a much more complex startup than a normal E3DV6. However, both of them need bed adjustments and temperature warm-ups. I currently have six flavors of extruders and I don’t want to make parallel changes in six different scripts.
The answer is to use scripting. Unfortunately, the scripting language provided by the slicer is pretty limited, so you can’t set variables to use later, for example. But you can read “placeholders” (system variables) to learn things like the first layer height or the desired temperature. You’ve probably seen this used in startup gcode before to prevent you from having to have different start-up scripts for different materials or nozzle sizes.
However, you can also learn the name of the printer preset and search it for a regular expression. I’ve taken advantage of that by naming each profile whatever I want but having !1! or !2! or some other number appear in the name. In that way, I can easily write code that modifies parameters based on which profile is using it. For example:
{if printer_preset=~/.*~!3!.*/ }
M305 P0 B4981
M301 E0 P22.7 I2.4 D53.8
{endif}

Obviously, there are similar bits of code for each hotend ID. The names of the printers look like: NF-!3! or E3D-!0!. You may prefer different characters and schemes. You could, of course, just search for the exact name if you prefer and skip the numeric encoding. However, this scheme allows me to have multiple profiles for the same hotend and still pick up the common parameters regardless of the exact name. That is, NF-!3! and NF-HF!3! both get the same start and end code.
One issue with the scripts, too, is they are all on one line with \n encoded to show the line wraps. The way I work around this is that I keep a version-controlled file with each startup script. When I need to make a change, I put it in any preset that I happen to have and save it either as a temporary name or sometimes I just save it since I’m about to write over it anyway (which you’ll hear about, below). Then I open the corresponding .ini file and copy the line to put in the bundle. There are many other ways you could do it.
As an extra feature, each script starts with a version number and a date so I can easily see that my changes have been made and I can easily go back using git without getting too confused.
The GUI Disconnection
The last problem is that of the GUI. As I mentioned before, importing the bundle destroys the relationship between presets. I’ve found a few simple rules that help manage the madness. I manage versions of the bundle and related files with git, but that’s no panacea since the individual files change.
- Never change the imported profiles and save them. You can, of course, but it will confuse you.
- If you do change an imported profile, save it with a similar new name (I add -exp for experimental to the name).
- When you decide you want to make a change to one of the standard presets or add one permanently, use the slicer to show you the differences between the preset and one you think will make a good base class.
- Edit the bundle to reflect the changes you want to keep. Some changes aren’t worth keeping and remember to set the “inherits” key to the base class.
- Reimport the bundle. Remove any extra presets you created in step 2.
If you make any mistakes, the import will warn you. One common problem is that the GUI likes to capitalize things like the names of infill patterns. However, in the file, everything is lowercase.
Once you do the import, you should be fine. One thing to watch for is that the [physical_printer] tag has all the presets you want set, so you don’t have to edit the physical printer to reassociate it with new profiles.
If you really want to do tool changing, check out [Joshua’s] Jubilee. If you aren’t using a compatible slicer, you can learn more about PrusaSlicer and Super Slicer.


Now this is where using Fossil, instead of Git, would really shine. Not only the version control, you also get Wiki and tickets + much more in a single executable.
What i have done is put firmware sources and configurations in a Fossil repo and made a wiki about the printer, the basic information (model, features etc.) and what mods i’ve done and tickets about things to do.
Great for profiles too and you can add information about filaments and sripts and whatever related as well. All in one, neat repo. Or if you have multiple printers then you might want a separate repos for printers and profiles or how ever you want to organize your setup.
Nobody uses Fossil. I checked.
Paleantologist do, I checked.
Great article Al. I also use SuperSlicer (moved from Cura, thankfully). The big problem I see with what you described is that it’s much too error-prone, even with git versioning etc.
It would be really great if some clever and wonderful person could make a pull request to Slic3r/SuperSlicer and add that functionality to the GUI. This is a very much needed feature, and the use-case for maintaining multiple profiles with inheritance is quite common for SS users.
I have thought about it. There are a few non-obvious, but solvable problems. There is already an entry for a “base” class in the last tab of the items, but you can’t change it and it really doesn’t respect it. One problem is that if the base class is deleted, what then?
One idea would be to store something like:
param_a = base:20 ; I get the value from my base class of 20
param_b = override:33 ; I override the value 33
So when you load it, you go get the base class, warn if anything has changed and/or is missing and act accordingly. But you at least wouldn’t break everything in the chain if you delete the root. The the GUI is simple. You show a unchecked override box for param_a and a grayed out 20 value. For param_b the override box is checked and you have editable 33. What do you think?
This is exactly the problem that the CraftWare Pro slicer tries to solve with its unique property system.
Instead of having lots of profiles for different scenarios, there is a base slicer profile using calculated values from various printer components/properties. E.g.: when you switch to an extruder with a different nozzle size, it will automatically adjust the extrusion, because there is an “Extrusion Width = 100% of Current Nozzle Width” rule in it. Printing speeds are also given as a chain of percentages, calculated from a special base value which is calculated from the physical properties of the current hardware/filament.
Also, these slicing rules (named Overrides) can be added to different printer components as well, so for example a filament can alter the slicing behavior as well.
The usage of the slicer is not too easy because it doesn’t work the same as the others and is not really documented, but when you get the hang of it, the system can be handy sometimes.
I’ve been using a simple solution to the inheritance problem. Rather than importing the profile through the GUI, just drop the whole INI file in \AppData\Roaming\PrusaSlicer\vendor (for PrusaSlicer, at least). Restart the slicer and all the profiles show up without breaking the relationships. In the future, just edit that file (still very good idea to use version contol like git or SVN).
The down side is the GUI doesn’t help you edit these profiles, so you’ve got to do it all in a text editor, but if you’re setting this up, you were doing that anyway.