Today if you want to reproduce a big schematic or a mechanical drawing, you just ask it to print or plot from the CAD model. But back in the day, you drew on big sheets at a drafting table. How do you make copies? Sure, there were a few large-format copiers, but they were expensive. A more common method was to use a heliographic copier which, often but not always, resulted in a blueprint — that is a blue page with white lines or vice versa. These days, you are more likely to see a blueprint as an artistic wall hanging, and since [Basement Creations] wanted some, he figured out how to make them with a 3D printer.
These prints aren’t really blueprints. They use the printer as a plotter and deposit white ink on a blue page. In the video below, he shows a number of ways to use a printer to create interesting wall art, even if you want it to be bigger than the print bed. Some of the wall art uses multiple 3D printed parts, and others use the printer as a plotter.
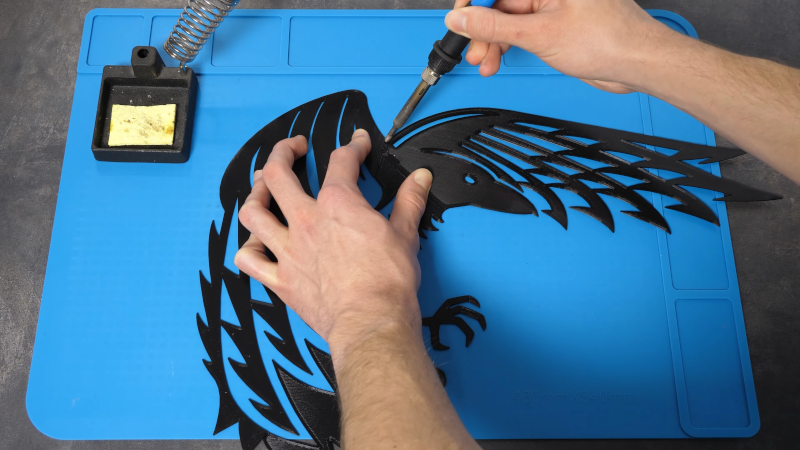
To join the printed pieces, he uses a soldering iron to weld them together. We wondered if it might be worthwhile to make overlapping pieces to glue which would also help with alignment. Plotting is great for making PCBs, of course, and while you could invert the image and print blue on white paper, it won’t really look like a blueprint.
You’d think mounting a pen to a printer is easy, and there are a lot of designs online. However, the pen needs to be rigid, and unless your bed is completely trammed, the pen needs some ability to move up and down to maintain pressure. The third mount he creates is pretty over-engineered, with two bearings and rods allowing the pen to ride up and down. It seems like a lot, but it also seems to work well. The final wall art is a 3D-printed replica of the James Webb Telescope that uses real mirrors to mimic the iconic look of that space-borne observatory.
This is one of those projects that isn’t a completely new idea, but we did like the variety of ideas and tips. Presumably, you could also join the blueprint paper to make larger ones.
This isn’t the first James Webb replica we’ve seen, but the last one had a wooden base. Maybe you could point your telescope replica at a faux moon.


I like the pen holder Jakub designed. It solves two issues I had when I tried a similar thing with my Ender 3. I created a rigid pen holder that snaps onto my stock extruder. It works well but requires the bed to be fairly level and I loose a couple of inches of printing area in the Y direction. I may have to try something similar to your design.
As for generating output for the printer, instead of using an SVG to STL converter, I created a program that reads HPGL plot files and generates the required G-Code directly. It works well when using plot files generated by Inkscape and old versions of AutoCAD (I don’t have anything resent versions to test with). There are still may HPGL features I’d like to add to my program but probably will do in the future. My Github for it is: https://github.com/PartierSP/2DPlotter (requires Gambas + Linux)
I may just have to go out and pick up some white pens and blue paper now. ;)
Ugh. I remember the Calcomp drum plotter at school. It could use felt-tip, ballpoint, or drafting pens, each with theirmown eccentricities. Plot too fast, and the pens skipped. Running out of ink, clogging or sqahed points in the case of felt tips. You’d get a couple of good plots and the pen was done. Nobody ever cleaned the drafting pens. Suffice it to say, there was a lot more expensive Calcomp paper used than jobs delivered to users.
I had an HP 7470 plotter, which moved the paper for the Y axis, and the pen for the X axis. Again, expensive, custom felt tip pens, good for a couple of plots. And the paper movement was finicky.
Don’t miss plotters at all.
Still, if I could get an HP plotter for free (any size) I wouldn’t turn it down.