The Hackaday tip line has been blowing up with a new Kickstarter for a 3D printer. Although this is a pretty common occurrence around here, this printer is actually very interesting: it’s quite possibly the simplest and cheapest laser resin printer ever.
Most of the 3D resin printers we’ve seen, like the Form1 use mechanical means to raise a print up to the next slice. At $100, the Peachy printer doesn’t have the budget for such luxuries as servos or motors, so the layer height is increased by dripping salt water over the liquid resin. The X and Y axes are controlled with mirrors and voice coils, allowing this printer’s electronics to be controlled by a computer’s sound card. It’s really amazing in its simplicity, and from the looks of it the Peachy can produce some fairly good prints.
For a great explanation of how the Peachy printer works, you can check out the video below.


This is going to be a game changer.
game changer in lowering the bar of acceptable quality
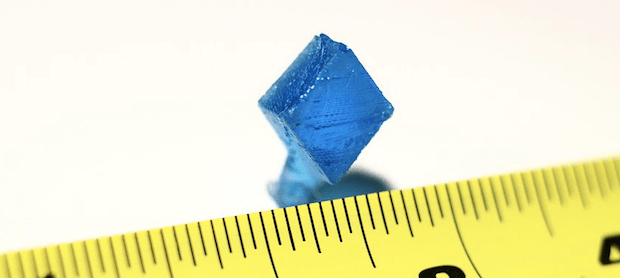
that potato shaped hexasomething in the picture is beyond bad. You would be better just carving things out of soap.
There is no ‘laser off’ mechanism, no ‘liquid stop’. It just pukes shapes as fast as it can and it shows
Another problem is plastic – something tells me you cant print OpenRC parts with it, or rather you can, but they will fall apart on first drive
It is great if you considered Form1 or other liquid printers. Im sure with a lot more R&D it will approach their quality – add some electronics to control laser, real pump, precision galvos and maybe separate precalibrated usb audio card for additional $100 and you might have Form1 competitior at 1/10 the price.
Game changer in lowering the barrier to entry. What you’re seeing in the video isn’t much more than a proof of concept, there’s obviously still work left to be done.
As for strength of parts, I don’t see any reason to think they’d be weaker than low-end FDM printed parts which are notorious for splitting between layers.
ok, just read about the resin and makerjuice cooperation – if they can bring flexible resin it will be huge.
if they can make rubber resin work this will be HUUUGE.
The rubber resin isn’t terribly strong but that’s not the exciting part here.
That’s rather short sighted. It’s a kickstarter project: the software isn’t finished and the quality isn’t there yet. But you’re assuming that laser and Z height control are necessary to get a precision output. I assure you that’s not the case. With some calibration and better software, you could easily account for all of these things without adding expensive components. Closed-loop feedback systems are all about taking poorly-controlled outputs and bringing them under control.
Saying that that object that is obviously a Hexahedron looks like a potato, makes me wonder if you’ve ever actually seen a potato before.
lol i second this…
I agree with both of you guys. I have a Form 1. The quality is good, but I’m looking at the thing and thinking “where’s the cost?”. A couple of galvos and a laser is about as simple as you can get. The only part of the machine that probably adds cost is the Z stage. So I’m not impressed with the peachy printer’s sound card thing – honestly I can’t imagine adding better control could add more than $5 or $10 to the price. But the drip system is definitely a game changer and will hopefully show up on other devices. So maybe this printer isn’t quite good enough, but the ideas could lead to a $150 printer that is.
The obvious problem is that you can’t print large objects because there’s no control over the amount of resin floating on top of the water. The laser shoots through the resin to cure the material at the boundary layer, so adding more resin to print a larger object would create a thicker layer of resin to shoot through, which would decrease the Z resolution, and the thickness of the resin layer would change significantly while you’re printing the object.
Dripping more resin on top would require a way to measure and control the layer thickness and supress ripples at the boundary and surface.
All these could be remedied by turning the system upside down and printing from the bottom up like in traditional photolitographic printers, only, you’d utillize a float to carry the object. As such, the two liquids don’t need to be in the same vessel – you can have a hollow plunger floating in a vat next to the actual printing vessel that rises up with the rising water level and lifts the printed object, and a drip system to add more resin to the printing vessel as it runs out.
I think that’s a clever solution, but I don’t think the problem is there. As it looks in the video, the laser doesn’t cure the resin down to the salt water, but down to the last layer. This means that the amount of resin present is irrelevant.
I think there will be a few people who will want to add manual z change functionality for other reasons, though.
Ooh, that’s clever and makes much more sense. Why didn’t I pick that up. The last layer of the object isn’t at the boundary but inside the resin just below the surface.
But you still have to account the amount of resin that’s left after you add a layer to the object, because that affects where your resin surface will be when you add more salt water. The cross-section of your object also changes the amount that the surface rises as you add more water in the same way as narrowing or widening the vessel itself would do, so for large objects you have to do a bit of additional math to predict where it’s gonna be.
And you need additional volume below the zero-Z level to contain enough resin for the whole object in the beginning.
Assuming that the resins density doesn’t change when cured no calculations are needed. The level will rise constant to the amount of liquid added.
It does change slightly in volume.
As long as you know the shrinkage factor when curing the resin and the cross-sectional area of the container, you could easily calculate the change in layer height due to the curing.
Another thing is that the light cone out of the projector causes the x-y resolution to change along the Z axis as the workpiece builds because the object fills a different cross-section of the cone. Larger pieces below get the same resolution as tiny pieces up higher.
A way to solve this disrepancy is to make the projector float as well, so it always projects the same resolution on the resin surface from a fixed distance. You just need some guides to keep it centered and straight, and some sort of rollers so it floats freely and doesn’t snag on the guides.
@Dax,
I’ve seen a lot of reasons why you and several other people don’t think this machine will work, but despite the reservations, it looks very sound.
The Z axis won’t change the diameter of the beam over the relatively short length of the build volume because there’s a collimating lens on the laser – the light rays are made parallel before they even enter the mirrors. Sure, it would make an important difference if you were trying to printing with a laser located at the other end of a football field, but not over the few inches of the bottom tank’s depth.
The saline is added during printing, and the cured resin is attached to the bottom of the tank so it won’t float. That means the cured resin remains below the surface of the liquid resin, and the density of the cured resin is almost identical to the density of the liquid resin, so curing more or less plastic on any given layer won’t significantly change the overall level of the resin.
The levels on the sound chips are independent, and don’t require the user to print an axially symmetric model.
Silkscreen shops sell photopolymer resins for as low as $29 per quart. That’s far less than the cost for an equivalent volume of ABS plastic filament. Even $40 for a liter of makerjuice is about as cheap. And you don’t have to have a nozzle or feed mechanism specially calibrated for 3mm or 1.75mm filament.
Additional saline is added beneath the level of the resin. One drop will raise the overall level of the floating resin by exactly that drop’s volume. The resin simply has to be less dense than salt water. Some photopolymers have a density of about 1.12 g/L, while saline at the maximum TDS of 360g/kg has a density of about 1.30 g/L.
That also means the viscosity of the resin can be fairly high, while remaining flat on the top. The flatness of the surface of the resin won’t be disturbed by adding saline, because the resin floats on top of the saline solution.
Some cured photopolymers have about 80% the strength of ABS. While that sounds like it’s a lot weaker, ABS is already quite strong. Besides, the fragility of most filament based 3D prints comes from failures of the layers to properly adhere to each other, (due to temperature or other issues) and that weakness is not due the strength of the ABS itself. This approach may actually improve upon that because the printer isn’t always trying to lay an entire layer down as a set of very thin lines. One layer is cured by running the laser all over in many patterns.
The laser doesn’t deliver enough energy to penetrate the resin more than a few um, so it can’t cure much below the very top of the surface. That should allow for very thin layers – much thinner than the beam itself.
Another advantage this has over filament printing is there is no need for complex support structure. At most, you might need to add a drain hole to a design so that uncured resin can be removed.
$29 per quart is far less than the cost for an equivalent volume of ABS plastic filament? Where are you buying your filament?
An equivalent amount of ABS (or PLA) is about a Kg, which you can buy both types for $16 in a 1.75mm spool, or if you have a filament extruder and just want pellets, you can get a Kg for $12. You can even get further discounts off of those prices if you buy 10kg or more.
Please tell me you’re not foolish enough to be buying from Makerbot at $65/Kg.
With a few more refinements, I agree.
Game changer? Just wait until the greedy Trial Lawyers slither out from under the rocks with their frivolous patents. And if he’s still alive after the lawyers have at him, then the IRS will have their way with him. Regardless, in the end the Chinese will just make clones for half the price.
So we’ll get $50 printers? Sweet. I’d call that a disruption.
2 days gone and already backed 104k of 50k… At first I thought too simple to work but at second glance the concept seems convincing. What’s exciting for me is that you can trade resolution for a bigger build volume.
Now if I only had some 90€ spare…
Seems like an issue with constantly rising z level versus x-y build time. I’m willing to gamble on this being a success. Backed.
But you do have some control over the rate that the Z rises, so for a larger print you could just have it rise slower.
Commercial micropumps are capable of creating drops around 5µl….that’s about ten times less than a usual water drop….this would get you an INCREDIBLE z-resolution!
Not really, the Z-resolution (liquid layer thickness) is severely limited by the viscosity and surface tension of the resin, which are very high, like syrup. A drop of (low viscosity) water won’t spread across an entire surface in an arbitrarily thin layer, even if its surface tension is dramatically reduced by a powerful surfactant. Fluids that DO behave this way are called superfluids and have fascinating, bizarre and inconvenient properties, like climbing out of any container they are placed in. Look up “liquid helium superfluid” on Youtube to see some of these properties in action
Except that the water is underneath the resin
Relatively easy solution – instead of the layers being parallel with the build platform, they can be slanted, kind of like how a CRT TV scans the screen…
a crt scans horizontally really fast and vertically a bit slower. It does not scan diagonally or slanted in any way.
Scanning horizontally and vertically and the same time produces a diagonal line.
Perhaps, but in a crt a magnetic plate changes the direction of the electron, which creates the picture when in comes into contact with the phosphorous and creates uv, then decays into visible light, almost like a CFL. The waveforms used create a surface by scanning top-left to bottom right, one row at a time, indicated by the vetical plate and waveform. Its a simulated diagonal line, not a real one, and you techincally went over the entire screen, you only see with your eyes the diagonal picture.
Magnetic plate? You mean a set of coils surely.
Thanks for bringing that up! I actually found this thread and your comment after googling “does the peachy 3D printer continuously drip?” after having the same question. Shouldn’t the drip stop until the beam has cured the entire layer, then drip again, stop drip, cure the cross sectional area of the layer, drip, stop drip, etc…? Timo seems correct in his suggestion for a micropump. Or, control the valve.
with mass production this thing could be so cheap they could give the printer away in a cerial box..its the resin that will cost you.
Yes, I could see this being given away as a freebie with 5 liter of resin for example.
Shanzai could crank those puppies out for <$5. When you come down to it its just a laser pointer and 2 speakers
Hmm, so this could revitalize HP ;)
This looks like an awesome idea! Anyone know if the creator made it to NYC Maker Faire?
Nice idea. But is reproducibility of the audio outputs and inputs really given? I would imagine that you get slightly different results on each computer and also depending on the audio processing settings of the driver. My understanding was always that the mechanical build was the cost driver for a 3d printer, not the controller. A $7 Arduino clone should be able to power this machine in a more controlled way.
yeah, can still use the audio signal and just use digital signalling. im suprised they didnt just go for the usb though, if they’re installing software not much more of a pain to potentially install a driver. Guess since its opensource you can just railroad it in when its released :p
You’d probably want some external DACs as well, but 12 bit is 1$ so that wouldn’t break the bank. A USB micro board with DACs is going to add a couple of bucks. When you’re trying to hit a low magical number like a hundred dollars every dollar matters, if a dollar is 5% of your profit then damn sure you’re going to try to save it.
Once it’s out there and you have made some bank you can start working on higher cost designs.
Not a problem if you can calibrate it. And calibration would be just pointing the thing at a sheet of paper and playing in the GUI till you get desired shape – you could even ship calibration pdf that user has to print and then match shapes.
Trivial
That totally beats my original idea of adding a webcam to the mix for auto-calibration. You win, good sir.
I love this approach in getting the cost down …
However – I see a problem with the sound card audio output driving the coils. A soundcard output is dc-free on purpose. Your signal osscillates around 0V in each of the channels. As the deflection is somewhat proportional to the voltage, the laser beam can only go to the same amount to the left as it goes to the right. It would be impossible to print a single layer of an object that has the center of gravity shifted from the center.
I guess you need to print additional dummy structures just to compensate for that. A modified external USB sound card (< 5USD) should be much better…
I guess all that time I spent DC-correcting poorly made recordings in the past was a waste of time, and the amazingly loud clicks you can get when a DC-imbalanced sound file stops playing are purely imaginary, then?
Modern sounds chips are pretty precise and all computers basically use the same one really.
Love the ideas used nice and simple. But like anyone else looking at this I wonder how much does the resin cost per litre/gallon ?
One of the rewards is 100ml of resin at the $10 pledge level. So that would be €74 for a litre or .$379. for a US Gallon.
Wow – the price is $40-$45 a litre at makerjuice. I can now see this printer as a game changer.
$60/litre on the ks.
I saw people mentioning resin at $45/liter
still ridiculous price for something that ends up being a weaker material than abs
Not really more crazy then the typical price of 2d printer carts.
People pay a lot for convenience.
I agree. I think 3d printers are a fairly dumb concept that will eventually go away. The proper way to do this sort of thing is via injection molding and cnc.
3D printing is for a completely different application than Injection molding and CNC.
The resin is made by http://makerjuice.com . It costs about $40/l. The resin dispalyed on the site is not the resin used in this printer though: http://www.peachyprinter.com/#!resin/cqv3
Let’s build a 3D printer from Headphones (5$), 2 Mirrors (2$), a BlueRay Laser (30$) and a Water tank(1.50$) and some Hotglue :P
It’s really an amazing design I would not be suprised if we soon see more of these
Dammit i forgot the safety goggles for 200$+
It’s mostly a really clever leap of imagination – combining the way that laser/LED printers work, with how the laser projectors for concerts etc work, and then applying it to laser-cured resin printing…
I’m just trying to work out how they pick out a particular spot in 3D rather than 2D space using this. Surely the better way would be to have two lasers, one for X and one for Y dimension, neither quite powerful enough to solidify the resin by themselves but able to do it at the point where their beams intersect … sort of how certain types of radiotherapy work?
Plastic bin over it for $5 seems cheaper than $200 safety glasses.
Smart to just forget about support beams for the moment, let open source handle and let the patent attorneys try to sue the whole internet.
I was wondering wondering why they hadn’t said anything about that.
it doesnt look like it needs any support – it works upside down
It doesn’t really matter which way you go, you will always have the potential for shapes which need support posts.
Not if the liquid supports it enough by floating till its set. (not sure if thats the case here though)
I seriously doubt that works, there is continuous flow along the top layer to fill in the voids left by the receding cured resin.
Really feeling these guys can scrap the “design” part and go STRAIGHT into the ILDA laser pathway. Everything is already there, just a small bridge needed to bridge the gap from 3D to 2D Layers. Which is not hard it seems, pick a method.
You do not NEED 40k for 3D printing, so getting a 10/15k set should be fine. If not over kill. Very good idea to use this old technology for a new technology, but why re-invent the wheel then.
um whaT? you want to replace laser pointer and 2 cheap galvos with $300 laser box?
Not at all, but why re-create a “method” when a near perfect standard already exist? Also, in context to the quality comment above, ILDA has been developed for years. One of their remarks on the campaign website is “developing the software further”. My question “Why?”. Also, they want to either CNC the parts (terrible tolerances, read the page….) or have it injection molded. Again, a complete ILDA kit costs around 50-70$ (excl the laser) so I still ask, why re-create the basics.
Because $100
Zero,
Could you point me to an ILDA kit? I’m very interested in playing with this technology asap and what your describing sounds like it would be a quick shortcut to get off the ground
Love this new idea but how tough is the resin and how durable are the parts (will they survive the dishwasher, will they crumble or decompose in the sun or not?). FDM machines like prusa’s, rostock, delta’s etc are pretty darn good nowadays. So If the resin doesn’t match the price of abs or pla spools soon it will loose. 1kg abs or pla in 3mm or 1.75mm is 20$. Resin is double the price. So if the resin price does not lower it will be like the betamax vs vhs story. It might be better technology but vhs (being fdm machines with the cheaper build material) will win. Same happened with mini disk versus cd etc. etc.
When people see my work they ask me if a 3d printer or laser did it.
I say it’s a screw driven machine with stepper motors.. People in general seem to be just enamored with newer concepts even though they don’t understand their applicability and seemingly just have an infatuation with what’s new. So perhaps that’s why this thing got backed?
Or because additive things can make things subtractive cant.
Not really a like-for-like comparison.
this is amazing. probably one of the best things I’ve read on hackaday for months.
2:16 A semi-opaque/semi-transparent blue octahedron? *Screeches Internally, Destroys Mountains*
Sheer genius. A functional printer with such minimal hardware and price is amazing, regardless of comparative quality.
I especially like how they compensated for the variance of a gravity drip system with optical feedback. Wouldn’t be surprised to see this used in part as inspiration for other things. Like planted aquarium autodosers. Open a cheap normally-closed solenoid valve until the desired drop count is achieved; if additional drops fall after that, compensate by delaying the next opening sufficiently to achieve the correct average over time. Or use an air pump to pressurize the nutrient container, which would let it be placed underneath the aquarium and flow up against gravity; and if the air through the nutrient solution via an airstone, you’d get the bonus of having it stirred. [Brian], you’re into that kind of stuff if I recall correctly.
There’s one thing I don’t understand. Why does the laser cure the resin *only* at the boundary layer?
I assume it cures the top layer, with a UV blocker in the resin to make sure the laser doesn’t penetrate too deeply.
I wonder how thin they can go in the Z direction. The liquid resin needs to flow over the cured resin, if the cured resin doesn’t wet well then it might not get covered if you try to use thin layers. Other systems have dropped the object before raising it again to solve this but that’s obviously not going to work with drips.
Use a surfactant akin to soap to lower the surface tension of the resin, and it should flow and wet the piece in extremely thin layers.
Yup. Commercial machines already do this.
add a plunger to raise the level while the resin flows and then lower it again for laser scan.
3D printing is not one of my main interests, but I read this thread and “took a step back” from whether any comment is more correct or intriguing than another, and whether any commenter is more right or articulate than another.
Something that strikes me is the range of knowledge and experience reflected in the comments here. 29 years ago I interviewed with what then and now is arguably the top consulting corporation in the world. Such corporations may be able to put a lot of IQ in one room, but as engineering resources go, IQ is a very distant third after knowledge and experience.
What strikes me is not that the dialog above includes false starts and paradigm shifting ideas, some expressed with hubris and others with humility, but rather that this dialog came together in only 24 hours and for free. In a traditional product development cycle, anything that even begins to approach this would take at least months and cost a staggering amount.
Yup, the interwebs, or is that intertubes or innertubes? Whatever. This here worldwide communications doohickey has raised the average level of intelligence (about *some* things) among those with access to it and the interest to acquire knowledge about all kinds of things.
Read “Earthweb” by Marc Stiegler. Published in 1999 it presaged the era of ubiquitous and dirt cheap portable computing/communication devices that would come to be called smartphones. It also had crowdsourcing for solving big problems before anyone was calling it crowdsourcing.
Now if only he’d get with it and write a sequel to tell us what’s really behind the attacks against Earth, if they really are attacks. Nobody actually knows their intentions because every one has been destroyed short of reaching Earth, thanks to all the ideas pouring in from billions of people.
How do you know who to trust and who actually knows what they are talking about? Yes, you get gems but lots of fluff too.
That’s not any different than inside a company – but there the idiots can get seniority and authority. On the internet they can just be ignored.
You have no idea how happy this comment made me.
[Ray]: Was good to be reminded of how amazing something is we frequently now take for granted.
[Galane]: The book sounded interesting, so I looked up a brief summary. What a coincidence! My favorite space combat sim of all time, Freespace 2, was released in 1999. It featured an inscrutable alien race, that disappears for years between escalating attacks, named – the Shivans. And whose intentions were also never explained by a much-desired sequel. Well that settles it, I’m off to Ebay. :)
The blue objects look like something made by Walter White.
Since when is a small stepper and a threaded rod a luxury? Snark aside, I just don’t see the point of picking that one aspect of an SLA printer to throw out in favor of something that has all sorts of issues.
It reminds me a bit of the single transistor wall warts from China, paired down to the point of ridiculousness … it’s kinda charming though. Anyway once they have got the volume to get the resin cheap, and the 100 buck price helps a lot there, others will no doubt improve upon the boundary layer approach.
It might be better to see this as a beta.
On this device, every technical challenge has such an elegant solution. Very well done, Peachy Printer team!
shut up and take my money.
There are some smart ass mutha’s out there. It’s amazing what some kick ass hackers can build. I feel like I should be working at McDonalds.
“5. Will smartphones and other devices be able to run the Peachy Printer?
Yes! Smartphones, radios, stereos, and mp3 players that have DC coupled audio will be capable of controlling the X and Y axises of the printer. However, only smartphones, computers, and micro-controllers will have the ability to detect the Z-level. We may implement a stretch goal to write software for android and iOS that runs the printer.
6. My computer has AC Coupled Audio, will it be able to run the printer?
Yes! We plan to ship a DC coupled USB Soundcard with each printer, or we can use an amplitude modulation circut to convert an AC Coupled signal into a DC signal. Hopefully we can do the latter, as that will allow all audio devices to control the X and Y axises of the printer. All the technical talk aside, be assured that we will make sure the Peachy works with practically all computers.”
Hmmm, I am not away of ANY commercial audio device that is DC coupled. Can some one point me to one as it would be very useful as an ADC in many applications.
The AM modulation trick should work though.
Your sound card on your computer is almost certainly DC coupled. If you have a multimeter, try it out some time: make a simple square wave audio file with like a 1 second period and measure the voltage on the outputs. You’ll almost certainly see a nice square wave rather than a fast decay back to 0.
(sorry for the late reply) Oh I do that all time one way or the other. My main hobby is NBTV (Narrow Band Television) and, of course the TV signal has a large DC content because the video is all positive and the sync is all negative. Alas the fact that sound cards (and all other domestic appliances) are AC coupled we need to always incorporate DC restoration into our NBTV monitors. (I should add that an NBTV signal typically has a max freq of about 10kHz so it works fine on decent audio equipment).
I have used literally hundreds of sound cards both in this hobby and professionally over the years and I haven’t come across one that was DC coupled on either the input or output. I don’t say they don’t exist however – but if they do I think that they would be a rare beast indeed (in my experience of course).
You may be measuring a DC value initially as a sound card has a rather long time constant but eventually it will decay to zero.
If there IS an unmodified (USB) sound card/device I should very much like to hear about it.
The OLPC/XO (one laptop per child) has software-selectable AC or DC coupling on its sound card, and even comes with a built-in oscilloscope app that uses the microphone jack.
Could the voice coils on a harddrive (and presumably some of the controlling circuitry) be adapted to orient the mirrors during printing? If the HDD manufacturers can move the head that finely, surely they can move a mirror instead…
Any one else notice that this printer is on Indigogo and Kickstarter at the same time?
I mention this for anyone who is wanting to get one of these who miss the boat on their desired package. May get a few days more. The Indigogo campaign is almost funded, so it to looks like it will be fully funded. Possibly just compared to the Kickstarter.
“Translate 3D model into an audio waveform. It then plays the audio file out to the printer through the headphone jack in your computer. This waveform drives a pair of electro magnetic mirrors which reflect and control the path of the laser beam”
Are there any more details on the above?
How do you translate a 3D model into an audio wave form (what does that even mean, audio wave forms and 3D models seem to be 2 entirely different things).
Also how does an audio wave form drive a pair or electromagnetic mirrors?
Just curious, because i’ve never heard of technology like this, sounds really innovative technically.
Well, what they mean is that they are using an audio device (sound card) to generate the waveform (be it square wave, saw tooth, or more likely in this case a sine wave) which is then amplified and applied to the electromagnet which cause the mirrors to then swing backwards and forwards in the required manner – it is a form of galvanometer. The basic approach has been used many times before for various things – for instance you can output 2 quadrature sine waves to drive a turntable stepper motor for perfect playback speed.
It’s NOT like playing Elvis’s “Hound dog” into it and you get a miniature figurine of the great man out of it ;-)
I get that, what i mean is how do do you actually come up with an algorithm which relates a 3D computer file, to the angles the mirrors need to make this work? I guess that’s the key point of the whole apparatus. any specific reason to output analog data through the soundcard? wouldn’t alternative methods to output the data from some other port, maybe in some other format be just as good? i’m surprised they can move the mirrors accurately enough and quickly enough. very neat.
There are 2 ways it can be done vector or raster – with a system like this what you are basically doing is creating an image of a series of “slices” taken through the 3D model. The Algorithm would “scan” these slices to determine where the laser should be on or off and then the algorithm would take this information and either create a series of XY vectors (as it appears in the demo) which are then applied as voltages to the electromagnet the deflection of the mirror is proportional to those voltages, or, alternatively you can output 2 waveforms that drag the laser point across and down the area of concern just like a raster on a CRT screen works – you then turn the laser on or off depending on whether the material is to be cured or not.
The real magic in the software of course would be in taking the slices through the 3D and working out the vector or raster image from that – but there are many ways of doing that.
There are many examples on youtube of laser XY projectors which are ostensibly the exact same mechanism. You have seen Lissajous curves? Same principle.
A sound card is used because you don’t need any further hardware and they are cheap and ubiquitous – I think you would need an external amplifier though – but if the mirror drive mechanism is “light” enough perhaps even that is not required. It is accurate because you have 2^16 individual voltage values you can output – it is also far quicker than is needed – the limitation will be in the mirror mass etc not the sound card.
You could, as you say, use other output methods if it was convenient or cost effective to do so
I think this is brilliant, but doesn’t the resin get trapped in hollow sections? Say you made a hollow ball, would the inside be full of resin?
Once the printer quality is higher this unit will be the front runner for home sla printing.
Amazing job. Coping with mirror response time, mirror motion damping, attenuating room vibration effects, liquid flow times is quite a feat. Would like to see how repeatable it is and some numbers on accuracy.
These guys stole off of the money and delivered nothing.